
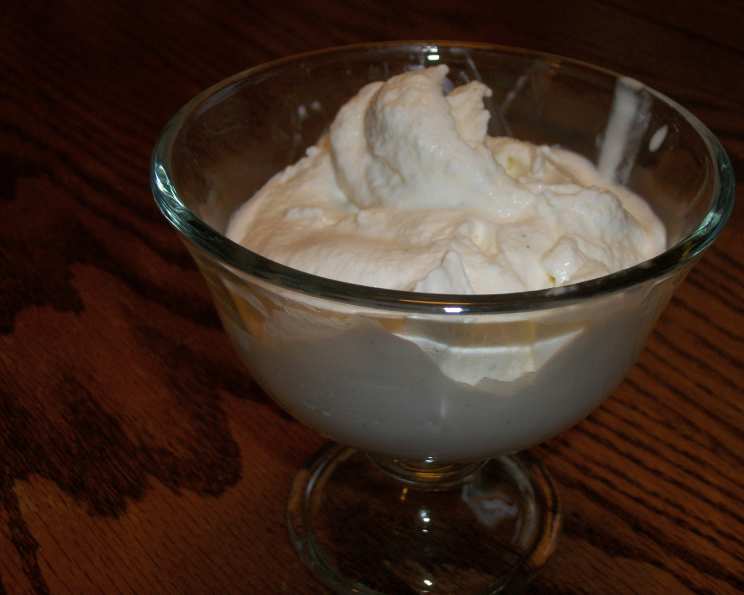
Philly Style Double Vanilla Ice Cream (No Egg)
The taste of vanilla ice cream transports me back to childhood summers spent on the boardwalk in Ocean City, New Jersey. The salt air, the screech of seagulls, and the sweet, cold creaminess of a simple vanilla cone were the perfect trifecta of sensory bliss. Even now, years later, a spoonful of good vanilla ice cream can instantly evoke those carefree days. This recipe aims to capture that nostalgic, pure vanilla flavor, but with a little Philly twist: incredibly rich, dense, and intensely flavored, thanks to a double dose of vanilla and plenty of cream.
Recipe Overview
- Prep Time: 20 minutes
- Cook Time: 15 minutes
- Total Time: At least 4 hours (includes chilling time)
- Servings: 8
- Yield: 1 quart
- Dietary Type: Not suitable for dairy-free, vegan, or low-fat diets.
Ingredients
- 2 cups half-and-half
- 1 cup whipping cream
- ¾ cup vanilla sugar (regular sugar works fine too, it’s just not quite as intense)
- 1 vanilla bean, split and scraped
Equipment Needed
- Medium saucepan
- Whisk
- Thermometer
- Airtight container
- Ice cream maker
Instructions
-
In a medium saucepan, combine the half-and-half, whipping cream, and vanilla sugar.
-
Split the vanilla bean lengthwise and scrape out the seeds. Add both the seeds and the pod to the saucepan.
-
Place the saucepan over medium heat on the stove.
-
Heat the mixture to 170°F, stirring occasionally to prevent scorching and to ensure the sugar dissolves completely. Use a thermometer to monitor the temperature accurately.
-
If you don’t have a thermometer, heat the mixture until you see a small bubble just barely break the surface. This is a visual cue that you’re approaching the target temperature. Be careful not to overheat!
-
DO NOT ALLOW IT TO BOIL! Boiling will alter the texture and flavor of the ice cream base.
-
Remove the saucepan from the heat and allow the mixture to cool slightly.
-
Transfer the mixture to an airtight container.
-
Refrigerate the container overnight (at least 4 hours) to allow the flavors to meld together. This step is crucial for developing a rich, complex vanilla flavor. If you’re short on time, you can expedite the chilling process.
-
To speed up the chilling, place the saucepan in an ice bath. Make sure the ice bath reaches about halfway up the side of the pan, and stir the mixture frequently to help it cool evenly.
-
Regardless of which chilling method you choose, the temperature of the mixture needs to be at or below 40°F before churning in most ice cream makers. Self-contained freezer ice cream makers may not require pre-chilling, so refer to your manufacturer’s instructions.
-
Remove the vanilla bean hull from the chilled mixture.
-
Freeze the ice cream base according to your ice cream maker’s manufacturer’s directions. Churning time will vary depending on the model and batch size, but it typically takes around 20-30 minutes.
-
Once the ice cream has reached a soft-serve consistency, transfer it to a lidded container.
-
To firm up the ice cream further, place it in the freezer for at least one hour before serving. This “hardening” process improves the texture and makes it easier to scoop.
-
Don’t discard that spent vanilla bean! Wash and thoroughly dry the hull. Place it in a jar with about 2 cups of regular sugar. In a week or two, you’ll have your own homemade vanilla sugar for your next batch of ice cream or other baking projects!
Expert Tips & Tricks
- Vanilla Sugar Boost: Using vanilla sugar in place of regular granulated sugar intensifies the vanilla flavor without adding extra liquid to the base. If you don’t have vanilla sugar on hand, you can make your own by storing a vanilla bean in a jar of granulated sugar for a few weeks.
- Infusion Time: Don’t skip the overnight chilling. This allows the vanilla bean to fully infuse its flavor into the cream base, resulting in a more aromatic and delicious ice cream.
- Alcohol Enhancement: For a subtle boozy kick, add a tablespoon of vodka or bourbon to the ice cream base before churning. The alcohol also helps prevent ice crystals from forming, resulting in a smoother texture.
- Salt Balance: A pinch of salt (about ⅛ teaspoon) enhances the sweetness and balances the overall flavor profile of the ice cream. Add it to the saucepan along with the other ingredients.
- Don’t Overchurn: Overchurning can result in a grainy or buttery texture. Stop churning when the ice cream reaches a soft-serve consistency.
- Storage Container Matters: Choose a freezer-safe container with a tight-fitting lid to prevent freezer burn. Press a piece of plastic wrap directly onto the surface of the ice cream before sealing the lid to further minimize ice crystal formation.
Serving & Storage Suggestions
Serve your Philly Style Double Vanilla Ice Cream in a variety of ways. Classic cones are always a hit, but don’t be afraid to get creative! Top it with fresh fruit, chocolate sauce, chopped nuts, or a drizzle of caramel. It’s also delicious served alongside warm brownies, apple pie, or even as a component in an ice cream sundae.
Leftover ice cream should be stored in an airtight container in the freezer. It will stay fresh for up to two weeks, although the texture may degrade slightly over time. It’s best to consume it within a week for optimal quality.
Do not leave the ice cream at room temperature for more than 30 minutes, as it will begin to melt and lose its creamy texture. If the ice cream becomes too hard to scoop after freezing, let it sit at room temperature for 5-10 minutes to soften slightly.
Nutritional Information
| Nutrient | Amount per Serving | % Daily Value |
|---|---|---|
| Calories | 181 kcal | – |
| Calories from Fat | 161g | 89% |
| Total Fat | 18 g | 27% |
| Saturated Fat | 11.2 g | 55% |
| Cholesterol | 63.1 mg | 21% |
| Sodium | 36.1 mg | 1% |
| Total Carbohydrate | 3.4 g | 1% |
| Dietary Fiber | 0 g | 0% |
| Sugars | 0.1 g | 0% |
| Protein | 2.4 g | 4% |
Note: Nutritional information is an estimate and may vary based on specific ingredients and portion sizes.
Variations & Substitutions
- Single Vanilla: If you prefer a more subtle vanilla flavor, you can reduce the amount of vanilla sugar to ½ cup or omit the vanilla bean entirely.
- Different Sugars: Experiment with different types of sugar, such as brown sugar or maple syrup, for a unique flavor profile. Keep in mind that these sugars will affect the texture and color of the ice cream.
- Spice it Up: Add a pinch of cinnamon, nutmeg, or cardamom to the ice cream base for a warm and comforting flavor.
- Chocolate Swirl: Drizzle melted chocolate into the ice cream after churning for a decadent chocolate swirl.
- Coffee Infusion: Steep coffee beans in the half-and-half and cream mixture for a delicious coffee-flavored ice cream.
FAQs (Frequently Asked Questions)
Q: Can I use vanilla extract instead of a vanilla bean?
A: While you can substitute vanilla extract, the flavor will not be as complex or intense as using a fresh vanilla bean. Use 1-2 teaspoons of high-quality vanilla extract if substituting.
Q: Why is it important to chill the ice cream base before churning?
A: Chilling the base allows the flavors to meld together and also helps the ice cream freeze more evenly, resulting in a smoother texture.
Q: My ice cream is icy. What did I do wrong?
A: Icy ice cream can be caused by several factors, including not chilling the base properly, overchurning, or not storing it in an airtight container.
Q: Can I make this recipe without an ice cream maker?
A: While it’s possible to make ice cream without an ice cream maker using the “bag method” or by stirring it frequently while freezing, the texture will not be as smooth or creamy.
Q: How can I prevent freezer burn?
A: Ensure the ice cream is stored in an airtight container and press a piece of plastic wrap directly onto the surface before sealing the lid.
Final Thoughts
This Philly Style Double Vanilla Ice Cream is more than just a dessert; it’s a sensory experience. The creamy texture and intense vanilla flavor will transport you to a place of pure indulgence. Don’t be intimidated by the process – it’s surprisingly simple and rewarding. Gather your ingredients, follow the steps, and prepare to be amazed by the homemade goodness. I encourage you to give this recipe a try and share your feedback! Pair it with a warm slice of pie or a decadent chocolate brownie for the ultimate dessert experience.