
The Ultimate Pumpkin Cheesecake: A Fall Dessert Masterpiece
There’s a certain magic in the air when autumn arrives, and for me, it’s always been tied to the scent of pumpkin pie spice wafting from the kitchen. My grandmother, a woman whose hands seemed to hold the secrets of all delicious things, always made a pumpkin cheesecake that was the star of every holiday gathering. The creamy texture, the warm spices, and that perfect graham cracker crust – it was pure comfort on a plate, and a tradition I’ve lovingly carried on. Now, let’s get baking!
Recipe Overview
- Prep Time: 20 minutes
- Cook Time: 60-70 minutes
- Total Time: At least 4 hours (including cooling and chilling)
- Servings: 8-10
- Yields: 1 (9-inch) cheesecake
- Dietary Type: Not specified (see Variations for Gluten-Free options)
Ingredients
For the Crust:
- 1 1/2 cups graham cracker crumbs
- 5 tablespoons butter, melted
- 1 tablespoon sugar
For the Filling:
- 3 (8 ounce) packages cream cheese, softened (do NOT substitute reduced fat, or whipped cream cheese)
- 1 cup sugar
- 1 teaspoon vanilla
- 1 cup Libby’s canned pumpkin (not pie mix)
- 3 eggs
- 1/2 teaspoon cinnamon
- 1/4 teaspoon nutmeg
- 1/4 teaspoon allspice
Equipment Needed
- 9-inch springform pan
- Large mixing bowl
- Electric mixer
- Measuring cups and spoons
- Aluminum foil
- Jelly roll pan or roasting pan
- Teakettle (optional, for water bath)
- Instant-read thermometer (optional, for checking doneness)
Instructions
- Preheat the oven to 350 degrees F (175 degrees C).
Crust Preparation
- In a medium bowl, combine the graham cracker crumbs with 1 tablespoon of sugar.
- Drizzle the melted butter over the top of the crumb mixture.
- Mix well until all of the crumbs are evenly coated with butter. The mixture should resemble wet sand and not form a paste.
- Press the crumb mixture onto the bottom and about two-thirds of the way up the sides of the springform pan. It’s okay if it doesn’t go all the way up the sides; you want part of the cheesecake to extend above the crust.
- Bake the crust for 5 minutes.
- Chill the crust in the refrigerator for at least 30 minutes, or up to 24 hours. This will help it set and prevent it from becoming soggy.
Filling Preparation
- Ensure the cream cheese is at room temperature before you begin mixing. This is crucial for a smooth, lump-free cheesecake. Cold cream cheese can lead to overbeating, which incorporates too much air into the batter and results in cracks on the surface of the finished cake.
- In a large mixing bowl, combine the softened cream cheese, 1 cup of sugar, and vanilla.
- Mix the cream cheese and sugar by themselves until the mixture is smooth and light. This is an important step. If you encounter lumps in your batter, you can either run the mixture through a sieve or give it a quick pulse in a food processor for a silky smooth result.
- Mix until smooth using an electric mixer. Make sure to eliminate all possible lumps in the cream cheese before adding the eggs. The eggs are what will hold air in the batter, so add them last and mix as little as possible once they are incorporated.
- Add the pumpkin, cinnamon, nutmeg, and allspice to the cream cheese mixture.
- Continue beating until the mixture is smooth and creamy.
- Lightly beat the room temperature eggs in a separate bowl.
- Add the eggs to the batter mixture, and blend well. Avoid over-whipping, as adding eggs and over-mixing can incorporate too much air into the mixture, which will escape during baking and cause cracks.
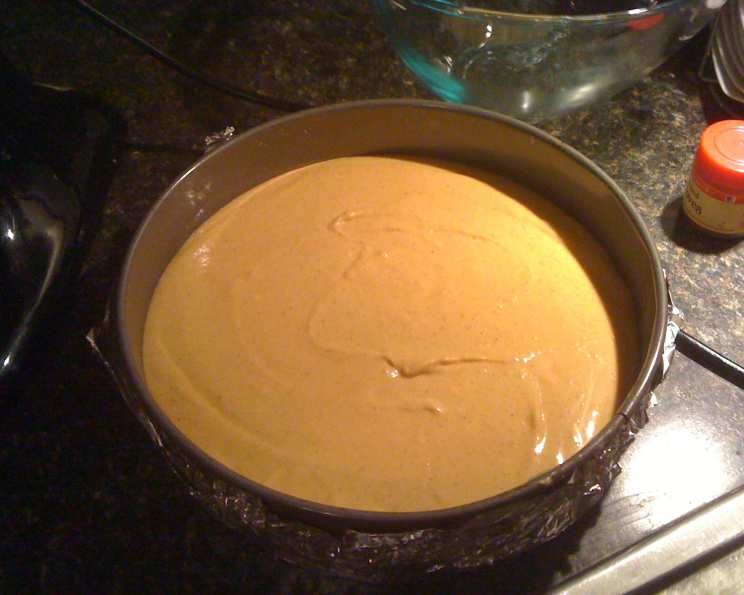
- Pour the pumpkin cheesecake filling into the prepared graham cracker crust.
Water Bath Baking
- Prepare a water bath. This is the secret to a perfectly creamy and evenly baked cheesecake. The water bath helps to regulate the temperature, preventing the edges from overbaking before the center is set.
- Wrap the bottom of the springform pan completely with heavy-duty aluminum foil, extending halfway up the sides, in a criss-cross pattern. This will prevent water from seeping into the pan and making the crust soggy. Alternatively, you can use a roasting bag around the pan for a foolproof waterproof barrier.
- Place the wrapped springform pan into a larger baking pan, such as a jelly roll pan or a disposable foil roasting pan.
- Place the pans into the preheated oven.
- Carefully pour hot water into the outer pan, filling it about halfway up the sides of the springform pan. A teakettle makes this process easier and safer.
- Bake in the water bath for 60-70 minutes.
- Check for doneness. The cheesecake is done when the edges are set, but the center still has a slight wobble, about 2-3 inches in diameter. Don’t overbake the cheesecake, as it will continue to set as it cools.
- Remove the cheesecake from the oven and carefully remove the springform pan from the water bath.
- Allow the cheesecake to cool at room temperature for at least an hour.
- Refrigerate the cheesecake for at least 3 hours, or preferably overnight. This allows the flavors to meld and the cheesecake to fully set.
Finishing Touches
- Once the cheesecake is thoroughly chilled, release the springform pan and remove the sides.
- For a seamless look, you can smooth the sides of the cheesecake with a hot, wet knife.
Expert Tips & Tricks
- Room Temperature Cream Cheese is Key: I cannot stress this enough! Cold cream cheese will result in a lumpy cheesecake. Plan ahead and let it soften naturally.
- Don’t Overmix: Overmixing after adding the eggs is a common mistake. Mix just until combined to avoid incorporating too much air.
- The Water Bath is Your Friend: Don’t skip the water bath! It ensures even baking and prevents cracks.
- Patience is a Virtue: Resist the urge to cut into the cheesecake before it’s fully chilled. It needs time to set properly.
- Adjust Baking Time: Ovens vary, so keep an eye on the cheesecake and adjust the baking time as needed.
Serving & Storage Suggestions
Serve the pumpkin cheesecake chilled, either plain or with a dollop of whipped cream and a sprinkle of cinnamon. It also pairs beautifully with a caramel drizzle or a sprinkle of chopped pecans. Leftover cheesecake should be stored in the refrigerator, tightly covered, for up to 5 days. You can also freeze individual slices for up to 2 months. To thaw, place the frozen slices in the refrigerator overnight.
Nutritional Information
| Nutrient | Amount per Serving | % Daily Value |
|---|---|---|
| Calories | 752 kcal | N/A |
| Calories from Fat | 478 g | 64% |
| Total Fat | 53.1 g | 81% |
| Saturated Fat | 29.2 g | 145% |
| Cholesterol | 243.4 mg | 81% |
| Sodium | 683.7 mg | 28% |
| Total Carbohydrate | 60 g | 20% |
| Dietary Fiber | 1.9 g | 7% |
| Sugars | 47.1 g | 188% |
| Protein | 11.9 g | 23% |
Note: Nutritional information is an estimate and may vary based on ingredient substitutions and specific brands used.
Variations & Substitutions
- Gluten-Free Crust: Use gluten-free graham crackers or a blend of almond flour and oats for the crust.
- Spice It Up: Add a pinch of ground ginger or cloves to the filling for an extra layer of warmth.
- Caramel Swirl: Drizzle caramel sauce over the filling before baking for a decadent touch.
- Chocolate Chips: Fold in chocolate chips into the filling for a chocolate pumpkin cheesecake.
- Different Crust: Try using gingersnap cookies for the crust for an even more festive flavor.
FAQs (Frequently Asked Questions)
Q: Why is my cheesecake cracking?
A: Cracking is often caused by overbaking or temperature fluctuations. A water bath helps to prevent cracks, and be sure not to overmix the batter after adding the eggs.
Q: Can I use reduced-fat cream cheese?
A: It’s best to use full-fat cream cheese for the best texture and flavor. Reduced-fat cream cheese may not set properly.
Q: How do I know when the cheesecake is done?
A: The cheesecake is done when the edges are set but the center still has a slight wobble. It will continue to set as it cools.
Q: Can I freeze the cheesecake?
A: Yes, you can freeze the cheesecake. Wrap it tightly in plastic wrap and then in foil. Thaw it in the refrigerator overnight.
Q: Do I have to use a water bath?
A: While not strictly necessary, a water bath is highly recommended for a creamy, evenly baked cheesecake that is less likely to crack.
Final Thoughts
This pumpkin cheesecake is more than just a dessert; it’s a celebration of autumn’s flavors and the joy of sharing delicious food with loved ones. Don’t be intimidated by the water bath – it’s easier than it sounds and makes a world of difference. So, gather your ingredients, preheat your oven, and get ready to create a truly unforgettable pumpkin cheesecake that will impress everyone at your table. I encourage you to make this recipe your own, and please share your feedback! Pair it with a warm cup of spiced cider for the perfect fall treat.