
Pumpkin Pie Pop Tarts: A Nostalgic Treat, Elevated
The first time I ever had a Pop-Tart, I was probably eight years old, and it was the brown sugar cinnamon flavor. The sheer convenience and sugary sweetness were revolutionary to my young palate. Years later, as a chef, I couldn’t help but wonder if I could recapture that childhood magic with a more sophisticated twist. These Pumpkin Pie Pop Tarts are the answer: flaky, buttery pastry filled with a warmly spiced pumpkin puree and drizzled with a tangy cream cheese glaze. Get ready to experience a taste of nostalgia, elevated.
Recipe Overview
- Prep Time: 30 minutes
- Cook Time: 35 minutes
- Total Time: 1 hour 5 minutes
- Servings: 8 pop tarts
- Yield: 8 pop tarts
- Dietary Type: Vegetarian
Ingredients
-
For the Filling:
- ¾ cup pure pumpkin puree
- ¼ cup packed light brown sugar
- 1 teaspoon ground cinnamon
- ½ teaspoon salt
-
For the Pastry:
- 2 sheets puff pastry, thawed (one 17.3-ounce package)
- All-purpose flour, for rolling
-
For the Cream Cheese Glaze:
- 2 ounces cream cheese, at room temperature
- 4 teaspoons whole milk
- 1 tablespoon pure maple syrup
- ⅛ teaspoon salt
Equipment Needed
- Small bowl
- Floured work surface
- Pizza cutter or chef’s knife
- Fork
- Baking sheet
- Wire rack
- Medium bowl
- Electric mixer
Instructions
-
Preheat your oven to 350 degrees F (175 degrees C). It’s crucial that your oven is fully preheated for even baking.
-
In a small bowl, combine the pumpkin puree, light brown sugar, ground cinnamon, and ½ teaspoon of salt. Mix well until everything is evenly incorporated. Set aside. The warmth of the cinnamon beautifully complements the earthy pumpkin.
-
Lightly flour a clean, flat work surface. Gently unfold one sheet of the thawed puff pastry. Roll the puff pastry into an 8×8 inch square. Repeat with the second sheet of puff pastry. This ensures an even thickness for baking.
-
Using a pizza cutter or a sharp chef’s knife, cut each 8×8 inch square into sixteen 4×4 inch pieces. You’ll have a total of 32 squares.
-
Carefully prick each square with a fork several times. This prevents the pastry from puffing up too much during baking and allows the filling to sit nicely.
-
Spread the prepared pumpkin mixture on half of the pastry squares (16 squares), dividing it evenly. Leave approximately a ½ inch border all around each square. This border is essential for crimping and sealing the pop tarts properly.
-
Gently place the remaining pastry squares (the other 16) on top of the pumpkin-filled squares, creating a sandwich.
-
Crimp the edges of each pop tart with a fork to seal them tightly. This prevents the filling from leaking out during baking and gives the pop tarts their classic appearance.
-
Transfer the assembled pop tarts to a baking sheet. For best results, line the baking sheet with parchment paper. Refrigerate for 30 minutes before baking. This chilling step helps the pastry retain its shape and prevents it from becoming too puffy.
-
Bake in the preheated oven, rotating the baking sheet halfway through, until the pop tarts are golden brown. This typically takes 35 to 40 minutes. Keep a close eye on them, as baking times can vary slightly depending on your oven.
-
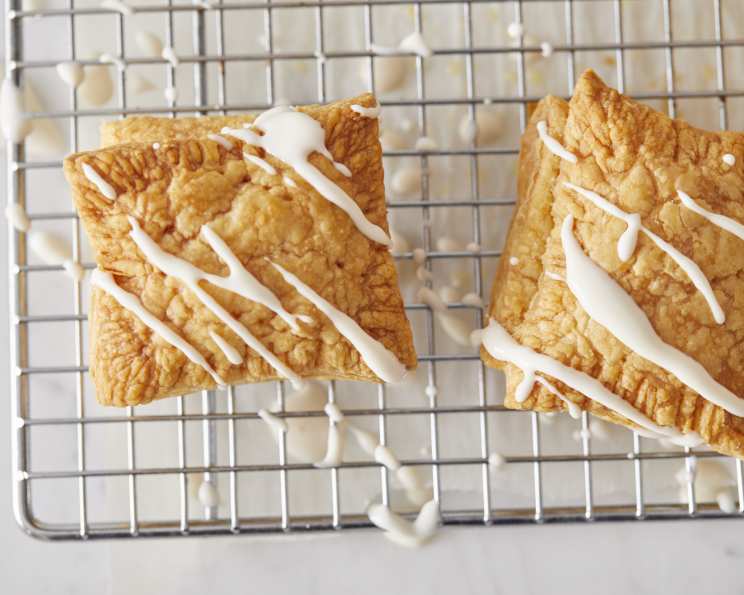
Once baked, carefully transfer the pop tarts to a wire rack to cool completely. This prevents them from becoming soggy.
-
While the pop tarts are cooling, prepare the cream cheese glaze. In a medium bowl, beat the cream cheese, milk, maple syrup, and ⅛ teaspoon of salt with an electric mixer until smooth and creamy. This should take about 1 to 2 minutes. Ensure the cream cheese is at room temperature to avoid lumps.
-
Once the pop tarts have cooled completely, drizzle them generously with the cream cheese glaze, dividing evenly. Let the glaze set slightly before serving.
Expert Tips & Tricks
- Puff Pastry Perfection: Ensure your puff pastry is cold but pliable before rolling. If it gets too warm, it will become sticky and difficult to work with. If that happens, pop it back in the fridge for a few minutes.
- Spice It Up: Feel free to adjust the spices in the pumpkin filling to your liking. A pinch of ginger, nutmeg, or cloves can add extra warmth and depth of flavor.
- Make-Ahead Magic: The pumpkin filling can be made a day in advance and stored in the refrigerator. This is a great way to save time on the day of baking.
- Glaze Consistency: If the cream cheese glaze is too thick, add a tiny bit more milk, a teaspoon at a time, until you reach your desired consistency. If it’s too thin, add a bit of powdered sugar.
- Prevent Soggy Bottoms: Ensure your oven rack is in the center position for even heat distribution. You can also place a pizza stone in the oven to help maintain a consistent temperature.
Serving & Storage Suggestions
Serve these Pumpkin Pie Pop Tarts warm or at room temperature. They are delicious on their own or with a cup of coffee or tea.
To store leftover pop tarts, place them in an airtight container at room temperature for up to 2 days, or in the refrigerator for up to 5 days. For longer storage, you can freeze them for up to 2 months. Thaw them in the refrigerator overnight before reheating.
To reheat, warm them in a toaster oven or regular oven at 300 degrees F (150 degrees C) for a few minutes until heated through. You can also microwave them for a few seconds, but be careful not to overdo it, as this can make them soggy.
Nutritional Information
| Nutrient | Amount per Serving | % Daily Value |
|---|---|---|
| Calories | 394 kcal | – |
| Calories from Fat | 233 | – |
| Total Fat | 25.9 g | 39% |
| Saturated Fat | 7.3 g | 36% |
| Cholesterol | 8.1 mg | 2% |
| Sodium | 360.5 mg | 15% |
| Total Carbohydrate | 35.8 g | 11% |
| Dietary Fiber | 1.1 g | 4% |
| Sugars | 7.6 g | – |
| Protein | 5.1 g | – |
Variations & Substitutions
- Gluten-Free Option: Use gluten-free puff pastry sheets instead of regular ones. Many brands are now available in most supermarkets.
- Vegan Version: Substitute the puff pastry with a vegan-friendly brand (check the ingredients for butter). Use a plant-based cream cheese alternative for the glaze, and almond or soy milk instead of dairy milk. Maple syrup remains vegan-friendly.
- Different Filling: Get creative with your fillings! Try apple pie filling, blueberry jam, or even a chocolate hazelnut spread.
- Spice Variations: Experiment with different spices. A pinch of cardamom or allspice can add a unique twist to the pumpkin filling.
- Nutty Topping: Sprinkle chopped pecans or walnuts on top of the glaze for added texture and flavor.
FAQs (Frequently Asked Questions)
Q: Can I use homemade puff pastry for this recipe?
A: Absolutely! Homemade puff pastry will elevate the flavor and texture even further. Just ensure it’s properly chilled before rolling and cutting.
Q: Can I freeze these pop tarts after baking?
A: Yes, you can freeze them. Allow them to cool completely, then wrap them individually in plastic wrap and place them in a freezer-safe bag or container. They can be frozen for up to 2 months.
Q: My puff pastry is sticking to the counter. What should I do?
A: Add more flour to your work surface. Also, make sure your puff pastry is cold. If it gets too warm, it will become sticky. You can also place it in the freezer for 5-10 minutes to firm it up.
Q: Can I use a different type of sugar in the filling?
A: Yes, you can substitute granulated sugar or coconut sugar for the light brown sugar. However, brown sugar adds a richer flavor and helps retain moisture.
Q: My cream cheese glaze is too thick. How can I thin it out?
A: Add a small amount of milk, a teaspoon at a time, until you reach your desired consistency.
Final Thoughts
These Pumpkin Pie Pop Tarts are more than just a recipe; they’re a journey back to childhood with a sophisticated twist. The combination of flaky pastry, warmly spiced pumpkin filling, and tangy cream cheese glaze is simply irresistible. I encourage you to give this recipe a try and share your creations with friends and family. Pair them with a warm cup of apple cider or a pumpkin spice latte for the ultimate fall treat! Don’t hesitate to experiment with variations and substitutions to make them your own. Happy baking!