
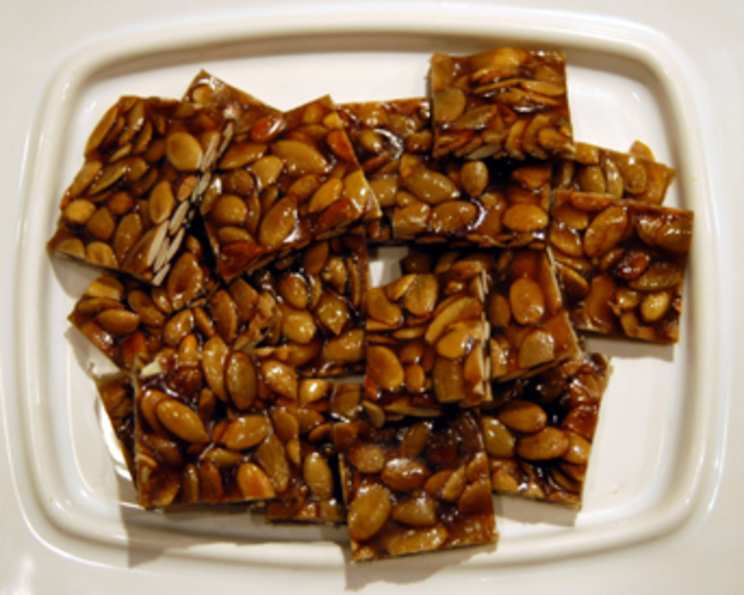
Pumpkin Seed Candy: A Sweet and Savory Delight
The first time I tasted pumpkin seed candy, I was at a fall festival in upstate New York. The air was crisp, filled with the scent of wood smoke and caramel apples, and the vibrant colors of autumn leaves created a picturesque backdrop. I remember biting into that small, unassuming piece of candy and being completely blown away. The nutty crunch of the pumpkin seeds, combined with the deep, caramelized sweetness of the honey, was an unexpectedly perfect pairing. It wasn’t just a treat; it was a taste of autumn itself, a memory I cherish to this day.
Recipe Overview
- Prep Time: 10 minutes
- Cook Time: 10 minutes
- Total Time: 20 minutes
- Yields: Approximately 15 pieces
- Dietary Type: Gluten-Free
Ingredients
- 1 cup hulled pumpkin seeds (pepitas)
- 1/4 cup sugar
- 2/3 cup good-quality honey
- 3 tablespoons cold unsalted butter, plus 2 tablespoons melted butter for brushing
Equipment Needed
- Large skillet
- Small saucepan
- Candy thermometer
- Fifteen 1-inch-diameter black paper cups
- Greased knife
Instructions
- Begin by preparing your pumpkin seeds. Heat a large skillet over medium-high heat.
- Add the pepitas to the skillet and toast them, stirring constantly, until they begin to pop and turn a slightly golden color. This should take about 3 minutes. It’s important to stir continuously to prevent burning.
- Once toasted, immediately transfer the pumpkin seeds to a bowl and set aside to cool slightly. This will stop the cooking process.
- Next, prepare the honey caramel. In a small saucepan, combine the sugar and honey.
- Place the saucepan over medium-high heat and bring the mixture to a boil, stirring constantly until the sugar is completely dissolved. This should take approximately 3 minutes. Monitor the mixture carefully to prevent burning.
- Add the toasted pumpkin seeds to the honey mixture.
- Continue cooking, stirring frequently, until the mixture reaches 285°F on a candy thermometer. This critical step typically takes 3 to 4 minutes. Reaching the correct temperature is key to achieving the desired hard-crack candy texture.
- Once the mixture reaches 285°F, immediately remove the saucepan from the heat.
- Stir in the cold butter until it is completely melted and incorporated into the mixture.
- Let the mixture cool to 240°F, about 4 minutes. This slight cooling allows the candy to set properly without becoming grainy.
- While the candy mixture is cooling, prepare your molds. Brush the inside of fifteen 1-inch-diameter black paper cups with the melted butter, reserving 1 tablespoon for later. The butter will prevent the candy from sticking to the cups.
- Once the candy mixture has cooled slightly to 240°F, spoon a scant tablespoon of the honey mixture into each buttered paper cup.
- Brush a clean work surface (such as a marble slab or a silicone baking mat) with the remaining tablespoon of melted butter. This will prevent the remaining candy from sticking.
- Spoon the remaining honey mixture onto the buttered work surface, allowing it to cool further. The candy will continue to cool and stiffen on the surface.
- When the remaining candy on the work surface is stiff and cool enough to handle (this should take about 6 minutes), use a greased knife to cut it into approximately 3/4-inch pieces. Grease the knife frequently to prevent sticking.
- Wrap each piece of candy individually in cellophane to keep them fresh and prevent them from sticking together.
Expert Tips & Tricks
- Toasting the Pepitas: Don’t skip the toasting step! Toasting enhances the nutty flavor of the pumpkin seeds and gives them a satisfying crunch. Watch them carefully, as they can burn quickly.
- Candy Thermometer is Key: Investing in a good candy thermometer is crucial for candy making. It ensures that your candy reaches the correct temperature for the perfect texture. If you don’t have one, you can use the cold water test: drop a small amount of the hot candy mixture into a glass of cold water. If it forms a hard, brittle thread, it’s ready.
- Butter is Your Friend: Generously buttering the paper cups and work surface is essential to prevent the candy from sticking.
- Work Quickly: Once the candy mixture reaches the correct temperature, you need to work relatively quickly, as it will start to harden as it cools. Have your molds and buttered surface ready to go.
- Texture Adjustment: If you prefer a softer candy, you can reduce the final cooking temperature by a few degrees.
Serving & Storage Suggestions
Serve your homemade pumpkin seed candy as a delightful after-dinner treat, a festive Halloween snack, or a unique addition to a dessert platter. These candies are also perfect for gifting!
Store the wrapped candies in an airtight container at room temperature. They will keep for up to a week. For longer storage, you can freeze them for up to a month. Thaw at room temperature before serving.
Nutritional Information
| Nutrient | Amount per Serving | % Daily Value |
|---|---|---|
| Calories | 120 kcal | 6% |
| Total Fat | 7g | 9% |
| Saturated Fat | 4g | 20% |
| Cholesterol | 10mg | 3% |
| Sodium | 5mg | 0% |
| Total Carbohydrate | 13g | 5% |
| Dietary Fiber | 1g | 4% |
| Sugars | 10g | |
| Protein | 2g | 4% |
Note: Nutritional information is an estimate and may vary based on specific ingredients and portion sizes.
Variations & Substitutions
- Spiced Pumpkin Seed Candy: Add a pinch of ground cinnamon, nutmeg, or ginger to the honey mixture for a warm, spiced flavor.
- Chocolate Covered Candy: Dip the cooled and cut candy pieces in melted dark or milk chocolate for an extra decadent treat.
- Salted Caramel Candy: Sprinkle a pinch of sea salt over the candy before it cools completely for a sweet and salty flavor combination.
- Nutty Variations: Substitute some of the pumpkin seeds with other nuts like pecans, walnuts, or almonds for a different flavor profile.
- Vegan Option: Replace the unsalted butter with a plant-based butter alternative.
FAQs (Frequently Asked Questions)
Q: Can I use pre-roasted pumpkin seeds?
A: While you can use pre-roasted pumpkin seeds, toasting them fresh in the skillet will give you the best flavor and texture. They will be more fragrant and have a better crunch.
Q: What if I don’t have black paper cups?
A: You can use any small, heat-resistant molds or simply pour the entire mixture onto the buttered work surface and cut it into squares once it has cooled.
Q: How do I prevent the candy from becoming too sticky?
A: Ensuring the candy reaches the correct temperature (285°F) is crucial. Also, wrapping the individual pieces in cellophane will help to prevent them from sticking together.
Q: Can I add other flavors to the candy?
A: Absolutely! Experiment with different spices, extracts, or even citrus zest to customize the flavor to your liking.
Q: What if my candy is too soft?
A: If your candy is too soft, it likely didn’t reach a high enough temperature. You can try melting it again in a saucepan and cooking it to a slightly higher temperature, but be careful not to burn it.
Final Thoughts
This pumpkin seed candy recipe is a delightful combination of sweet and savory, crunchy and chewy. It’s surprisingly easy to make and is perfect for adding a touch of autumnal charm to any occasion. Don’t be intimidated by candy making – with a little patience and attention to detail, you’ll be enjoying these delicious treats in no time. I encourage you to try this recipe and share your creations with friends and family. Pair it with a warm cup of spiced apple cider or a scoop of vanilla ice cream for a truly memorable treat. Happy candy making!