
The Quintessential Puyallup Fair Scone: A Taste of Nostalgia
My earliest memories of the Puyallup Fair are a kaleidoscope of colors, sounds, and, most importantly, smells. The aroma of farm animals mingled with the sweet, yeasty scent of caramel corn and the unmistakable, buttery fragrance of Fisher Scones baking in massive ovens. Each year, my family would make a pilgrimage to the fair, and a pilgrimage to the Fisher Scones booth was non-negotiable. The warm, crumbly scone, slathered with butter and raspberry jam, was the taste of pure, unadulterated joy – a fleeting moment of perfection amidst the chaos and excitement of the fair. It wasn’t just a treat; it was tradition.
Recipe Overview
- Prep Time: 20 minutes
- Cook Time: 15 minutes
- Total Time: 35 minutes
- Servings: 8
- Yield: 8 scones
- Dietary Type: Vegetarian
Ingredients
- 2 1/2 cups unbleached all-purpose flour (the original recipe calls for Fisher Blend Flour)
- 2 teaspoons baking powder (make sure your baking powder is still active!)
- 2 tablespoons sugar
- 1/2 teaspoon salt
- 6 tablespoons shortening
- 3/4 cup milk
- 1/2 cup raisins (optional – if omitting, add another 2 tablespoons of milk)
- Butter and raspberry jam for serving
Equipment Needed
- Large mixing bowl
- Measuring cups and spoons
- Pastry blender or your fingertips
- Baking sheet
- Sifter
- Rolling pin (optional)
Instructions
-
Start by sifting and measuring the flour. This is a crucial step to ensure a light and airy scone. Over-measuring flour is a common pitfall in baking, so gently spoon the flour into your measuring cup and level it off with a knife.
-
Re-sift the measured flour with the baking powder, sugar, and salt into the mixing bowl. This evenly distributes the leavening agent and other dry ingredients, resulting in a more consistent texture.
-
Work the shortening into the dry ingredients using a pastry blender or your fingertips. The goal is to create a mixture that resembles coarse crumbs. The smaller the pieces of shortening, the more tender your scones will be. Be careful not to overwork the mixture, as this can develop the gluten in the flour and result in tough scones.
-
If using, add the raisins to the flour-fat mixture and mix thoroughly. Ensure the raisins are evenly distributed throughout the mixture.
-
Add the milk to the mixture. If you are omitting the raisins, add an additional 2 tablespoons of milk. Gently mix until just combined. Do not overmix! The dough will be slightly sticky, and that’s perfectly fine.
-
Turn the dough out onto a lightly floured surface.
-
Divide the dough into two equal pieces.
-
Roll or pat each piece into a round, about 3/4 inch to a full inch thick – similar to the thickness of biscuits. If using a rolling pin, be gentle and avoid over-rolling, as this can develop the gluten and make the scones tough. You can also simply pat the dough into shape with your hands.
-
Cut each round into wedge-shaped pieces, like slices of a pie. Typically, each round will yield 4 scones, resulting in 8 scones total.
-
Bake the scones on an ungreased baking sheet for about 15 minutes at 450 degrees Fahrenheit. The scones are done when they are golden brown on top and slightly puffed up.
-
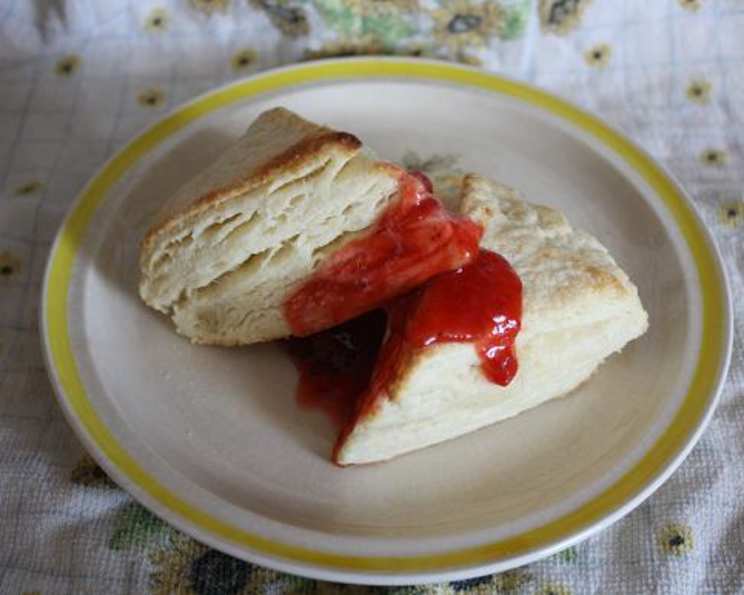
To serve like they do at the fair: split each scone open horizontally, but do not cut all the way through.
-
Fill with a generous slab of butter and a dollop of raspberry jam, then close the scone.
-
Eat immediately and enjoy!
Expert Tips & Tricks
- Keep your ingredients cold: Cold butter and milk help to create a flakier scone. Consider chilling the flour and shortening beforehand as well.
- Don’t overmix: Overmixing develops the gluten in the flour, resulting in a tough scone. Mix until just combined.
- Handle the dough gently: Avoid overworking the dough when shaping it.
- Baking sheet temperature: For extra lift, place the baking sheet in the oven while it preheats. Then, carefully place the scones on the hot sheet.
- Egg Wash (optional): Brush the tops of the scones with a beaten egg before baking for a shinier, golden-brown crust.
- Adjust baking time: Ovens vary, so keep an eye on the scones and adjust the baking time as needed. They should be golden brown on top and cooked through.
- High Altitude Baking: At higher altitudes, you may need to reduce the baking powder slightly (by about 1/4 teaspoon) to prevent the scones from rising too quickly and then collapsing.
Serving & Storage Suggestions
Fisher Scones are best served warm, straight from the oven. The classic accompaniment is a generous spread of butter and a spoonful of raspberry jam. However, feel free to experiment with other toppings like clotted cream, honey, or other fruit preserves.
Leftover scones can be stored in an airtight container at room temperature for up to 2 days. They can also be refrigerated for up to a week. To reheat, microwave for a few seconds or warm them in a low oven (around 300°F) until heated through. For longer storage, freeze the scones in an airtight container for up to 2 months. Thaw completely before reheating.
Nutritional Information
| Nutrient | Amount per Serving | % Daily Value |
|---|---|---|
| Calories | 282 kcal | – |
| Calories from Fat | 97 kcal | – |
| Total Fat | 10.9 g | 16% |
| Saturated Fat | 3 g | 14% |
| Cholesterol | 3.2 mg | 1% |
| Sodium | 249.1 mg | 10% |
| Total Carbohydrate | 41.5 g | 13% |
| Dietary Fiber | 1.4 g | 5% |
| Sugars | 8.6 g | – |
| Protein | 5.1 g | 10% |
Variations & Substitutions
- Gluten-Free: Substitute the all-purpose flour with a gluten-free all-purpose blend. You may need to add a bit more milk to achieve the desired dough consistency.
- Dairy-Free: Replace the milk with a plant-based milk alternative like almond milk, soy milk, or oat milk.
- Sweetness: Adjust the amount of sugar to your liking. You can also add a touch of vanilla extract or other flavorings to the dough.
- Fruit Variations: Experiment with different dried fruits, such as cranberries, chopped apricots, or dates. You can also add fresh or frozen berries to the dough (add frozen berries just before baking).
- Savory Scones: Omit the sugar and add savory ingredients like shredded cheese, herbs, or chopped vegetables.
- Spices: Add a pinch of cinnamon, nutmeg, or cardamom for a warm, comforting flavor.
FAQs (Frequently Asked Questions)
Q: Why are my scones tough?
A: Overmixing the dough is the most common cause of tough scones. Mix the ingredients until just combined, and avoid overworking the dough when shaping it.
Q: Can I make the dough ahead of time?
A: Yes, you can make the dough ahead of time and store it in the refrigerator for up to 24 hours. Wrap it tightly in plastic wrap to prevent it from drying out. Let the dough come to room temperature slightly before baking.
Q: My scones didn’t rise very much. What happened?
A: Make sure your baking powder is fresh and active. Also, avoid overmixing the dough, as this can deflate the leavening.
Q: Can I freeze the baked scones?
A: Yes, baked scones can be frozen for up to 2 months. Thaw completely before reheating.
Q: What’s the best way to reheat scones?
A: You can reheat scones in the microwave for a few seconds, or warm them in a low oven (around 300°F) until heated through. For best results, split the scone and toast it lightly before adding butter and jam.
Final Thoughts
These Puyallup Fair scones are more than just a recipe; they’re a taste of nostalgia, a connection to cherished memories, and a celebration of simple pleasures. Whether you’re a seasoned baker or a beginner, I encourage you to try this recipe and experience the joy of creating your own warm, buttery, jam-filled scones. Share them with friends and family, and perhaps you’ll create some new memories of your own. Don’t be afraid to experiment with variations and toppings to make them your own. And most importantly, don’t forget the butter and jam! Let me know how they turn out, and happy baking!