
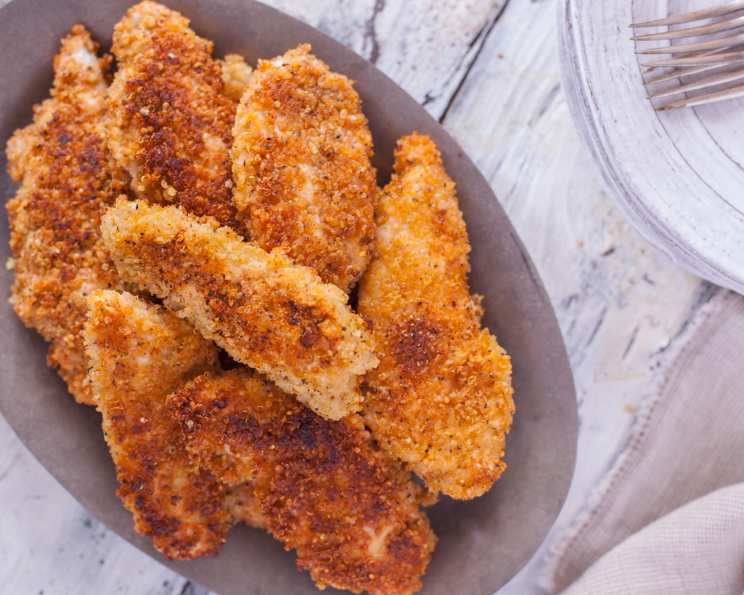
Quinoa Crusted Chicken Fingers: A Healthy and Delicious Twist on a Classic
I remember being a kid, and the sheer delight of chicken fingers dipped in ketchup. They were the ultimate comfort food! But as a chef, I’ve always sought ways to elevate those familiar favorites, to make them not only delicious but also genuinely good for you. These Quinoa Crusted Chicken Fingers are precisely that: a nostalgic indulgence reimagined with wholesome ingredients. They offer that satisfying crunch and savory flavor we all crave, but with a boost of protein and fiber that leaves you feeling energized, not sluggish. Trust me, this is a recipe you’ll want to add to your repertoire – for kids and grown-ups alike.
Recipe Overview
- Prep Time: 15 minutes
- Cook Time: 10 minutes
- Total Time: 25 minutes
- Servings: 6
- Dietary Type: Gluten-Free (If using gluten-free breadcrumbs)
Ingredients
- 2 lbs boneless, skinless chicken breasts, sliced into 3-inch long tenders (or buy chicken tenders)
- 1 teaspoon salt
- 2 teaspoons garlic powder
- 2 teaspoons fresh ground black pepper
- 2 teaspoons paprika
- 2 cups cooked red quinoa or 2 cups cooked white quinoa
- 1/2 cup whole wheat breadcrumbs or 1/2 cup seasoned breadcrumbs (Use gluten-free breadcrumbs for a gluten-free option)
- 2 egg whites
- 2 tablespoons olive oil
Equipment Needed
- Large skillet
- Wax paper or aluminum foil
- Shallow bowl
- Plate
Instructions
- Begin by preparing your coating. Spread the cooked quinoa out on a piece of wax paper or aluminum foil. This will give you a nice, even surface to work on.
- Sprinkle the breadcrumbs evenly over the quinoa.
- Using your fingertips, gently squeeze the quinoa and breadcrumbs together. This helps the breadcrumbs adhere to the quinoa and allows the mixture to absorb some of the quinoa’s moisture, creating a cohesive crust. You want the mixture to feel slightly damp and clumpy.
- Now, season the chicken tenders. In a bowl, combine the salt, garlic powder, pepper, and paprika. Sprinkle this mixture evenly over the chicken, ensuring each tender is well coated.
- Place the egg whites in a shallow bowl. This will act as your binder, helping the quinoa crust adhere to the chicken.
- Dip each chicken tender into the egg whites, making sure it’s fully coated. Allow the excess egg white to drip off.
- Immediately transfer the egg-coated chicken to the quinoa mixture. Press the chicken firmly into the quinoa, ensuring it’s completely covered on all sides. You may need to use your hands to gently press the quinoa onto the chicken.
- Warm the olive oil in a large skillet over medium-high heat. The oil should be shimmering but not smoking.
- Once the oil is hot, carefully add the quinoa-crusted chicken fingers to the skillet. Be careful not to overcrowd the pan; you may need to cook them in batches.
- Reduce the heat to medium. Cook each side for approximately 5 minutes, or until the crust begins to brown and the chicken is no longer translucent in the center. Use a spatula to gently flip the chicken. An internal temperature of 165°F (74°C) ensures the chicken is cooked through.
- Once cooked, transfer the chicken fingers to a plate lined with paper towels to absorb any excess oil.
- Serve immediately and enjoy!
Expert Tips & Tricks
- Quinoa Perfection: Make sure your quinoa is cooked properly. It should be fluffy and slightly al dente, not mushy. Rinse the quinoa thoroughly before cooking to remove any bitterness.
- Crust Adhesion: For a better-adhering crust, you can lightly pat the chicken tenders dry with paper towels before dipping them in the egg whites. This will help the egg whites grip the chicken better.
- Batch Cooking: Don’t overcrowd the skillet! Overcrowding lowers the oil temperature, resulting in soggy chicken fingers. Cook in batches to ensure even browning and crispy crust.
- Oven-Baked Option: For a healthier version, you can bake the chicken fingers instead of pan-frying. Preheat your oven to 400°F (200°C). Place the coated chicken fingers on a baking sheet lined with parchment paper. Bake for 15-20 minutes, flipping halfway through, until the chicken is cooked through and the crust is golden brown.
- Spice it Up: Feel free to adjust the spices to your liking. Add a pinch of cayenne pepper for a little heat, or some smoked paprika for a smoky flavor.
Serving & Storage Suggestions
These Quinoa Crusted Chicken Fingers are best served immediately while the crust is still crispy. They make a fantastic main course served with a side of roasted vegetables, a fresh salad, or your favorite dipping sauce. Consider serving them with a honey-mustard sauce, a creamy ranch dressing, or a tangy BBQ sauce.
Leftovers can be stored in an airtight container in the refrigerator for up to 3 days. To reheat, bake them in a preheated oven at 350°F (175°C) for about 10-15 minutes, or until heated through. You can also reheat them in a skillet over medium heat, but the crust may not be as crispy. Freezing is not recommended as the crust will become soggy upon thawing.
Nutritional Information
| Nutrient | Amount per Serving | % Daily Value |
|---|---|---|
| Calories | 651.1 kcal | N/A |
| Calories from Fat | 162 g | 25% |
| Total Fat | 18 g | 27% |
| Saturated Fat | 2.9 g | 14% |
| Cholesterol | 145.3 mg | 48% |
| Sodium | 878.4 mg | 36% |
| Total Carbohydrate | 57.1 g | 19% |
| Dietary Fiber | 6.8 g | 27% |
| Sugars | 0.3 g | 1% |
| Protein | 62.5 g | 125% |
Note: Nutritional information is an estimate and may vary based on specific ingredients and cooking methods.
Variations & Substitutions
- Gluten-Free: Use gluten-free breadcrumbs to make this recipe completely gluten-free. You can also use almond flour or crushed gluten-free crackers for the crust.
- Different Protein: Try using turkey tenders instead of chicken for a slightly different flavor profile.
- Spice Variations: Experiment with different spice combinations. Add a touch of chili powder for a southwestern twist, or some Italian seasoning for a Mediterranean flair.
- Nut-Free: For a nut-free version, ensure the breadcrumbs used are processed in a nut-free facility.
- Herb Infusion: Add finely chopped fresh herbs like parsley, cilantro, or thyme to the quinoa mixture for an extra burst of flavor.
FAQs (Frequently Asked Questions)
Q: Can I prepare the quinoa crust ahead of time?
A: Yes, you can prepare the quinoa and breadcrumb mixture ahead of time and store it in an airtight container at room temperature for up to 2 days.
Q: Can I use pre-cooked chicken?
A: While possible, it’s not recommended. Using raw chicken tenders ensures the chicken cooks evenly with the crust. Pre-cooked chicken may become dry when cooked again.
Q: How do I prevent the quinoa crust from falling off?
A: Make sure to press the quinoa mixture firmly onto the chicken after dipping it in the egg whites. Also, avoid overcrowding the pan, which can cause the crust to steam rather than crisp.
Q: Can I use regular breadcrumbs instead of whole wheat?
A: Yes, you can use regular breadcrumbs if you prefer. However, whole wheat breadcrumbs offer a bit more fiber.
Q: What dipping sauces go well with these chicken fingers?
A: Honey mustard, BBQ sauce, ranch dressing, and sweet chili sauce are all excellent choices.
Final Thoughts
These Quinoa Crusted Chicken Fingers are a delightful way to enjoy a classic comfort food with a healthy twist. They’re easy to make, packed with flavor, and sure to be a hit with everyone. I encourage you to try this recipe and experience the delicious combination of crispy quinoa and tender chicken. Don’t be afraid to experiment with different spices and dipping sauces to create your own unique version. And if you have any questions or feedback, please don’t hesitate to share it – I’d love to hear how your culinary adventure goes! Perhaps serve these with a vibrant coleslaw or a refreshing cucumber salad for a complete and satisfying meal. Happy cooking!