
Decadent Raspberry White Chocolate Cake: A Symphony of Sweetness and Tartness
My grandmother, bless her heart, wasn’t much of a baker, but she had one recipe that everyone raved about: a simple pound cake slathered with raspberry jam. I can still picture her in her floral apron, carefully spreading the jam with a butter knife, a smear of red always finding its way onto her cheek. This Raspberry White Chocolate Cake is my attempt to elevate that comforting memory, to combine the tartness of raspberries with a more sophisticated sweetness, creating a dessert that’s both elegant and deeply nostalgic.
Recipe Overview
- Prep Time: 25 minutes
- Cook Time: 28-32 minutes
- Total Time: 1 hour 15 minutes
- Servings: 10
- Yield: 1 cake
- Dietary Type: Not specified
Ingredients
Cake Ingredients
- 1 (18 ounce) package white cake mix
- 2 eggs
- 2 egg whites
- 1 tablespoon lemon juice
- 2/3 cup water
- 1/3 cup oil
- 6 ounces white chocolate chips (about half a bag)
Filling
- 1/2 cup raspberry jam (approximate)
Frosting
- 1 (8 ounce) package neufchatel cheese, softened (or cream cheese)
- 6 ounces white chocolate chips
- 1/4 cup butter, softened
- 3 cups powdered sugar, sifted
- 1/2 – 1 teaspoon lemon juice (optional)
- 1 pinch salt
- 6 ounces fresh raspberries, to decorate (approximately 40)
Equipment Needed
- Microwave-safe bowl
- Electric mixer
- 2 round 8-inch cake pans
- Measuring cups and spoons
- Whisk
- Wire rack
- Spatula or frosting knife
Instructions
-
Begin by melting the first 6 ounces of white chocolate chips. Place them in a microwave-safe bowl and microwave on high for 1 minute. Stir well. Then, microwave for another minute, and stir again until completely melted and smooth. Allow the melted white chocolate to cool for a few minutes. This cooling is crucial to prevent the chocolate from seizing when added to the batter.
-
In a large mixing bowl, combine the white cake mix, eggs, egg whites, lemon juice, water, and oil. Use an electric mixer to mix well for several minutes, ensuring all ingredients are fully incorporated. The mixture should be smooth and relatively lump-free.
-
Gently whisk the cooled, melted white chocolate into the cake batter. Be careful not to overmix, as this can result in a tough cake. Mix until just combined.
-
Grease and flour 2 round 8-inch cake pans. This step is essential to prevent the cakes from sticking. You can also use parchment paper rounds for extra insurance.
-
Divide the batter evenly between the prepared cake pans. Gently spread the batter to ensure it reaches all edges of the pans.
-
Bake for 28-32 minutes at 350 degrees Fahrenheit (175 degrees Celsius), or until the cakes are golden brown and fragrant. To check for doneness, insert a toothpick into the center of one of the cakes. If it comes out clean, the cakes are done. If not, continue baking for a few more minutes and check again. Ovens can vary, so keep a close eye on the cakes, especially during the last few minutes of baking.
-
Once baked, allow the cakes to cool in the pans for about 10 minutes. This allows them to firm up slightly, making them easier to remove.
-
After 10 minutes, turn the cakes out onto a wire rack and let them cool completely. This is a critical step, as frosting a warm cake will cause the frosting to melt and slide off.
-
While the cakes are cooling, prepare the frosting. Melt the remaining 6 ounces of white chocolate chips using the same method as in step 1. Set aside to cool slightly.
-
In a large mixing bowl, cream the softened butter and neufchatel cheese (or cream cheese) together until fluffy. This is best done with an electric mixer. The mixture should be light and airy.
-
Slowly add the sifted powdered sugar to the creamed butter and cheese, mixing well until combined. It is crucial to sift the powdered sugar to avoid lumps in the frosting. Add the powdered sugar gradually to prevent it from creating a cloud of dust.
-
Whisk in the melted white chocolate, a pinch of salt, and the lemon juice (if using). Mix until everything is well combined and the frosting is smooth.
-
Check the consistency of the frosting. If it is too thin, beat in more sifted powdered sugar, a tablespoon at a time. If it is too thick, beat in more softened butter, a tablespoon at a time. Keep in mind that the frosting will solidify slightly once refrigerated.
-
Once the cakes are completely cool, it’s time to assemble the cake. Evenly spread the top of one of the cooled cakes with the raspberry jam. The amount of jam can be adjusted to your preference.
-
Carefully place the second cake on top of the jam-covered cake.
-
Using a spatula or frosting knife, spread the frosting evenly over the top and sides of the cake. Aim for a smooth, even layer.
-
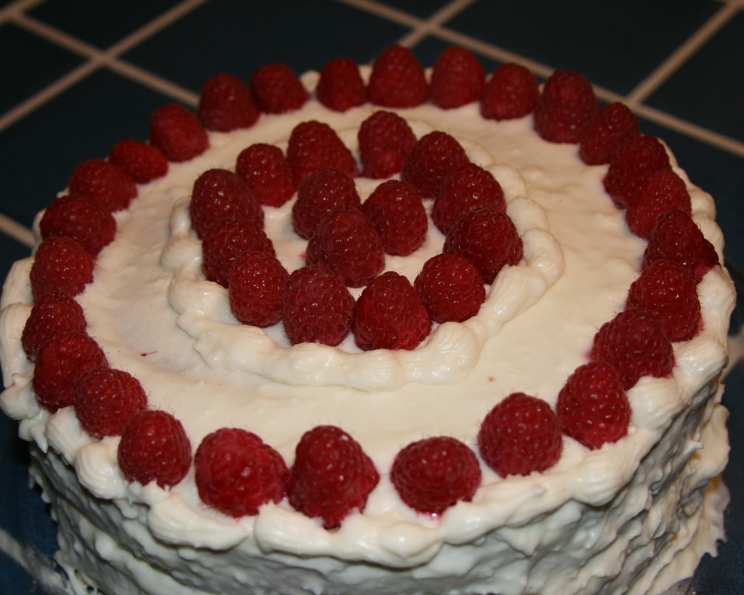
Decorate with leftover frosting, if desired, and garnish with the fresh raspberries. Arrange the raspberries attractively on top of the cake.
-
Keep the finished cake refrigerated until ready to serve. This will help the frosting to set and prevent the cake from becoming soggy.
Expert Tips & Tricks
- For a more intense raspberry flavor, use a high-quality raspberry jam or even consider making your own. A homemade raspberry coulis swirled into the frosting would also be a delightful addition.
- If you’re short on time, you can use store-bought frosting. However, the homemade frosting really elevates the cake and is worth the effort.
- To prevent the cake layers from drying out, wrap them in plastic wrap while they cool.
- Don’t overbake the cakes! A slightly underbaked cake is better than a dry one.
- For a more pronounced lemon flavor, add the zest of one lemon to the cake batter.
- If your frosting is too sweet, add a little more lemon juice to balance the flavors.
Serving & Storage Suggestions
Serve the Raspberry White Chocolate Cake chilled or at room temperature. A dollop of whipped cream or a scoop of vanilla ice cream would be a lovely accompaniment.
Store leftover cake in an airtight container in the refrigerator for up to 3 days. The cake can also be frozen for longer storage. Wrap individual slices tightly in plastic wrap and then place them in a freezer-safe bag or container. Thaw in the refrigerator before serving.
Nutritional Information
| Nutrient | Amount per Serving | % Daily Value |
|---|---|---|
| Calories | 776 kcal | 39% |
| Total Fat | 34.6g | 53% |
| Saturated Fat | 14.5g | 72% |
| Cholesterol | 73.4mg | 24% |
| Sodium | 535.7mg | 22% |
| Total Carbohydrate | 110.3g | 36% |
| Dietary Fiber | 1.8g | 7% |
| Sugars | 92.7g | 370% |
| Protein | 8.7g | 17% |
Variations & Substitutions
- For a gluten-free version, use a gluten-free white cake mix and ensure all other ingredients are gluten-free.
- To add a bit of texture, consider adding chopped nuts, such as almonds or pecans, to the cake batter or frosting.
- For a festive twist, use different colored sprinkles or edible glitter to decorate the cake.
- Other berries like blueberries, blackberries, or strawberries can be used instead of raspberries.
FAQs (Frequently Asked Questions)
Q: Can I use a different type of cake mix?
A: While a white cake mix is recommended for the best flavor and color, you can experiment with other flavors, such as vanilla or even a light lemon cake mix.
Q: Can I use frozen raspberries instead of fresh ones?
A: Fresh raspberries are preferred for garnish due to their texture and appearance. However, frozen raspberries can be used in the filling if fresh ones are not available. Just be sure to thaw and drain them well before using.
Q: How can I prevent the cake from sticking to the pan?
A: Thoroughly grease and flour the cake pans. Alternatively, you can use parchment paper rounds to line the bottoms of the pans.
Q: My frosting is too thin. How can I thicken it?
A: Gradually add more sifted powdered sugar, a tablespoon at a time, until the frosting reaches your desired consistency.
Q: Can I make this cake ahead of time?
A: Yes, you can bake the cake layers ahead of time and store them in the refrigerator or freezer until you’re ready to assemble the cake. The frosting can also be made ahead of time and stored in the refrigerator.
Final Thoughts
This Raspberry White Chocolate Cake is more than just a dessert; it’s a celebration of flavors and a tribute to simple joys. I encourage you to try this recipe and experience the delightful combination of sweet and tart. Feel free to experiment with variations and make it your own. Share your creations with friends and family, and don’t forget to let me know what you think! Enjoy!