
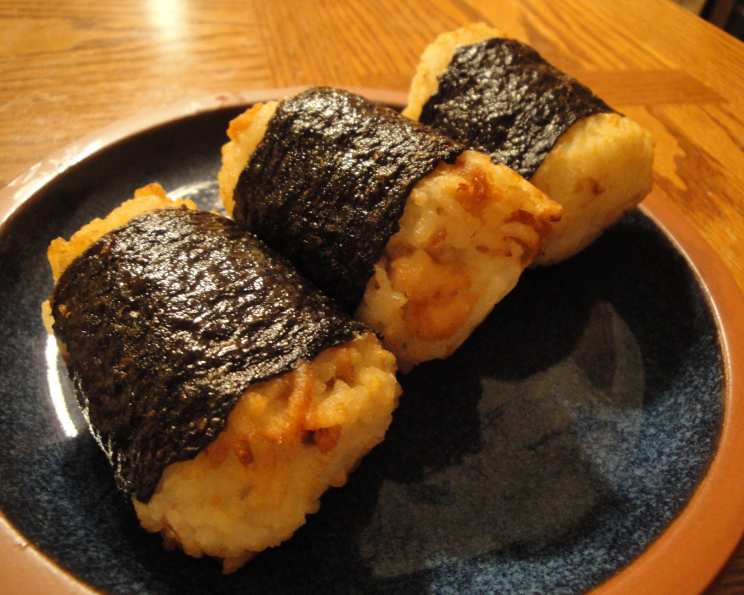
Rody’s Fried Onigiri: A Crispy Rice Ball Delight
I remember the first time I tasted fried onigiri. I was visiting a small, unassuming street food stall in Tokyo, the air thick with the aroma of soy sauce and sizzling oil. The vendor, a kind-faced woman with decades of experience etched into her smile, handed me a golden-brown triangle. The initial crunch gave way to a burst of savory tuna and fluffy rice, a symphony of textures and flavors that instantly transported me. It was simple, comforting, and utterly addictive – a culinary experience I’ve been chasing ever since. Rody’s version captures that magic perfectly, adding a unique twist with its delightful crispiness.
Recipe Overview
- Prep Time: 15 minutes
- Cook Time: 15 minutes
- Total Time: 30 minutes
- Servings: 10
- Yield: 10 onigiri
- Dietary Type: Can be made Gluten-Free and Dairy-Free
Ingredients
- 2 cups cooked rice (preferably short grain, but normal rice works)
- 5 ounces tuna fish (canned, drained)
- 1 egg, beaten
- Canola oil, for frying
- 1 teaspoon salt
- Black pepper, to taste (optional)
- Nori sheets
Equipment Needed
- Large Mixing Bowl
- Frying Pan
- Paper Towels
Instructions
-
Heat about 1/2 inch of canola oil in a frying pan over medium heat. Ensure the oil is hot enough for frying, but not smoking. A good test is to drop a tiny piece of rice into the oil; it should sizzle immediately.
-
In a large mixing bowl, gently mix the beaten egg into the cooled, cooked rice until the rice is well-coated. Be careful not to overmix, as this can make the rice sticky.
-
Take a generous spoonful of the rice mixture and gently roll it into a ball shape in your hands. Moisten your hands with water to prevent the rice from sticking.
-
Using your thumb or a small spoon, press a hole into the middle of the rice ball. This will create a pocket for the filling.
-
Spoon a small amount of the tuna fish into the hole. Don’t overfill, or the onigiri will be difficult to close.
-
Cover the hole with more of the rice mixture, carefully sealing the tuna inside. Gently reshape the ball until it is uniformly round and the filling is completely enclosed. You can also shape them into triangles if preferred.
-
Carefully place each rice ball into the heated canola oil. Fry on each side for approximately 3-5 minutes, or until golden brown and crispy. Ensure even browning by rotating the onigiri gently with tongs.
-
Remove the fried onigiri from the pan and set them aside on paper towels to drain any excess oil and cool slightly.
-
While the onigiri are still warm, season lightly with salt and black pepper (if desired). This step is optional, but it enhances the savory flavor.
-
Cut the nori sheets into strips, wide enough to wrap around the base of the onigiri.
-
Wrap each fried onigiri with a strip of nori. The nori adds a subtle seaweed flavor and provides a convenient handle for eating.
-
Serve immediately and enjoy! The crispy exterior and warm, flavorful interior are best enjoyed fresh.
Expert Tips & Tricks
- Rice Selection: Short-grain rice, like sushi rice, is ideal for onigiri because it’s stickier and holds its shape well. However, if you only have long-grain rice on hand, don’t worry! Just be extra gentle when shaping the onigiri. Add a tiny splash of rice vinegar into the cooked rice to help it bind together.
- Prevent Sticking: Keep a small bowl of water nearby while shaping the onigiri. Wetting your hands frequently will prevent the rice from sticking to your fingers and make the process much easier.
- Even Frying: Maintain a consistent oil temperature during frying to ensure even browning. If the oil is too cold, the onigiri will absorb too much oil and become greasy. If it’s too hot, they will burn on the outside before the inside is heated through.
- Make-Ahead Tip: The rice can be cooked ahead of time and stored in the refrigerator. Allow it to come to room temperature before mixing it with the egg and shaping the onigiri. You can also pre-shape the onigiri and store them (unfried) in the refrigerator for a few hours before frying. This will save time when you’re ready to cook.
Serving & Storage Suggestions
Serve Rody’s Fried Onigiri immediately while they are still warm and crispy. They make a perfect snack, light meal, or addition to a bento box. You can serve them with a side of soy sauce for dipping, or alongside a simple salad.
Leftover fried onigiri can be stored in an airtight container in the refrigerator for up to 2 days. However, the crispy texture will soften over time.
To reheat, you can bake them in a preheated oven at 350°F (175°C) for 5-10 minutes, or until heated through. You can also microwave them, but be aware that this will make them even softer. For best results, reheat in a skillet with a little oil to crisp them up again.
Freezing is not recommended, as the texture will change significantly upon thawing.
Nutritional Information
| Nutrient | Amount per Serving | % Daily Value |
|---|---|---|
| Calories | 164 kcal | 8% |
| Total Fat | 7g | 9% |
| Saturated Fat | 2g | 10% |
| Cholesterol | 25mg | 8% |
| Sodium | 287mg | 12% |
| Total Carbohydrate | 31g | 11% |
| Dietary Fiber | 0.6g | 2% |
| Sugars | 0g | 0% |
| Protein | 6.8g | 14% |
Note: Nutritional information is an estimate and may vary based on specific ingredients and portion sizes.
Variations & Substitutions
- Filling Variations: Get creative with the filling! Salmon, cooked chicken, ground beef, or even pickled vegetables (like kimchi) are all delicious options. For a vegetarian version, try seasoned tofu or edamame.
- Gluten-Free: Ensure that your tuna is packed in water (not oil with gluten-containing additives) and use gluten-free soy sauce for dipping.
- Vegan: Substitute the egg with a flax egg (1 tablespoon ground flaxseed mixed with 3 tablespoons of water, let sit for 5 minutes to thicken) or simply omit it. Use a plant-based filling like seasoned tofu or edamame.
- Flavor Boost: Add a pinch of red pepper flakes to the rice mixture for a subtle kick of heat. Or, mix in some finely chopped green onions or sesame seeds for added flavor and texture.
- Onigiri Seasoning: Furikake is a Japanese seasoning blend that adds a wonderful umami flavor to the rice. Sprinkle some into the rice mixture for an extra layer of deliciousness.
FAQs (Frequently Asked Questions)
Q: Can I use leftover rice for this recipe?
A: Absolutely! In fact, leftover rice is often ideal for onigiri, as it tends to be a bit drier and holds its shape better.
Q: Can I bake the onigiri instead of frying them?
A: While frying provides the characteristic crispy exterior, you can bake them for a healthier option. Brush the onigiri with a little oil and bake at 375°F (190°C) for about 15-20 minutes, flipping halfway through. The texture won’t be the same, but it’s still delicious.
Q: How do I prevent the nori from becoming soggy?
A: Wrap the onigiri with nori just before serving. This will keep the nori crisp and prevent it from absorbing moisture from the rice.
Q: Can I make these ahead of time and freeze them?
A: While freezing is not ideal, you can freeze the unfried onigiri. Thaw them completely before frying. Be aware that the rice texture may change slightly.
Q: What is the best way to shape the onigiri?
A: Wet your hands with water to prevent the rice from sticking. Gently press and mold the rice into the desired shape. Triangular or round shapes are most common.
Final Thoughts
Rody’s Fried Onigiri is more than just a recipe; it’s an invitation to experience the joy of simple, flavorful food. The combination of crispy rice, savory filling, and subtle seaweed notes is simply irresistible. I encourage you to try this recipe, experiment with different fillings, and make it your own. Share your creations with friends and family, and let them experience the magic of fried onigiri! Consider pairing them with a refreshing cucumber salad or a bowl of miso soup for a complete and satisfying meal. Enjoy!