
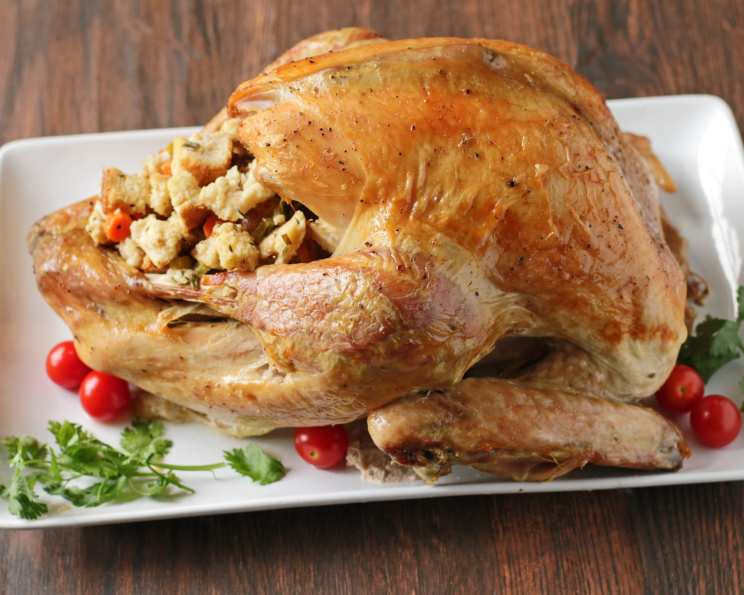
Uncle Bill’s Foolproof Method for the Juiciest Turkey You’ll Ever Make
The aroma always hits me first – that unmistakable blend of roasting turkey, savory herbs, and the promise of a gathering filled with laughter. Thanksgiving at Uncle Bill’s house wasn’t just a meal; it was an institution. While he was a man of few words, his turkey spoke volumes. I remember being a young, aspiring cook, eagerly watching him perform the ritual he swore by, a method passed down through generations, resulting in the most succulent, flavorful turkey imaginable. I’ve adapted and refined countless recipes in my career, but Uncle Bill’s method remains the gold standard, a testament to simple techniques executed perfectly.
Recipe Overview
- Prep Time: 30 minutes
- Cook Time: 5 hours
- Total Time: 5 hours 30 minutes
- Servings: 14-18
- Dietary Type: Varies based on stuffing
Ingredients
- 1 (16 lb) whole turkey
- Salt
- Pepper
- Granulated garlic powder
- Water
- ½ cup (or more, if needed) extra virgin olive oil
- Optional: Your favorite stuffing
- Optional: Cheesecloth (if stuffing)
- Optional: Meat wrapping twine
- Optional: Butter
Equipment Needed
- Large kettle
- Clean sink or large roasting pan
- Wire rack
- Roasting pan
- Heavy aluminum foil
- Instant-read thermometer
Instructions
-
Begin by ensuring your turkey is completely thawed if using a frozen bird. If using a fresh turkey, proceed directly to the next step.
-
Remove any turkey parts (neck, giblets, etc.) from the cavities. You can use these for making gravy later, if desired.
-
Thoroughly wash the inside of the turkey cavities with cold water.
-
Boil a kettle of water until it is scalding hot.
-
Place the turkey in a clean sink or a large roasting pan.
-
Carefully pour the scalding hot water over the entire turkey, including inside the cavities. This process tightens the skin, helping to seal in the natural juices during cooking. Don’t worry, this step is crucial and won’t cook the turkey, just tighten the skin.
-
Once the turkey has been scalded, pat it dry both inside and out with paper towels.
-
Preheat your oven to 400°F (200°C).
-
Sprinkle the inside of the turkey cavities generously with salt, black pepper, and granulated garlic powder. This simple seasoning is key to a flavorful bird.
-
If you are planning to stuff the turkey, line the inside of the main cavity with cheesecloth. This helps contain the stuffing and makes for easier removal later. Loosely fill the cavity with your favorite stuffing. Remember to not pack the stuffing too tightly, as it needs room to expand during cooking.
-
Use meat wrapping twine to tie the turkey legs together securely. Also, tie the wings close to the body. Create a lifting loop with the twine to make it easier to remove the cooked turkey from the pan.
-
Place a wire rack in the bottom of your roasting pan. This allows for better air circulation and prevents the bottom of the turkey from becoming soggy.
-
Place the turkey on the wire rack, breast side up.
-
Pour 2 cups of water or chicken broth into the bottom of the roasting pan. This adds moisture to the oven and helps to keep the turkey from drying out.
-
Drizzle about ½ cup (or more, if needed) of extra virgin olive oil over the entire exterior of the turkey. For an extra crispy skin, you can rub butter over the bird in addition to the oil.
-
Cover the turkey completely with heavy-duty aluminum foil. Ensure the foil doesn’t directly touch the turkey, as it can stick during cooking. Pinch the foil tightly to the sides of the roasting pan to create a sealed environment.
-
Place the turkey on the lower rack of the preheated oven and cook for 1 hour at 400°F (200°C).
-
Reduce the oven temperature to 325°F (160°C) and continue cooking for 2 ½ hours.
-
Increase the oven temperature to 350°F (175°C) and cook for another ½ hour.
-
Remove the aluminum foil from the turkey. At this point, check the internal temperature of the turkey breast using an instant-read thermometer. You’re aiming for a final internal temperature of 175°F (80°C).
-
Baste the turkey with the pan juices. Continue cooking, uncovered, for an additional 1 hour at 350°F (175°C), basting approximately every 15 minutes to achieve a beautiful, even brown color.
-
When the cooking time is complete, again check for doneness. Insert the instant-read thermometer into the thickest part of the turkey breast. The reading should be 175°F (80°C) and no higher. You can also check the thickest part of the leg or thigh; it should read 180°F (82°C).
-
Remove the turkey from the oven. Using the string loops you created earlier, carefully lift the turkey out of the roasting pan.
-
Cover the turkey loosely with foil and let it rest for about ½ hour before carving. This allows the juices to redistribute, resulting in a more tender and flavorful bird.
-
The total cooking time for a 16-pound stuffed turkey is approximately 5 hours.
Expert Tips & Tricks
- Don’t skip the scalding step! It’s crucial for locking in moisture.
- If your turkey starts to brown too quickly, loosely tent it with foil.
- For an even crispier skin, consider rubbing softened butter all over the turkey under the olive oil before the final hour of cooking.
- Use a good-quality instant-read thermometer for accurate temperature readings.
- Don’t overcook the turkey! Dry turkey is a culinary tragedy.
Serving & Storage Suggestions
Serve your perfectly cooked turkey immediately after carving. Accompany it with your favorite side dishes, such as mashed potatoes, gravy, cranberry sauce, and stuffing.
Store leftover turkey in an airtight container in the refrigerator for up to 3-4 days. You can also freeze it for up to 2-3 months. To reheat, slice the turkey and gently warm it in the oven or microwave with a little broth to prevent it from drying out.
Nutritional Information
(Note: Nutritional information will vary based on size of bird, ingredients used in stuffing, and added oil/butter)
| Nutrient | Amount per Serving (estimated) | % Daily Value (estimated) |
|---|---|---|
| Calories | 675 kcal | N/A |
| Total Fat | 38g | 58% |
| Saturated Fat | 10g | 48% |
| Cholesterol | 258mg | 86% |
| Sodium | 247mg | 10% |
| Total Carbohydrate | 0g | 0% |
| Dietary Fiber | 0g | 0% |
| Sugars | 0g | 0% |
| Protein | 78g | 154% |
Variations & Substitutions
- Herb-Roasted Turkey: Add fresh herbs like rosemary, thyme, and sage to the turkey cavities and under the skin for an aromatic flavor.
- Citrus-Infused Turkey: Place citrus slices (lemon, orange, or grapefruit) inside the turkey cavities for a bright, zesty flavor.
- Spicy Turkey: Add a pinch of cayenne pepper or chili flakes to the seasoning blend for a little heat.
- Unstuffed Turkey: If you prefer an unstuffed turkey, simply omit the stuffing step and reduce the overall cooking time (refer to the provided cooking time chart).
- Gluten-Free Turkey: Ensure your stuffing is made with gluten-free bread or rice.
FAQs (Frequently Asked Questions)
Q: Why do I need to scald the turkey with hot water?
A: The scalding process tightens the skin of the turkey, which helps to trap in the natural juices and results in a more moist and flavorful bird.
Q: Can I skip the wire rack in the roasting pan?
A: While you can, using a wire rack allows for better air circulation around the turkey, which helps it to cook more evenly and prevents the bottom from becoming soggy.
Q: How do I know when the turkey is fully cooked?
A: The best way to check for doneness is to use an instant-read thermometer. Insert it into the thickest part of the breast, and the reading should be 175°F (80°C). You can also check the thickest part of the thigh, which should read 180°F (82°C).
Q: My turkey is browning too quickly. What should I do?
A: If your turkey is browning too quickly, loosely tent it with aluminum foil to protect it from the heat.
Q: Can I use this method for a smaller or larger turkey?
A: Yes, but you will need to adjust the cooking time accordingly. Refer to the provided cooking time chart for guidelines based on the weight of your turkey.
Final Thoughts
Uncle Bill’s method might seem a little unconventional with the initial scalding, but trust me – it’s the secret to the juiciest, most flavorful turkey you’ll ever taste. Don’t be intimidated; the steps are simple, and the results are truly exceptional. So, gather your ingredients, preheat your oven, and prepare to impress your family and friends with a Thanksgiving centerpiece that will have them singing your praises. Don’t hesitate to experiment with different stuffing recipes or herb combinations to personalize it. I encourage you to try Uncle Bill’s method this holiday season. And let me know how it turns out! I promise, you won’t be disappointed.