
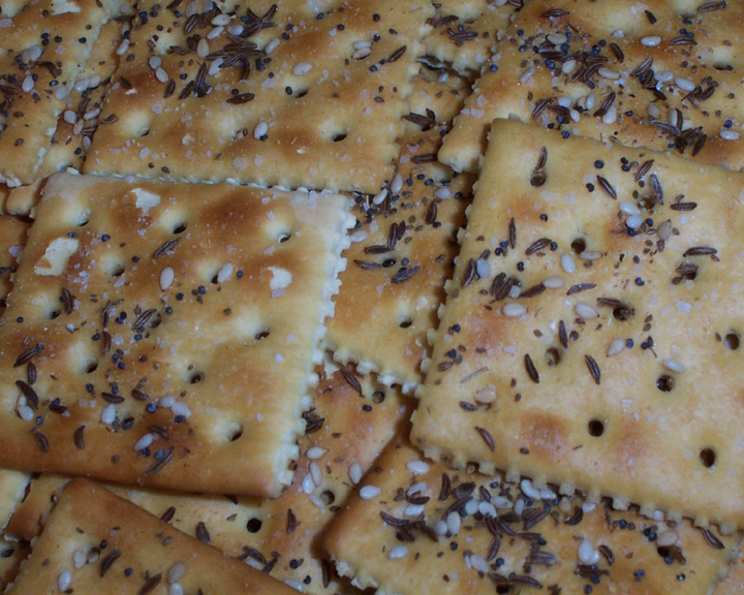
Loaded Saltines: The Unassuming Cracker Elevated
My grandmother, bless her heart, was a woman who believed in the power of simple pleasures. Fancy hors d’oeuvres were never her style. Instead, a platter of unassuming saltines, glistening with butter and sprinkled with a medley of seeds, always held a place of honor at her gatherings. The salty, buttery, and savory crunch of those crackers still evokes a wave of nostalgia – a reminder of laughter, warmth, and unpretentious joy. These loaded saltines are a direct homage to her, a way to bring that same simple magic to my own table.
Recipe Overview
- Prep Time: 5 minutes
- Cook Time: 10 minutes
- Total Time: 15 minutes
- Yields: 72 crackers
- Serves: 12
- Dietary Type: Vegetarian
Ingredients
- 72 saltines (about 2 sleeves, I use fat free)
- 2 teaspoons caraway seeds
- 2 teaspoons poppy seeds
- 2 teaspoons sesame seeds
- 2 teaspoons celery seeds
- ½ teaspoon garlic powder
- ½ teaspoon kosher salt
- ½ cup butter, melted
Equipment Needed
- Cookie sheet
- Parchment paper
- Small bowl (for melting butter)
- Pastry brush or spoon
Instructions
-
Begin by preheating your oven to 300°F (150°C). This low temperature is crucial for gently toasting the saltines without burning them.
-
Line a cookie sheet with parchment paper. This will prevent the saltines from sticking and make cleanup a breeze. The parchment also helps to distribute the heat evenly.
-
Arrange the saltines in a single layer on the prepared cookie sheet. Make sure they aren’t overlapping so they bake evenly.
-
In a small bowl, melt the butter. You can do this in the microwave in 30-second intervals, or in a small saucepan over low heat. Watch it carefully to prevent it from splattering or burning.
-
Brush the melted butter evenly over the saltines. You can use a pastry brush or even a spoon, making sure each cracker is well-coated. The butter is key to the flavor and helps the seasonings adhere.
-
Now comes the fun part: topping with the seasonings! Evenly sprinkle the caraway seeds, poppy seeds, sesame seeds, and celery seeds over the buttered saltines. Don’t be shy! A generous sprinkling ensures maximum flavor in every bite.
-
Sprinkle the garlic powder and kosher salt evenly over the seeds. The garlic powder adds a subtle savory note, and the kosher salt enhances all the other flavors.
-
Bake in the preheated oven for about 10 minutes, or until the saltines are lightly browned around the edges. Keep a close eye on them, as they can burn quickly at the end.
-
Remove from the oven and let the loaded saltines cool completely on the cookie sheet. As they cool, they will crisp up further.
-
Once cooled, transfer the saltines to a plate or serving platter. They are now ready to be served with your favorite cheese or dip.
Expert Tips & Tricks
-
Spice it up: Experiment with different seasonings! Try adding a pinch of red pepper flakes for a little heat, or some dried herbs like rosemary or thyme for a more savory flavor. Onion powder is another great addition.
-
Cheese lover? Sprinkle a bit of grated Parmesan or Romano cheese on top before baking for a cheesy twist.
-
Make it ahead: You can prepare the saltines up to a day in advance and store them in an airtight container at room temperature.
-
Preventing soggy crackers: Be sure to use just enough melted butter to coat the crackers without soaking them. Too much butter can make them soggy.
-
Even Baking: Ensure crackers are uniformly sized to allow consistent cooking times. Overlapping crackers will remain soft.
Serving & Storage Suggestions
These loaded saltines are incredibly versatile. Serve them as a simple appetizer with a cheese board or alongside a bowl of creamy soup. They’re also delicious with dips like hummus, spinach artichoke dip, or even a simple guacamole.
Store any leftover saltines in an airtight container at room temperature for up to a week. They may lose some of their crispness over time, but they will still be delicious. If they do lose their crispness, you can re-crisp them in a low oven (250°F) for a few minutes. I do not recommend freezing, as it can affect the texture of the crackers.
Nutritional Information
(Estimated per serving of 6 crackers)
| Nutrient | Amount per Serving | % Daily Value |
|---|---|---|
| Calories | 153 kcal | 8% |
| Total Fat | 10.3 g | 15% |
| Saturated Fat | 5.2 g | 26% |
| Cholesterol | 20.3 mg | 6% |
| Sodium | 320.9 mg | 13% |
| Total Carbohydrate | 13.4 g | 4% |
| Dietary Fiber | 0.8 g | 3% |
| Sugars | 0.2 g | 0% |
| Protein | 2.1 g | 4% |
Variations & Substitutions
-
Gluten-Free: While saltines are traditionally made with wheat flour, you can find gluten-free cracker options in most supermarkets. Use gluten-free crackers as a base for this recipe.
-
Vegan: Use a vegan butter substitute or olive oil instead of butter. Be sure to check the ingredients of your butter substitute to ensure it is truly vegan.
-
Seed Sensitivities: Feel free to omit or substitute any of the seeds based on your preferences or dietary restrictions. Pumpkin seeds, sunflower seeds, or flax seeds would all be great additions.
-
Herbaceous: Incorporate dried herbs like rosemary, thyme, or oregano for a more complex flavor profile.
FAQs (Frequently Asked Questions)
Q: Can I use salted butter instead of unsalted?
A: You can, but you may want to reduce the amount of kosher salt you add to prevent the crackers from being too salty.
Q: Can I use regular salt instead of kosher salt?
A: Yes, but kosher salt has a coarser texture and a cleaner taste. If using regular table salt, use slightly less, as it is more concentrated.
Q: How long will these loaded saltines stay fresh?
A: Stored in an airtight container at room temperature, they should stay fresh for up to a week, though they are best enjoyed within the first few days.
Q: Can I double or triple the recipe?
A: Absolutely! Just be sure to use a larger cookie sheet or bake in batches.
Q: My saltines are burning on the edges. What am I doing wrong?
A: Your oven temperature might be too high. Try lowering the temperature by 25 degrees or shortening the baking time. Make sure the crackers are in a single layer and not overlapping.
Final Thoughts
These loaded saltines are a testament to the fact that sometimes, the simplest things in life are the most satisfying. They are incredibly easy to make, customizable to your taste, and always a crowd-pleaser. I encourage you to try this recipe and make it your own. Experiment with different seasonings, and don’t be afraid to get creative! Share your creations with friends and family, and let me know what you think. These little crackers are perfect with a crisp glass of white wine or a comforting cup of tea. Enjoy!