
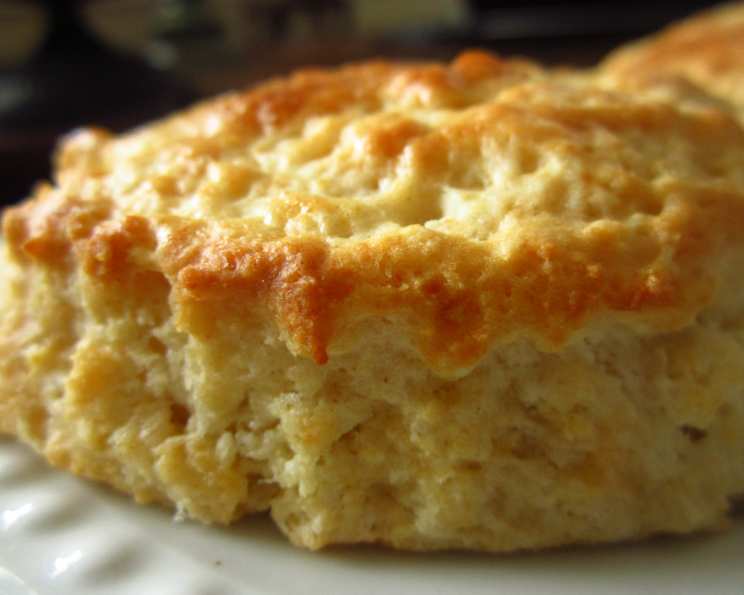
Classic Canadian Living Scones: A Taste of Home
The aroma of freshly baked scones always transports me back to my grandmother’s kitchen. She had a knack for creating the most comforting treats, and her scones were legendary. I remember standing on a stool beside her, my tiny hands covered in flour as we carefully cut out the rounds. The anticipation as we waited for them to turn golden brown in the oven was almost unbearable, but the first warm bite, slathered with butter and jam, was always worth the wait. To this day, that simple pleasure evokes a feeling of warmth, love, and pure deliciousness.
Recipe Overview
- Prep Time: 15 minutes
- Cook Time: 15 minutes
- Total Time: 30 minutes
- Yields: 12 scones
- Serves: 12
- Dietary Type: Vegetarian
Ingredients
- 2 1/4 cups all-purpose flour
- 2 tablespoons granulated sugar
- 2 1/2 teaspoons baking powder
- 1/2 teaspoon baking soda
- 1/2 teaspoon salt
- 1/2 cup cold butter, cubed
- 1 cup buttermilk
- 1 large egg, lightly beaten
Equipment Needed
- Large bowl
- Whisk
- Pastry blender or food processor
- Measuring cups and spoons
- Lightly floured surface
- 2-inch round cutter
- Rimless baking sheet
- Parchment paper or silicone mat
- Cooling rack
Instructions
- Preheat your oven to 425°F (220°C). Line a rimless baking sheet with parchment paper or a silicone mat. Alternatively, lightly dust the baking sheet with flour. Set the prepared baking sheet aside.
- In a large bowl, whisk together the all-purpose flour, granulated sugar, baking powder, baking soda, and salt. Make sure all dry ingredients are well combined for even rising.
- Using a pastry blender or your fingertips, cut in the cold, cubed butter until the mixture resembles coarse crumbs. Work quickly to prevent the butter from melting; the colder the butter, the flakier the scones will be. You can also use a food processor for this step – pulse until the mixture resembles coarse crumbs.
- Pour the buttermilk over the dry ingredients. Stir with a fork until the ingredients are just combined to form a soft, slightly sticky, ragged dough. Be careful not to overmix, as this will result in tough scones.
- Turn the dough out onto a lightly floured surface. With lightly floured hands, gently knead the dough about 10 times to smooth it out. If the dough is too sticky, add a sprinkle more flour to the work surface. Avoid overworking the dough.
- Gently pat or roll the dough out into a generous ½-inch thick round. Ensure the thickness is uniform for even baking.
- Using a 2-inch cutter, cut out rounds. Dip the cutter in flour before each cut to prevent sticking. Place the rounds on the prepared baking sheet, spacing them slightly apart.
- Gather up the scraps, re-pat the dough, and cut out more rounds. Press any remaining scraps into a final scone (the baker’s scone). These last scones will be a bit tougher, but still delicious!
- Brush the tops of the scones with the lightly beaten egg. This will give them a beautiful golden sheen.
- Bake in the center of the preheated 425°F oven until golden brown, about 15 minutes. Keep a close eye on them to prevent burning.
- Let the scones cool on the baking sheet for 5 minutes. This allows them to firm up slightly.
- Transfer the scones to a wire rack to finish cooling completely.
Expert Tips & Tricks
- Cold Ingredients are Key: Make sure the butter and buttermilk are very cold. This helps create steam during baking, resulting in a lighter, flakier scone. Consider chilling the flour for 15 minutes before using it in hot weather.
- Don’t Overmix: Overmixing develops the gluten in the flour, leading to tough scones. Mix just until the ingredients are combined.
- Dip the Cutter: Before cutting out each scone, dip the cutter into flour to prevent sticking. This will ensure clean, even cuts.
- Minimize Scrap Rerolling: The more you reroll the dough, the tougher the scones will be. Try to cut out as many scones as possible from the first roll.
- For extra richness: Substitute heavy cream for buttermilk.
Serving & Storage Suggestions
Serve these classic scones warm with your favorite toppings. Some popular choices include butter, clotted cream, jam, lemon curd, or a drizzle of honey. They are perfect for breakfast, brunch, or afternoon tea.
- Room Temperature: Store scones in an airtight container at room temperature for up to 2 days.
- Refrigerator: Store scones in an airtight container in the refrigerator for up to 4 days.
- Freezer: For longer storage, freeze scones in an airtight container or freezer bag for up to 2 months. Thaw completely before serving.
- Reheating: To reheat, wrap the scones in foil and warm them in a 350°F (175°C) oven for 5-10 minutes, or until heated through. You can also microwave them for a few seconds, but they may become slightly softer.
Nutritional Information
| Nutrient | Amount per Serving | % Daily Value |
|---|---|---|
| Calories | 175.9 kcal | N/A |
| Calories from Fat | N/A | 43% |
| Total Fat | 8.5 g | 13% |
| Saturated Fat | 5.1 g | 25% |
| Cholesterol | 36.6 mg | 12% |
| Sodium | 320.4 mg | 13% |
| Total Carbohydrate | 21.2 g | 7% |
| Dietary Fiber | 0.6 g | 2% |
| Sugars | 3.2 g | N/A |
| Protein | 3.7 g | 7% |
Note: Nutritional information is an estimate and can vary based on specific ingredients and portion sizes.
Variations & Substitutions
- Sweet Scones: Add ½ cup of dried fruit (raisins, cranberries, or chopped apricots) to the dry ingredients.
- Savory Scones: Omit the sugar and add 1 cup of shredded cheese (cheddar, Gruyere, or Parmesan) and 1/4 cup of chopped fresh herbs (chives, rosemary, or thyme) to the dry ingredients.
- Lemon Poppy Seed Scones: Add the zest of 1 lemon and 2 tablespoons of poppy seeds to the dry ingredients.
- Gluten-Free Scones: Substitute the all-purpose flour with a gluten-free all-purpose flour blend. You may need to add a bit more buttermilk to achieve the right consistency.
- Vegan Scones: Substitute the butter with vegan butter and the buttermilk with a mixture of plant-based milk and 1 tablespoon of lemon juice or apple cider vinegar. Use a flax egg (1 tablespoon ground flaxseed mixed with 3 tablespoons water) instead of the egg for brushing.
FAQs (Frequently Asked Questions)
Q: Why are my scones flat and dense?
A: This is usually due to overmixing the dough or using warm ingredients. Make sure to use cold butter and buttermilk, and mix just until the ingredients are combined.
Q: Can I make the dough ahead of time?
A: Yes, you can make the dough ahead of time and store it in the refrigerator for up to 24 hours. Wrap it tightly in plastic wrap to prevent it from drying out.
Q: How do I get my scones to rise higher?
A: Make sure your baking powder and baking soda are fresh. Also, avoid overmixing the dough and ensure your oven is properly preheated.
Q: Can I use regular milk instead of buttermilk?
A: Buttermilk adds a tangy flavor and tender texture to the scones. If you don’t have buttermilk, you can make a substitute by adding 1 tablespoon of lemon juice or white vinegar to 1 cup of regular milk. Let it sit for 5 minutes before using.
Q: What is the best way to serve scones?
A: Scones are best served warm with butter, jam, clotted cream, or lemon curd. They are a delightful addition to breakfast, brunch, or afternoon tea.
Final Thoughts
These classic Canadian Living scones are a timeless treat that’s perfect for any occasion. Their simple elegance and comforting flavor make them a crowd-pleaser, whether you’re sharing them with family, friends, or simply enjoying a quiet moment with a cup of tea. So, gather your ingredients, preheat your oven, and let the aroma of freshly baked scones fill your home. Don’t be afraid to experiment with different variations and find your own signature scone recipe. And most importantly, share your creations and spread the joy of baking!