
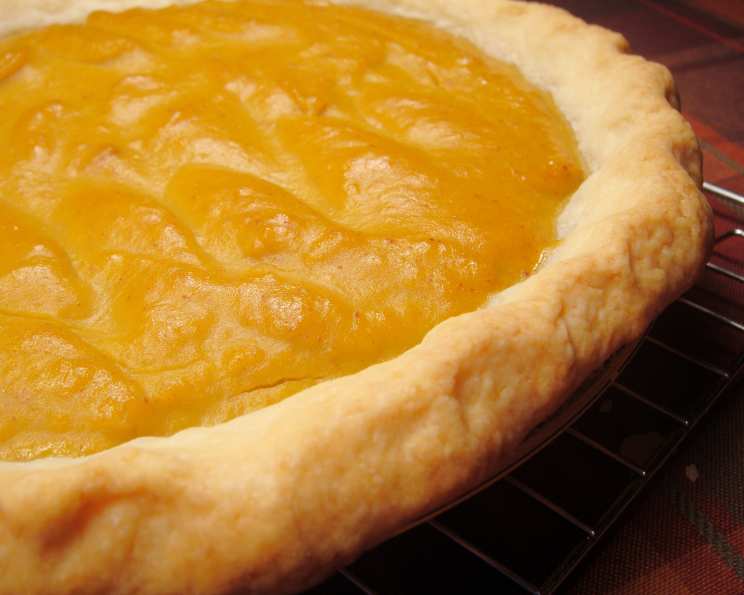
The Ultimate Single Flaky Pie Crust (Food Processor)
I remember the first time I attempted pie crust. It was Thanksgiving, and I was determined to impress my grandmother, the undisputed pie queen of our family. I envisioned a golden, flaky masterpiece. What I created instead was a tough, dense hockey puck of dough. The tears I shed that day were almost as salty as the crust itself. Thankfully, after much practice and experimentation, I’ve mastered the art of the single flaky pie crust, and this food processor method is my go-to for perfect results every time.
Recipe Overview
- Prep Time: 15 minutes
- Cook Time: 25-30 minutes (depending on filling)
- Total Time: 45 minutes (plus chilling time)
- Servings: 8
- Yield: 1 pie crust (9-inch)
- Dietary Type: Vegetarian (easily adaptable to vegan – see variations)
Ingredients
- 1 1/3 cups all-purpose flour
- 1 tablespoon sugar
- 1/2 teaspoon salt
- 6 tablespoons unsalted butter, chilled, cut into 1/2-inch pieces
- 2 tablespoons vegetable shortening, chilled, cut into 1/2-inch pieces
- 3 tablespoons ice water (or more, as needed)
Equipment Needed
- Food Processor
- Plastic Wrap
- Rolling Pin
- Lightly Floured Work Surface
- 9-inch diameter glass pie dish
Instructions
-
Begin by combining the dry ingredients. In the bowl of your food processor, add 1 1/3 cups all-purpose flour, 1 tablespoon sugar, and 1/2 teaspoon salt. Pulse a few times to ensure the ingredients are evenly distributed.
-
Add the chilled fats. Add the 6 tablespoons unsalted butter, cut into 1/2-inch pieces, and 2 tablespoons vegetable shortening, also cut into 1/2-inch pieces, to the food processor.
-
Pulse until coarse meal forms. Using short, on/off pulses, process the mixture until it resembles a coarse meal with some pea-sized pieces of butter and shortening remaining. This step is crucial for creating a flaky crust. Avoid over-processing, as this will develop the gluten in the flour, leading to a tough crust.
-
Add the ice water. Drizzle 3 tablespoons of ice water over the flour mixture. It’s important that the water is very cold; this helps to keep the fat solid, which is essential for flakiness.
-
Process until clumps form. Process the mixture again, using short pulses, just until moist clumps start to form. If the dough appears too dry, add more ice water, one teaspoon at a time, until it just comes together. Be very careful not to add too much water, as this will also result in a tough crust.
-
Shape and chill the dough. Turn the dough out onto a lightly floured surface. Gently gather it into a ball. Flatten the ball into a disk, about 1 inch thick. Wrap the disk tightly in plastic wrap.
-
Chill the dough. Refrigerate the dough for at least 30 minutes, or up to 2 days. This chilling period allows the gluten to relax, making the dough easier to roll out and preventing it from shrinking during baking.
-
Roll out the dough. Once the dough is sufficiently chilled, remove it from the refrigerator and place it on a lightly floured work surface. Using a rolling pin, roll the dough out into a 12-inch round. Start from the center and roll outwards, rotating the dough a quarter turn after each roll to ensure even thickness. If the dough sticks to the surface, dust lightly with flour.
-
Transfer to the pie dish. Carefully transfer the rolled-out dough to a 9-inch-diameter glass pie dish. Gently press the dough into the bottom and sides of the dish, ensuring there are no air pockets.
-
Trim and crimp the edges. Trim any excess dough from the edges of the pie dish, leaving about a 1-inch overhang. Fold the overhang under and press it against the rim of the pie dish to create a thicker edge. Crimp the edges decoratively using your fingers, a fork, or a spoon.
-
Prepare for baking. At this point, you can either pre-bake the crust for a filled pie or proceed directly to filling it. For pre-baking, prick the bottom of the crust several times with a fork to prevent it from puffing up. You can also line the crust with parchment paper and fill it with pie weights or dried beans to help it maintain its shape.
-
Bake the crust. Bake in a preheated oven at 375°F (190°C) for 20-25 minutes, or until golden brown. If pre-baking, remove the pie weights and parchment paper during the last 5 minutes of baking to allow the bottom crust to brown evenly. If baking with a filling, adjust the baking time according to the filling recipe.
Expert Tips & Tricks
-
Keep everything cold: This is the golden rule for flaky pie crust. Use ice water, chill the butter and shortening thoroughly, and chill the dough before rolling.
-
Don’t over-process: Over-processing develops the gluten in the flour, resulting in a tough crust. Use short pulses and stop as soon as the dough comes together.
-
Handle the dough gently: Avoid overworking the dough, as this will also develop the gluten.
-
Blind baking secrets: For a perfectly crisp blind-baked crust, dock the dough thoroughly with a fork, and use a generous amount of pie weights. Consider using sugar as part of your pie weights for added flavor and browning.
-
Egg Wash: For a beautiful glossy finish, brush the crust with an egg wash (1 egg yolk mixed with 1 tablespoon of milk or cream) before baking.
-
Prevent soggy bottoms: To prevent a soggy bottom crust, brush the bottom of the pre-baked crust with melted chocolate or a thin layer of egg white before adding the filling.
Serving & Storage Suggestions
Serve your pie warm or at room temperature, depending on the filling. A slice of warm apple pie with a scoop of vanilla ice cream is always a classic choice. Store leftover pie in the refrigerator for up to 3 days. To reheat, warm individual slices in a preheated oven at 350°F (175°C) for 10-15 minutes, or until heated through. You can also freeze baked pie for up to 2 months. Wrap it tightly in plastic wrap and then in foil to prevent freezer burn. Thaw overnight in the refrigerator before serving.
Nutritional Information
| Nutrient | Amount per Serving | % Daily Value |
|---|---|---|
| Calories | 210 kcal | 10% |
| Total Fat | 13g | 20% |
| Saturated Fat | 8g | 40% |
| Cholesterol | 30mg | 10% |
| Sodium | 120mg | 5% |
| Total Carbohydrate | 20g | 7% |
| Dietary Fiber | 1g | 4% |
| Sugars | 2g | – |
| Protein | 2g | 4% |
Note: Nutritional information is an estimate and may vary based on specific ingredients and preparation methods.
Variations & Substitutions
- Vegan Pie Crust: Substitute the unsalted butter with vegan butter sticks and ensure the vegetable shortening is plant-based.
- Gluten-Free Pie Crust: Use a gluten-free all-purpose flour blend designed for baking. You may need to adjust the amount of water slightly.
- Whole Wheat Pie Crust: Substitute up to half of the all-purpose flour with whole wheat flour for a nuttier flavor and added fiber.
- Herb-Infused Crust: Add 1-2 tablespoons of chopped fresh herbs, such as rosemary or thyme, to the flour mixture for a savory pie crust.
- Lemon or Orange Zest: Add 1 teaspoon of lemon or orange zest to the flour mixture for a citrusy twist.
FAQs (Frequently Asked Questions)
Q: Why is my pie crust tough?
A: Overworking the dough develops the gluten, leading to a tough crust. Also, using too much water or not chilling the dough sufficiently can contribute to toughness.
Q: Can I make the pie dough ahead of time?
A: Absolutely! The pie dough can be made up to 2 days in advance. Wrap it tightly in plastic wrap and store it in the refrigerator.
Q: How can I prevent my pie crust from shrinking during baking?
A: Chilling the dough thoroughly before rolling and baking is crucial. Also, avoid stretching the dough when placing it in the pie dish.
Q: What can I use if I don’t have pie weights?
A: Dried beans or rice make excellent pie weights. Just line the crust with parchment paper first to protect it.
Q: Can I freeze unbaked pie crust?
A: Yes, you can freeze unbaked pie crust for up to 2 months. Wrap it tightly in plastic wrap and then in foil. Thaw overnight in the refrigerator before using.
Final Thoughts
Making pie crust from scratch might seem daunting, but with this food processor method, it’s easier than you think. The key is to keep everything cold, avoid over-processing, and handle the dough gently. Don’t be afraid to experiment with different fillings and flavors to create your own signature pie. And most importantly, have fun! Now, go bake a pie and share it with someone you love. Your family will thank you for it!