
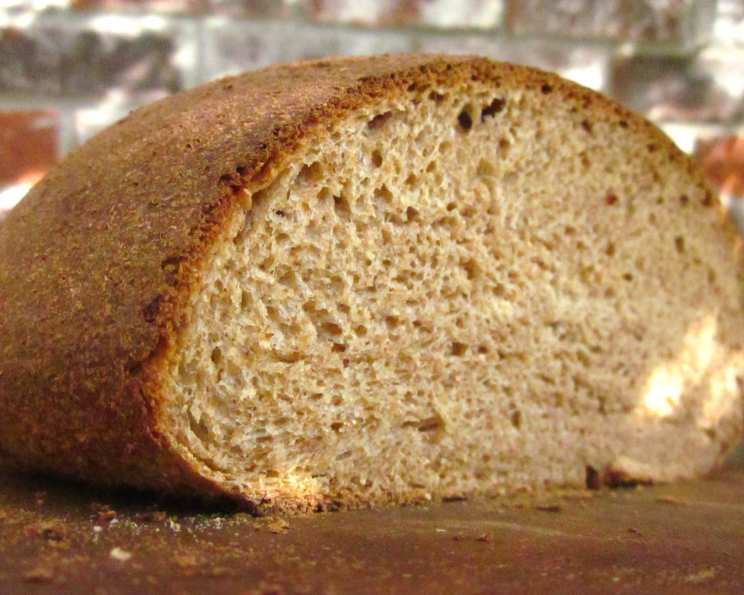
Sourdough Honey Whole Wheat Bread: A Taste of Home
I remember the first time I truly appreciated the magic of sourdough. It wasn’t in a trendy bakery, but in my grandmother’s cozy kitchen. The aroma of warm, yeasty dough mingled with the sweet scent of honey, creating an intoxicating fragrance that promised comfort and nourishment. She’d spend hours coaxing her starter to life, a bubbling testament to patience and care. The result was always a loaf of perfectly imperfect bread – crusty on the outside, soft and chewy within, with a subtle tang that hinted at its wild origins. This recipe, inspired by those cherished memories, brings that same comforting experience to your own kitchen.
Recipe Overview
- Prep Time: 20 minutes (plus rise time)
- Cook Time: 35-40 minutes
- Total Time: 3 hours (approximate, including rise times)
- Servings: Approximately 12 slices
- Yield: 1 loaf
- Dietary Type: Vegetarian
Ingredients
- 1 tablespoon active dry yeast
- 1 cup water, warm (105-115°F)
- 1 teaspoon salt
- 2/3 cup sourdough starter, active and bubbly
- 1/2 cup honey
- 1 1/2 tablespoons shortening
- 4 cups whole wheat flour, plus extra for kneading
Equipment Needed
- Large mixing bowl
- Measuring cups and spoons
- Greased bowl for rising
- Clean kitchen towel
- 9×5 inch bread pan
- Oven
Instructions
- Activate the Yeast: In a large mixing bowl, dissolve 1 tablespoon of active dry yeast in 1 cup of warm water. Ensure the water isn’t too hot, as this can kill the yeast. A temperature of 105-115°F is ideal. Let it stand for about 5-10 minutes, until the mixture becomes foamy. This indicates that the yeast is alive and active.
- Combine Wet Ingredients: Add 2/3 cup of sourdough starter, 1/2 cup of honey, 1 teaspoon of salt, and 1 1/2 tablespoons of shortening to the yeast mixture. Stir well to combine. The honey not only adds sweetness but also helps to feed the yeast and contributes to a beautiful crust.
- Add Flour and Knead: Gradually add 3 cups of the whole wheat flour to the wet ingredients, mixing until a shaggy dough forms. Add the remaining 1 cup of flour gradually, as needed, to create a stiff dough that is slightly sticky but manageable.
- Kneading: Turn the dough out onto a lightly floured surface. Knead the dough vigorously for about 150 strokes, or approximately 8-10 minutes, until it becomes smooth and elastic. This is a crucial step in developing the gluten, which gives the bread its structure. If the dough is too sticky, add a little more flour, one tablespoon at a time.
- First Rise: Place the kneaded dough in a greased bowl, turning to coat all sides. Cover the bowl with a clean kitchen towel or plastic wrap. Let the dough rise in a warm place for 1 to 1 1/2 hours, or until it has doubled in size. The time it takes to rise will depend on the temperature of your kitchen.
- Punch Down and Second Rise: Gently punch down the risen dough to release the air. Let it rise again for another hour, or until doubled. This second rise helps to develop the flavor and texture of the bread.
- Shape the Loaf: Punch down the dough again. On a lightly floured surface, gently roll the dough into a tight loaf. The tighter the loaf, the more even the crumb structure will be.
- Final Proof: Grease a 9×5 inch bread pan thoroughly. Place the shaped loaf into the prepared pan. Cover and let it rise in the pan until it has doubled in size, about 45 minutes to 1 hour. Ensure the loaf doesn’t rise above the top of the pan excessively, as it may collapse during baking.
- Bake: Preheat your oven to 400 degrees F (200 degrees C). Once the loaf has fully risen, bake it in the preheated oven for 35 to 40 minutes, or until it is very dark golden brown. To check for doneness, the internal temperature should reach 200-210°F. You can also tap the bottom of the loaf; it should sound hollow.
- Cool: Remove the baked bread from the pan and let it cool completely on a wire rack before slicing. This is important to prevent the bread from becoming gummy.
Expert Tips & Tricks
- Sourdough Starter Health: A healthy, active sourdough starter is key to a flavorful loaf. Feed your starter regularly and discard a portion before feeding to maintain its vigor.
- Kneading Technique: Proper kneading is crucial for developing gluten. Use a firm, even pressure and avoid tearing the dough.
- Oven Temperature: Ovens can vary in temperature. If your bread is browning too quickly, lower the oven temperature by 25 degrees F and cover the loaf with foil for the last 15 minutes of baking.
- Adding Seeds: For added texture and flavor, try adding sunflower seeds, flax seeds, or pumpkin seeds to the dough during the kneading process. About 1/4 to 1/2 cup is usually sufficient.
- Steam for Crust: To achieve an extra-crispy crust, place a baking sheet filled with hot water on the bottom rack of your oven during the first 15 minutes of baking. The steam will help to create a beautiful, shiny crust.
Serving & Storage Suggestions
This Sourdough Honey Whole Wheat Bread is delicious served warm with butter, jam, or honey. It also makes excellent toast and sandwiches.
- Storage: Store the cooled bread in an airtight container at room temperature for up to 3 days. For longer storage, wrap the bread tightly in plastic wrap and freeze it for up to 2 months.
- Reheating: To reheat frozen bread, thaw it at room temperature and then bake it in a preheated oven at 350°F for 5-10 minutes to refresh the crust.
Nutritional Information
| Nutrient | Amount per Serving | % Daily Value* |
|---|---|---|
| Calories | 196 kcal | 10% |
| Total Fat | 2.7g | 4% |
| Saturated Fat | 0.5g | 3% |
| Cholesterol | 0mg | 0% |
| Sodium | 196mg | 8% |
| Total Carbohydrate | 38.5g | 14% |
| Dietary Fiber | 4.8g | 19% |
| Sugars | 10.8g | |
| Protein | 5.8g | 12% |
| Vitamin D | 0 IU | 0% |
| Calcium | 21mg | 2% |
| Iron | 1mg | 6% |
| Potassium | 139mg | 3% |
*Percent Daily Values are based on a 2000 calorie diet. Your daily values may be higher or lower depending on your calorie needs.
Variations & Substitutions
- Spelt Flour: Substitute up to half of the whole wheat flour with spelt flour for a slightly nutty flavor.
- Maple Syrup: Replace the honey with maple syrup for a different sweetener profile.
- Olive Oil: Use olive oil instead of shortening for a more savory flavor.
- Seeds and Nuts: Add chopped walnuts, pecans, or pumpkin seeds for added texture and nutrition.
- Dried Fruit: Incorporate dried cranberries, raisins, or apricots for a touch of sweetness and chewiness.
FAQs (Frequently Asked Questions)
Q: Why is my sourdough starter not rising?
A: Several factors can affect starter activity, including temperature, flour type, and hydration. Ensure your starter is kept in a warm place (around 75-80°F), is fed regularly with good-quality flour, and has the correct water-to-flour ratio.
Q: My bread is dense and doesn’t rise properly. What could be the issue?
A: This is often due to under-kneading, using old or inactive yeast, or not allowing the dough to rise for long enough. Make sure your yeast is fresh, knead the dough thoroughly, and give it ample time to rise in a warm place.
Q: How can I tell if my bread is fully baked?
A: The best way is to use a food thermometer. The internal temperature should reach 200-210°F. You can also tap the bottom of the loaf; it should sound hollow.
Q: Can I make this recipe with all-purpose flour instead of whole wheat?
A: While you can, the texture and flavor will be different. You may need to adjust the amount of liquid, as all-purpose flour absorbs less water than whole wheat flour. The bread will also be less nutritious.
Q: What’s the best way to slice homemade bread?
A: Use a serrated bread knife and a gentle sawing motion to slice the bread without crushing it. Allow the bread to cool completely before slicing for best results.
Final Thoughts
Creating this Sourdough Honey Whole Wheat Bread is more than just following a recipe; it’s about connecting with a tradition of home baking and nourishing yourself and loved ones with wholesome, flavorful food. Don’t be intimidated by the process. Each loaf is a learning experience, and even “imperfect” loaves are often delicious. Embrace the journey, experiment with variations, and share your creations with friends and family. I encourage you to try this recipe and experience the satisfaction of baking your own delicious and healthy bread. Pair a warm slice with a comforting bowl of soup, a smear of creamy butter, or simply enjoy it on its own. Happy baking!