
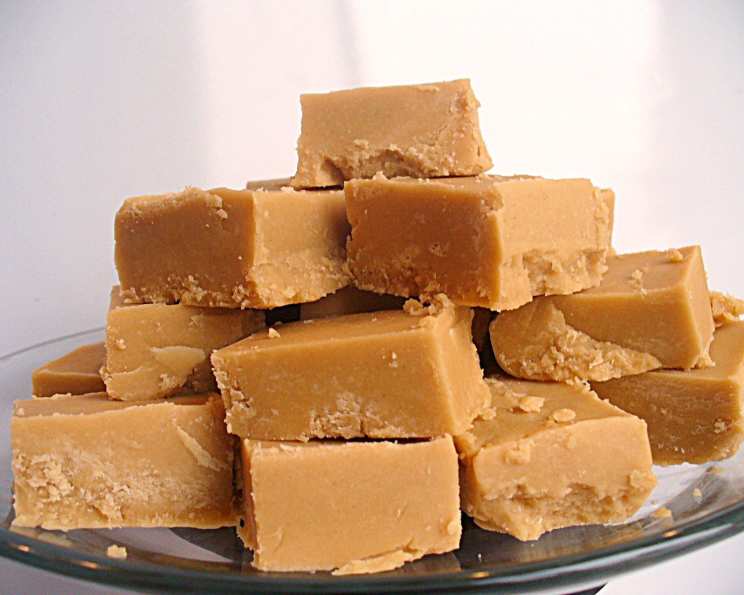
South African Nestle’s Fudge: A Sweet Slice of Nostalgia
My grandmother, a woman of unwavering culinary traditions, had a recipe box overflowing with treasures. Amongst the stained and tattered index cards, one always stood out: “Fudge – Nestle’s.” The card, written in her elegant cursive, promised a taste of pure South African comfort. This fudge, a regular feature at family gatherings, was more than just a sweet treat; it was a symbol of love, togetherness, and the simple joys of life. Its rich, melt-in-your-mouth texture and unforgettable flavor always brings me back to those cherished moments around her kitchen table.
Recipe Overview
- Prep Time: 10 minutes
- Cook Time: 30-40 minutes
- Total Time: 1 hour (plus cooling)
- Servings: Approximately 24 squares
- Yield: One 9×13 inch pan of fudge
- Dietary Type: Not Vegan, Not Gluten-Free, Not Dairy-Free
Ingredients
- 1 (397 g) can condensed milk
- 400 g (or 500 ml) sugar
- 25 ml golden syrup
- 75 ml water
- 60 g butter
- 5 ml vanilla extract
Equipment Needed
- Large, heavy-bottomed saucepan
- Wooden spoon or heat-resistant spatula
- Greased 9×13 inch baking pan
- Measuring cups and spoons
- Candy thermometer (optional, but recommended)
Instructions
- Begin by preparing your baking pan. Thoroughly grease a 9×13 inch baking pan with butter or cooking spray. This will prevent the fudge from sticking and make it easier to remove once cooled.
- In a large, heavy-bottomed saucepan, combine the sugar and water. The heavy bottom is crucial to prevent scorching.
- Place the saucepan over low heat. Stir constantly until the sugar has completely dissolved. It’s essential to ensure no sugar granules remain, as this can affect the final texture of the fudge.
- Add the butter and golden syrup to the saucepan. Continue to stir until the butter has fully melted and is incorporated into the sugar mixture.
- Increase the heat to medium. Gently pour in the condensed milk, stirring continuously to combine all ingredients.
- Bring the mixture to a boil, stirring constantly. Once boiling, reduce the heat to low and continue to boil very slowly, stirring constantly, until the mixture reaches the soft ball stage. This is critical for the fudge to set correctly.
- If using a candy thermometer, aim for 112-116°C (234-240°F).
- If you don’t have a candy thermometer, test for the soft ball stage by dropping a small amount of the fudge mixture into a glass of cold water. If it forms a soft, pliable ball that you can easily flatten between your fingers, it’s ready.
- Remove the saucepan from the heat. Immediately stir in the vanilla extract.
- Now comes the important part for a smooth fudge! Beat the mixture vigorously with a wooden spoon or spatula until it begins to thicken and lose its glossy sheen. This process can take a few minutes. Be patient and keep stirring. You’ll notice the mixture becoming more matte and slightly grainy. This is what you want. Beating incorporates air and helps prevent sugar crystals from forming large, undesirable clumps.
- Quickly pour the thickened fudge mixture into the prepared baking pan. Use a spatula to spread it evenly.
- Let the fudge cool completely at room temperature. This can take several hours. Resist the urge to put it in the fridge to speed up the process, as this can sometimes affect the texture.
- Once the fudge is completely cold and firm, cut it into squares using a sharp knife. For neat squares, you can wipe the knife clean between each cut.
Expert Tips & Tricks
- Use a heavy-bottomed saucepan: This prevents the fudge from scorching and ensures even heat distribution.
- Constant stirring is key: Don’t walk away from the stove! Stirring prevents sticking, burning, and sugar crystallization.
- Soft ball stage is crucial: Under- or overcooking will result in fudge that is either too soft or too hard. Use a candy thermometer for accuracy.
- Beat vigorously: The beating process is essential for the fudge’s texture. Don’t skimp on this step.
- Grease the pan well: This will prevent the fudge from sticking and make it easier to remove. Line the pan with parchment paper, leaving an overhang, for easy removal.
- If your fudge is grainy: This is usually caused by sugar crystals forming. Next time, ensure all sugar is dissolved before boiling, stir constantly, and don’t overcook.
- If your fudge is too soft: You likely didn’t cook it to the soft ball stage. You can try re-melting the fudge, cooking it to a higher temperature, and then re-cooling it, but results may vary.
Serving & Storage Suggestions
Serve the South African Nestle’s Fudge at room temperature. Arrange the cut squares on a platter or in a decorative box. This fudge is perfect as an after-dinner treat, a sweet addition to a dessert buffet, or a thoughtful homemade gift.
- Storage: Store the fudge in an airtight container at room temperature for up to a week. It can also be stored in the refrigerator for up to two weeks, but it may become slightly harder.
- Freezing: For longer storage, wrap the fudge tightly in plastic wrap and then place it in a freezer-safe container. It can be frozen for up to three months. Thaw overnight in the refrigerator before serving.
- Reheating: While reheating isn’t typically necessary, you can soften the fudge slightly by microwaving it for a few seconds.
Nutritional Information
(Estimated per serving, based on 24 servings)
| Nutrient | Amount per Serving | % Daily Value |
|---|---|---|
| Calories | 180 kcal | 9% |
| Total Fat | 5g | 8% |
| Saturated Fat | 3g | 15% |
| Cholesterol | 10mg | 3% |
| Sodium | 30mg | 1% |
| Total Carbohydrate | 32g | 11% |
| Dietary Fiber | 0g | 0% |
| Sugars | 30g | N/A |
| Protein | 2g | 4% |
Variations & Substitutions
- Nutty Fudge: Add chopped nuts (such as walnuts, pecans, or almonds) to the fudge mixture after removing it from the heat.
- Chocolate Fudge: Add 2-3 tablespoons of unsweetened cocoa powder to the sugar and water mixture.
- Peanut Butter Fudge: Swirl in a few tablespoons of peanut butter after removing the fudge from the heat.
- Espresso Fudge: Add a teaspoon of instant espresso powder to the sugar and water mixture for a coffee-flavored kick.
- Salted Caramel Fudge: Sprinkle coarse sea salt on top of the fudge after pouring it into the pan.
- Extract Variations: Substitute the vanilla extract with other extracts like almond, peppermint, or orange for different flavor profiles.
FAQs (Frequently Asked Questions)
Q: Why did my fudge turn out grainy?
A: Grainy fudge is usually caused by sugar crystals forming. Ensure all the sugar is dissolved before boiling, stir constantly during cooking, and avoid overcooking.
Q: How do I know when the fudge has reached the soft ball stage without a thermometer?
A: Drop a small spoonful of the fudge mixture into a glass of cold water. If it forms a soft, pliable ball that you can easily flatten between your fingers, it’s ready.
Q: Can I use a different type of sugar?
A: While granulated sugar is recommended, you can experiment with other sugars like caster sugar. However, the texture and flavor may be slightly different. Avoid using brown sugar, as it will significantly alter the flavor profile.
Q: Can I add chocolate chips to this recipe?
A: Yes, you can add chocolate chips. Stir them in after removing the fudge from the heat, along with the vanilla extract.
Q: How long does this fudge last?
A: Stored properly in an airtight container, this fudge will last for up to a week at room temperature, two weeks in the refrigerator, or three months in the freezer.
Final Thoughts
This South African Nestle’s Fudge recipe is more than just a collection of ingredients and instructions; it’s a gateway to cherished memories and a taste of home. I encourage you to try this recipe, share it with your loved ones, and create your own sweet moments. Whether you enjoy it with a cup of coffee, as a simple dessert, or as a thoughtful gift, this fudge is sure to bring a smile to your face. And, if you try any fun variations, let me know how they turn out!