
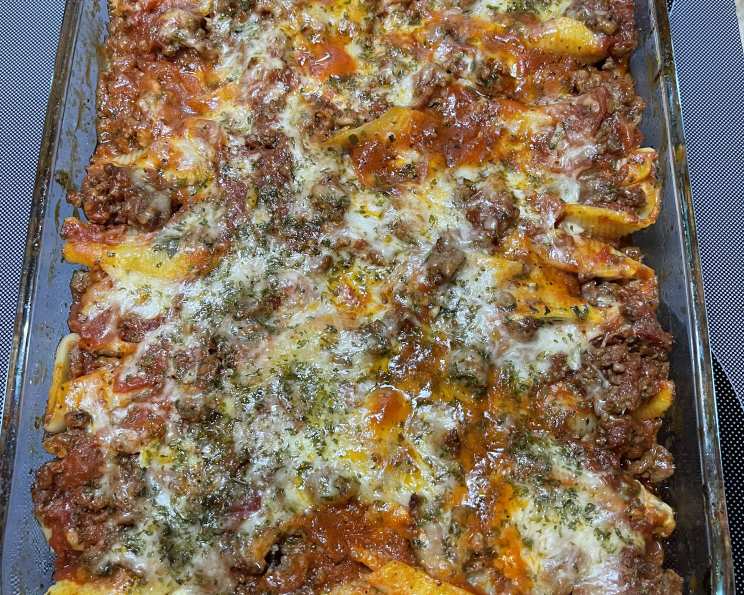
Comfort in a Shell: Mastering the Art of Stuffed Shells
There are certain dishes that immediately transport me back to childhood, and stuffed shells are undoubtedly one of them. I remember the warmth radiating from the oven as my grandmother pulled out a bubbling, cheesy masterpiece. The aroma of sweet tomato sauce mingling with creamy ricotta filled the air, promising a comforting and satisfying meal. It was more than just food; it was an experience, a feeling of being utterly and completely loved. Every bite was a reminder of family, togetherness, and the simple pleasures in life. Now, I strive to recreate that same magic in my own kitchen, hoping to share a little piece of that warm nostalgia with my loved ones.
Recipe Overview: Stuffed Shells
- Prep Time: 30 minutes
- Cook Time: 30 minutes
- Total Time: 1 hour
- Servings: 6
- Yield: Approximately 24 shells
- Dietary Type: Vegetarian
Ingredients
- 1 (12 ounce) package jumbo pasta shells
- 1 (15 ounce) container ricotta cheese
- 1 (12 ounce) package mozzarella cheese, shredded
- 1 (10 ounce) package spinach, thawed and drained
- 3 eggs
- 2 tablespoons butter
- 2 tablespoons parmesan cheese, grated
- 1⁄2 teaspoon salt
- 1⁄8 teaspoon pepper
- 1 (32 ounce) jar spaghetti sauce
Equipment Needed
- Large pot
- Colander
- Large bowl
- 9×13 inch baking dish
- Aluminum foil
Instructions
-
Begin by preheating your oven to 325 degrees Fahrenheit. This lower temperature allows the shells to bake gently, preventing the sauce from burning while ensuring the filling is heated through.
-
Cook the jumbo pasta shells according to the package directions, aiming for al dente. It’s crucial not to overcook the pasta, as this will make them too soft and prone to tearing when you attempt to fill them. Overcooked shells can also fall apart during baking. Drain the cooked shells in a colander and rinse them immediately with cold water. This stops the cooking process and prevents the shells from sticking together, making them easier to handle.
-
While the pasta is cooking, prepare the filling. In a large bowl, lightly beat the eggs. This helps to incorporate air and create a smoother, more cohesive filling. Add the ricotta cheese, shredded mozzarella cheese, thawed and drained spinach, butter, salt, and pepper to the bowl. The spinach needs to be thoroughly drained; otherwise, it will release excess moisture during baking and make the filling watery. You can squeeze it dry with your hands or use a clean kitchen towel.
-
Mix all the filling ingredients together until they are well blended. Ensure that the ricotta is evenly distributed and that there are no large clumps of spinach. A uniform mixture will result in a more consistent flavor and texture in each stuffed shell.
-
Once the pasta shells are cool enough to handle, begin filling them with the cheese mixture. Use a spoon or your fingers to carefully stuff each shell with a generous amount of filling. Don’t overstuff them, as the filling may expand slightly during baking.
-
Spread a thin layer of spaghetti sauce on the bottom of a 9×13 inch baking dish. This prevents the pasta shells from sticking to the dish and adds an extra layer of flavor.
-
Arrange the filled pasta shells on top of the sauce in the baking dish. Place them close together, but not so tightly that they become difficult to serve.
-
Pour the remaining spaghetti sauce over the stuffed shells, ensuring that they are evenly coated. This will keep the pasta moist and flavorful during baking.
-
Sprinkle the top with grated Parmesan cheese. This adds a salty, savory element and creates a golden-brown crust as it bakes.
-
Cover the baking dish with aluminum foil. This helps to trap moisture and prevent the sauce from splattering in the oven.
-
Bake in the preheated oven for 30 minutes. After 30 minutes, remove the foil and continue baking for another 5-10 minutes, or until the cheese is melted and bubbly, and the sauce is heated through. Removing the foil allows the cheese to brown and create a more appealing presentation.
Expert Tips & Tricks
- For easy cleanup, consider lining your baking dish with aluminum foil before adding the sauce and shells. This makes removing any baked-on sauce a breeze.
- To save time on busy weeknights, assemble the stuffed shells ahead of time. You can prepare the dish up to the point of baking, cover it tightly, and store it in the refrigerator for up to 24 hours. When you’re ready to bake, simply remove it from the refrigerator and bake as directed, adding a few extra minutes to the baking time if needed.
- Don’t be afraid to experiment with different fillings. Consider adding cooked ground beef, sausage, or vegetables such as mushrooms, onions, or bell peppers to the cheese mixture.
- If you prefer a richer, creamier sauce, stir in a dollop of heavy cream or sour cream to the spaghetti sauce before pouring it over the shells.
Serving & Storage Suggestions
Serve the stuffed shells hot, directly from the baking dish. Garnish with fresh basil or parsley for a pop of color and flavor. Stuffed shells pair well with a simple green salad, garlic bread, or steamed vegetables.
Leftover stuffed shells can be stored in an airtight container in the refrigerator for up to 3-4 days. To reheat, simply microwave individual portions until heated through, or bake the entire dish in a preheated oven at 350 degrees Fahrenheit until warmed through.
For longer storage, stuffed shells can be frozen. Place the cooled shells in a freezer-safe container or bag, ensuring that they are well-sealed to prevent freezer burn. Frozen stuffed shells can be stored for up to 2-3 months. To reheat, thaw the shells in the refrigerator overnight and bake as directed, adding a few extra minutes to the baking time if needed.
Nutritional Information
| Nutrient | Amount per Serving | % Daily Value |
|---|---|---|
| Calories | 669.4 kcal | N/A |
| Calories from Fat | 289 g | 43% |
| Total Fat | 32.2 g | 49% |
| Saturated Fat | 17.9 g | 89% |
| Cholesterol | 188.8 mg | 62% |
| Sodium | 1083.4 mg | 45% |
| Total Carbohydrate | 59.3 g | 19% |
| Dietary Fiber | 5 g | 20% |
| Sugars | 9.9 g | N/A |
| Protein | 35 g | 69% |
Variations & Substitutions
- Meat Lovers: Add cooked and crumbled Italian sausage or ground beef to the ricotta mixture for a heartier dish.
- Vegetarian Delight: Incorporate roasted vegetables like zucchini, eggplant, and bell peppers into the filling.
- Spicy Kick: Add a pinch of red pepper flakes to the ricotta mixture or use a spicy marinara sauce.
- Cheesy Goodness: Use a blend of different cheeses in the filling, such as provolone, asiago, or fontina.
- Gluten-Free: While the traditional shells are not gluten-free, gluten-free jumbo shells can be found in most well-stocked grocery stores. Make sure to check the label on your marinara sauce as well.
FAQs (Frequently Asked Questions)
Q: Can I use frozen spinach instead of fresh?
A: Yes, you can use frozen spinach. Just be sure to thaw it completely and squeeze out as much excess water as possible before adding it to the ricotta mixture.
Q: Can I make this dish ahead of time?
A: Absolutely! Stuffed shells are a great make-ahead meal. Assemble the dish up to the point of baking, cover it tightly, and store it in the refrigerator for up to 24 hours.
Q: What if I don’t have ricotta cheese?
A: You can substitute cottage cheese for ricotta cheese in this recipe. Just be sure to drain it well before adding it to the filling.
Q: How do I prevent the shells from sticking together after cooking?
A: Rinse the cooked shells with cold water immediately after draining them. This will stop the cooking process and prevent them from sticking together.
Q: Can I freeze the stuffed shells after they are baked?
A: Yes, you can freeze baked stuffed shells. Allow them to cool completely, then wrap them individually or in small portions in freezer-safe wrap.
Final Thoughts
Stuffed shells are more than just a meal; they’re an experience. The comforting combination of pasta, cheese, and sauce is sure to please even the pickiest eaters. Whether you’re preparing them for a weeknight dinner or a special occasion, this recipe is a guaranteed crowd-pleaser. I encourage you to try this recipe and make it your own by experimenting with different fillings and sauces. Don’t be afraid to get creative and have fun in the kitchen! And most importantly, share your delicious creation with the people you love. Bon appétit!