
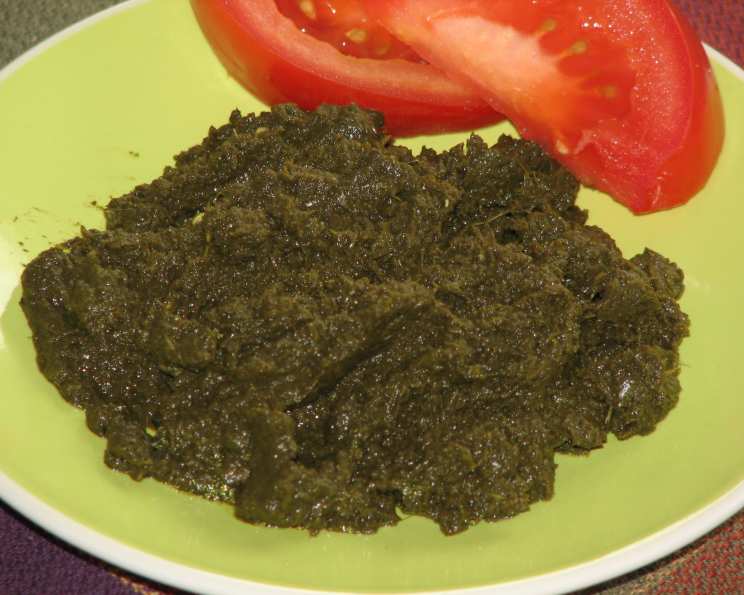
Tangy Coriander (Cilantro) Mint Chutney: A Symphony of Fresh Flavors
I remember the first time I tasted this chutney. It wasn’t in a fancy restaurant, but at a bustling family gathering in my aunt’s sun-drenched kitchen. The aroma of freshly ground spices filled the air, mingling with the laughter and chatter of relatives. This vibrant green chutney, served alongside crispy samosas, was an explosion of freshness that instantly awakened my taste buds. It was a simple condiment, but it spoke volumes about the love and care that went into every dish in that kitchen. Ever since then, this chutney has been a constant in my culinary journey, a reminder of those cherished family moments.
Recipe Overview
- Prep Time: 15 minutes
- Cook Time: 10 minutes
- Total Time: 25 minutes
- Servings: 6
- Yield: About 1 cup
- Dietary Type: Vegan, Gluten-Free, Dairy-Free
Ingredients
- 2 bunches cilantro (coriander leaves)
- 1 bunch of fresh mint, small
- 3 small green chilies, small variety
- ¼ teaspoon tamarind paste
- 1 pinch asafoetida powder (or paste)
- ⅛ teaspoon salt
- 1 teaspoon oil
Equipment Needed
- Blender or food processor
- Non-stick skillet
- Measuring spoons
- Airtight container
Instructions
- Begin by preparing the fresh herbs. Pick the cilantro and mint leaves from their stems. This step ensures a smoother chutney.
- Thoroughly wash the cilantro and mint leaves to remove any dirt or grit. Give them a rough chop. This makes it easier for the blender to process.
- Next, dissolve the tamarind paste in a tablespoon of water. This will help it blend evenly into the chutney and provide a consistent tangy flavor.
- If using asafoetida paste (which I highly recommend for its richer flavor), dissolve it in a tablespoon of water as well. If you’re using asafoetida powder, skip this step and add it directly to the blender.
- Now, it’s time to combine all the ingredients. Place the cilantro, mint, green chilies, dissolved tamarind paste, dissolved asafoetida (or powder), and salt into the blender or food processor.
- Grind the ingredients into a fine puree. If the mixture is too thick, add small amounts of water, a teaspoon at a time, until you achieve a smooth, paste-like consistency. Be careful not to add too much water, as it will dilute the flavor.
- Taste the puree and adjust the salt to your liking. Remember that the amount of salt is subjective and depends on your personal preference. I always recommend starting with a small amount and adding more as needed.
- Heat a non-stick skillet over medium heat. This will help to evaporate the moisture in the chutney and intensify the flavors.
- Add the oil to the heated skillet. Once the oil is warm, add the herb puree to the skillet.
- Stir the puree continuously until the water evaporates and the mixture darkens in color. This process usually takes about 5-7 minutes. Be careful not to burn the chutney.
- Once the chutney has thickened and darkened, remove it from the heat and allow it to cool completely.
- Transfer the cooled chutney to an airtight container. Store it in the refrigerator. This will help preserve its freshness and flavor.
Expert Tips & Tricks
- Adjusting the Spice Level: If you prefer a milder chutney, remove the seeds from the green chilies before blending. For a spicier chutney, add an extra chili or two.
- Enhancing the Flavor: Roasting the green chilies slightly before adding them to the blender can enhance their flavor and add a subtle smoky note to the chutney.
- Preventing Discoloration: To prevent the chutney from discoloring, add a squeeze of lemon juice while blending. The acidity in the lemon juice will help preserve the vibrant green color.
- Texture Perfection: For a smoother chutney, strain the puree through a fine-mesh sieve after blending. This will remove any remaining fibers and create a silky-smooth texture.
- A Note on Asafoetida: Asafoetida has a strong, pungent aroma in its raw form, but it mellows out beautifully when cooked. Don’t be intimidated by its initial smell; it adds a unique and savory depth to the chutney.
Serving & Storage Suggestions
This tangy Coriander Mint Chutney is incredibly versatile and can be served with a wide variety of dishes. It’s a classic accompaniment to samosas, pakoras, and other savory snacks. It can also be used as a flavorful spread on bread for sandwiches. Try topping it with sliced cucumbers for a refreshing and light sandwich. In addition, it can be served as a dipping sauce for grilled meats or vegetables, or as a condiment for rice and curry dishes.
To store the chutney, transfer it to an airtight container and refrigerate it. It will last for up to a week in the refrigerator. For longer storage, you can freeze the chutney in ice cube trays. Once frozen, transfer the cubes to a freezer bag and store them for up to 2 months. Thaw the chutney in the refrigerator before using. Avoid leaving the chutney at room temperature for more than 2 hours.
Nutritional Information
| Nutrient | Amount per Serving | % Daily Value |
|---|---|---|
| Calories | 18.2 kcal | N/A |
| Calories from Fat | 7 g | 42% |
| Total Fat | 0.8 g | 1% |
| Saturated Fat | 0.1 g | 0% |
| Cholesterol | 0 mg | 0% |
| Sodium | 54.6 mg | 2% |
| Total Carbohydrate | 2.6 g | 0% |
| Dietary Fiber | 0.6 g | 2% |
| Sugars | 1.3 g | 5% |
| Protein | 0.7 g | 1% |
Variations & Substitutions
- Spicier Chutney: Use hotter varieties of green chilies, such as serrano peppers or bird’s eye chilies.
- Sweeter Chutney: Add a small amount of jaggery or brown sugar dissolved in water while grinding. This will balance out the tanginess and spiciness of the chutney.
- Tangier Chutney: Increase the amount of tamarind paste or add a squeeze of lime juice for an extra burst of tanginess.
- Nutty Chutney: Add a handful of roasted peanuts or cashews to the blender for a richer, nuttier flavor.
- Yogurt Chutney: Blend in a few tablespoons of plain yogurt for a creamier and milder chutney.
- Coconut Chutney: Add shredded coconut to the mixture for a slightly sweet and textured twist.
FAQs (Frequently Asked Questions)
Q: Can I use dried mint instead of fresh mint?
A: While fresh mint is highly recommended for its vibrant flavor, you can use dried mint in a pinch. Use about 1 tablespoon of dried mint for every 1 bunch of fresh mint.
Q: How can I prevent the chutney from turning brown?
A: Adding a squeeze of lemon or lime juice helps prevent oxidation and keeps the chutney vibrant green. Storing it in an airtight container in the refrigerator also helps.
Q: Can I make this chutney ahead of time?
A: Yes, this chutney can be made ahead of time and stored in the refrigerator for up to a week. The flavors will actually meld together and deepen over time.
Q: Can I freeze this chutney?
A: Absolutely! Freezing is a great way to preserve the chutney for longer. Divide it into ice cube trays for easy portioning and store the frozen cubes in a freezer bag.
Q: What can I serve this chutney with?
A: This chutney is incredibly versatile! Serve it with samosas, pakoras, grilled meats, vegetables, or as a spread for sandwiches. It also adds a delicious kick to rice and curry dishes.
Final Thoughts
This tangy Coriander Mint Chutney is more than just a condiment; it’s a flavor explosion that will elevate your meals and transport you to a vibrant culinary world. I encourage you to try this recipe and experience the symphony of fresh flavors for yourself. Feel free to experiment with variations and substitutions to create your own signature chutney. And most importantly, share your feedback and creations with others! Pair it with your favorite Indian snacks, grilled dishes, or even a simple sandwich – you won’t be disappointed. Enjoy!