
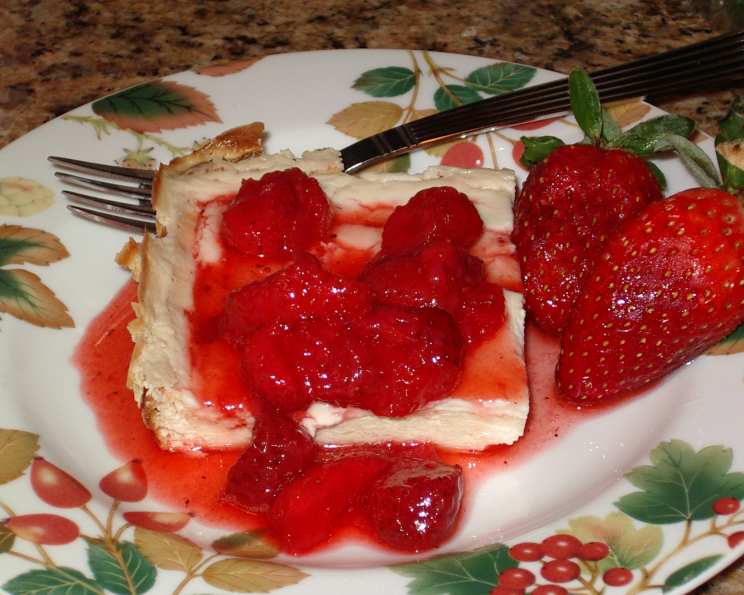
The South Beach Diet Cheesecake: Guilt-Free Indulgence
I remember the first time I tried a “diet” cheesecake. I was skeptical, envisioning a bland, rubbery imitation of the real thing. Instead, a friend who was following the South Beach Diet brought one to a potluck, and I was pleasantly surprised. The texture was surprisingly creamy, the sweetness satisfying, and the fact that it wouldn’t derail my own healthy eating habits was a huge bonus. It proved that you can have your (cheese)cake and eat it too, without the guilt!
Recipe Overview
- Prep Time: 20 minutes (includes cool-down time)
- Cook Time: 45 minutes
- Total Time: 1 hour, 5 minutes (plus chilling time)
- Servings: 6
- Yield: 1 cheesecake
- Dietary Type: Low-Carb, Reduced-Fat, South Beach Diet Phase 2
Ingredients
For the Cheesecake:
- 2 (8 ounce) packages low-fat cream cheese, softened
- 3 eggs
- 1 cup Splenda sugar substitute
- 1 teaspoon vanilla extract
For the Topping:
- 1 pint low-fat sour cream
- 1/4 cup Splenda sugar substitute
- 1 teaspoon vanilla extract
Equipment Needed
- 9-inch square baking pan
- Electric mixer (handheld or stand mixer)
- Measuring cups and spoons
- Mixing bowls
- Rubber spatula
Instructions
-
Preheat your oven to 350 degrees Fahrenheit (175 degrees Celsius). Lightly grease a 9-inch square baking pan. This will prevent the cheesecake from sticking and make it easier to remove after baking.
-
In a large mixing bowl, combine the softened low-fat cream cheese, eggs, Splenda sugar substitute, and vanilla extract.
-
Using an electric mixer, beat the ingredients together until the mixture is completely smooth and creamy. Ensure there are no lumps of cream cheese remaining. This step is crucial for a silky-smooth final texture.
-
Pour the cheesecake batter into the prepared 9-inch square baking pan, spreading it evenly with a rubber spatula.
-
Bake in the preheated oven for 35 minutes. The cheesecake should be set around the edges but still slightly jiggly in the center.
-
Remove the cheesecake from the oven and let it cool for 15 minutes on a wire rack. It’s important to leave the oven on during this cooling period as it will be used again for the topping. This cool-down allows the cheesecake to settle slightly before adding the sour cream topping.
-
While the cheesecake is cooling, prepare the topping. In a separate mixing bowl, combine the low-fat sour cream, Splenda sugar substitute, and vanilla extract. Mix well until the ingredients are fully incorporated and the mixture is smooth.
-
After the 15-minute cooling period, carefully pour the sour cream topping over the partially baked cheesecake, spreading it evenly to cover the entire surface.
-
Return the cheesecake to the oven and bake for an additional 10 minutes. The topping should be set and slightly golden.
-
Remove the cheesecake from the oven and let it cool completely at room temperature. Once cooled, cover the pan with plastic wrap and chill in the refrigerator for at least 4 hours, or preferably overnight, before serving. This allows the cheesecake to fully set and develop its flavor.
Expert Tips & Tricks
- Softened Cream Cheese is Key: Make sure your cream cheese is thoroughly softened before mixing. This will help prevent lumps and ensure a smooth, creamy texture. Leave it at room temperature for at least an hour, or microwave it in short bursts (15-20 seconds) until softened but not melted.
- Don’t Overbake: Overbaking can result in a dry, cracked cheesecake. The cheesecake is done when the edges are set but the center still jiggles slightly. It will continue to set as it cools.
- Water Bath (Optional): For an even creamier texture and to prevent cracking, you can bake the cheesecake in a water bath. Wrap the bottom of the pan in aluminum foil, place it in a larger pan, and add hot water to the larger pan until it reaches halfway up the sides of the cheesecake pan.
- Smooth Topping: To avoid a lumpy topping, ensure the Splenda is fully dissolved in the sour cream mixture. You can also use a powdered sugar substitute for an even smoother result.
- Patience is a Virtue: Don’t be tempted to cut into the cheesecake before it has been properly chilled. Chilling allows the flavors to meld and the texture to firm up.
Serving & Storage Suggestions
To serve, cut the chilled cheesecake into squares. It can be enjoyed plain, or you can add a few fresh berries for a touch of color and added flavor. A dollop of sugar-free whipped cream would also be a delicious addition.
Store any leftover cheesecake in an airtight container in the refrigerator. It will keep well for up to 3-4 days. While freezing is not recommended due to potential texture changes, individual slices can be frozen for up to a month. Thaw in the refrigerator overnight before serving. It is best served cold.
Nutritional Information
| Nutrient | Amount per Serving | % Daily Value (approximate) |
|---|---|---|
| Calories | 215 kcal | 11% |
| Total Fat | 14g | 22% |
| Saturated Fat | 9g | 45% |
| Cholesterol | 125mg | 42% |
| Sodium | 250mg | 10% |
| Total Carbohydrate | 5g | 2% |
| Dietary Fiber | 0g | 0% |
| Sugars | 1g | N/A |
| Protein | 13g | 26% |
Note: Nutritional information is an estimate and may vary based on specific ingredients and portion sizes.
Variations & Substitutions
- Crustless Delight: This recipe is already crustless, making it a great option for those looking to further reduce carbs.
- Flavor Boost: Add a few drops of lemon extract or orange extract to the cheesecake batter for a citrusy twist.
- Berry Swirl: Swirl in a sugar-free berry puree into the batter before baking for a marbled effect and added flavor.
- Chocolate Indulgence: Add a tablespoon of unsweetened cocoa powder to the batter for a chocolate cheesecake. You can also drizzle melted sugar-free chocolate over the finished cheesecake.
- Spice it up: Add a pinch of cinnamon or nutmeg to the batter for a warmer, more comforting flavor.
FAQs (Frequently Asked Questions)
Q: Can I use a different sugar substitute?
A: Yes, you can substitute another granulated sugar substitute for Splenda, but be sure to adjust the amount according to the substitute’s instructions, as sweetness levels may vary.
Q: Why did my cheesecake crack?
A: Cracking is often caused by overbaking or sudden temperature changes. Avoid overbaking and allow the cheesecake to cool gradually in the oven with the door slightly ajar.
Q: Can I make this in a different size pan?
A: While the recipe is designed for a 9-inch square pan, you can use an 8-inch round pan. Baking time may need to be adjusted slightly.
Q: How do I know when the cheesecake is done?
A: The cheesecake is done when the edges are set and the center still jiggles slightly when you gently shake the pan. It will continue to set as it cools.
Q: Can I add fruit to the topping?
A: Yes, you can top the cheesecake with fresh berries, such as strawberries, raspberries, or blueberries, after it has chilled.
Final Thoughts
So, there you have it – a delicious and guilt-free cheesecake that’s perfect for anyone following the South Beach Diet or simply looking for a healthier dessert option. Don’t be afraid to experiment with different flavors and toppings to create your own signature version. I encourage you to give this recipe a try and share your creations and feedback with me. Serve it with a sugar-free coffee or tea for the perfect after-dinner treat!