
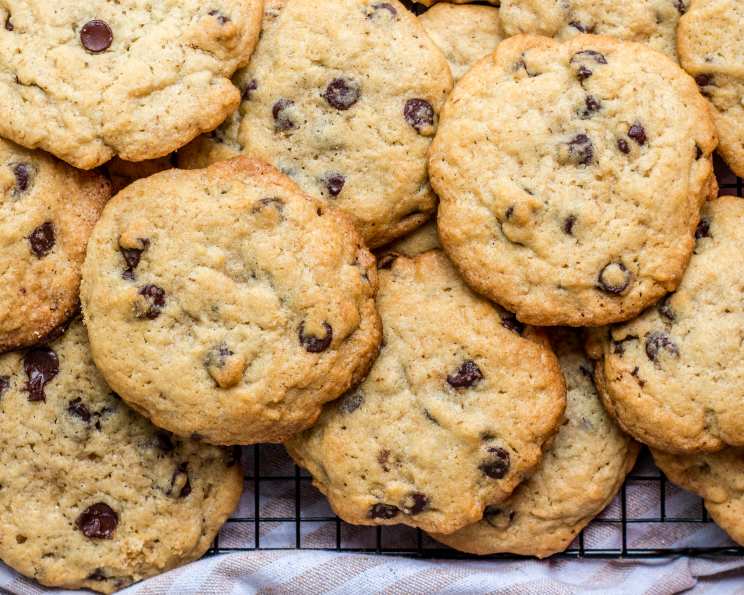
The Ultimate Thick, Soft, and Chewy Chocolate Chip Cookies
The aroma alone is enough to transport me back to childhood. I can almost feel the warmth of my grandmother’s kitchen, the sunlight streaming through the window as she pulled a tray of golden-brown cookies from the oven. The memory of those first, warm, melty bites of chocolate chip goodness is forever etched in my mind, a taste of pure, unadulterated comfort that I’ve been chasing ever since. After years of searching, tweaking, and baking, I’ve finally landed on a recipe that comes incredibly close to replicating that nostalgic perfection. This recipe makes cookies that aren’t just good; they’re an experience.
Recipe Overview
- Prep Time: 15 minutes
- Cook Time: 10 minutes
- Total Time: 25 minutes
- Servings: 36
- Yield: 3 dozen cookies
- Dietary Type: Not specified
Ingredients
- 2 ½ cups all-purpose flour
- 1 teaspoon baking soda
- ½ teaspoon salt
- ½ cup real butter, at room temperature
- ½ cup shortening
- 1 ½ cups firmly packed brown sugar
- 2 teaspoons vanilla
- 2 large eggs
- 1 (12 ounce) package semi-sweet chocolate chips
- 1 cup chopped nuts (optional)
Equipment Needed
- Mixing bowls
- Electric mixer
- Measuring cups and spoons
- Baking sheets
- Spatula
- Cooling rack
Instructions
- In a small bowl, whisk together the flour, baking soda, and salt. This ensures the leavening and salt are evenly distributed throughout the dough, leading to a consistent texture.
- In a separate, larger bowl, beat the butter and shortening together with an electric mixer until light and creamy. The combination of butter and shortening creates a balance of flavor and texture, giving you that perfect chewiness.
- Add the firmly packed brown sugar and vanilla to the creamed butter mixture. Beat with the mixer on medium speed until well blended and the mixture is light and fluffy. The brown sugar adds moisture and a caramel-like flavor, while the vanilla enhances the overall sweetness.
- Beat in the eggs, one at a time, mixing well after each addition. Incorporating the eggs gradually allows them to emulsify properly with the fats, creating a stable dough.
- Gradually add the flour mixture to the wet ingredients, beating slowly at first to incorporate, then increasing the speed to blend well. Be careful not to overmix the dough, as this can develop the gluten in the flour and result in tough cookies.
- Stir in the chocolate chips and nuts (if using) until evenly distributed throughout the dough.
- Drop the batter in 2-tablespoon portions about 2 inches apart on ungreased baking sheets. Using a consistent size ensures even baking.
- Bake in a 375°F (190°C) preheated oven until the edges of the cookies are golden brown but an area about 1 inch wide in the center is still pale, approximately 10 minutes. Don’t overbake them! This is crucial for achieving that soft and chewy center.
- If using two pans in one oven, switch their positions halfway through the baking time to ensure even browning.
- Let the cookies cool on the baking sheets for about 5 minutes before transferring them to a wire rack to cool completely. This allows them to firm up slightly and prevents them from breaking.
- Serve warm or cooled.
Expert Tips & Tricks
- Butter Temperature Matters: Ensure the butter is at room temperature, but not too soft. If it’s greasy, the cookies may spread too thin. If that happens, refrigerate the dough for about an hour to help them hold their shape during baking.
- Don’t Overmix: Overmixing develops gluten, leading to tough cookies. Mix until just combined.
- Ingredient Quality: Using high-quality butter, like Land O’ Lakes, can make a noticeable difference in the flavor and texture of the cookies.
- Oven Circulation: Ensure good air circulation in your oven. Smaller cookie sheets might be necessary if you have a smaller oven to avoid flat cookies.
- Warm Dough Prevention: If it’s a warm day, use the mixer on the dough in between batches going into the oven to prevent the dough from separating.
Serving & Storage Suggestions
These cookies are best served warm, with a glass of cold milk or a scoop of vanilla ice cream. To store, place cooled cookies in an airtight container at room temperature for up to 3 days. For longer storage, freeze the cookies in a single layer on a baking sheet, then transfer them to a freezer bag. Frozen cookies can be reheated in a warm oven or enjoyed straight from the freezer.
Nutritional Information
| Nutrient | Amount per Serving | % Daily Value |
|---|---|---|
| Calories | 164.3 kcal | N/A |
| Calories from Fat | N/A | 47% |
| Total Fat | 8.6 g | 13% |
| Saturated Fat | 4.1 g | 20% |
| Cholesterol | 17.1 mg | 5% |
| Sodium | 97.5 mg | 4% |
| Total Carbohydrate | 21.7 g | 7% |
| Dietary Fiber | 0.8 g | 3% |
| Sugars | 14.1 g | 56% |
| Protein | 1.7 g | 3% |
Note: Nutritional information is an estimate and may vary based on specific ingredients and portion sizes.
Variations & Substitutions
- Nut-Free: Omit the nuts entirely for a nut-free version.
- Different Chocolate: Experiment with different types of chocolate chips, such as dark chocolate, milk chocolate, or white chocolate.
- Spice It Up: Add a pinch of cinnamon or nutmeg to the flour mixture for a warm, spiced flavor.
- Citrus Zest: Incorporate the zest of an orange or lemon for a bright, citrusy twist.
- Oatmeal Chocolate Chip: Substitute 1 cup of the all-purpose flour with 1 cup of rolled oats for a heartier cookie.
FAQs (Frequently Asked Questions)
Q: Why are my cookies flat?
A: The butter might have been too soft, or the oven temperature could be inaccurate. Also, ensure good air circulation in your oven.
Q: Can I use all butter instead of shortening?
A: Yes, but the cookies might not be as chewy. Using all butter will result in a more crisp outer layer.
Q: How do I prevent the chocolate chips from melting too much?
A: Use high-quality chocolate chips and don’t overbake the cookies. Cooling them on the baking sheet helps them set.
Q: Can I make the dough ahead of time?
A: Absolutely! The dough can be stored in the refrigerator for up to 2 days. Let it soften slightly before baking.
Q: My cookies are too dry. What did I do wrong?
A: You may have overmeasured the flour or overbaked the cookies. Make sure to measure the flour accurately and watch the cookies carefully during baking.
Final Thoughts
I hope this recipe brings as much joy to your kitchen as it has to mine. There’s something undeniably special about a warm, homemade chocolate chip cookie, and I encourage you to experiment with variations and make this recipe your own. Don’t be afraid to share your creations and feedback – baking is a journey, and I’m thrilled to be a part of yours! Consider pairing these cookies with a rich cup of coffee or a scoop of your favorite ice cream for the ultimate treat. Happy baking!