
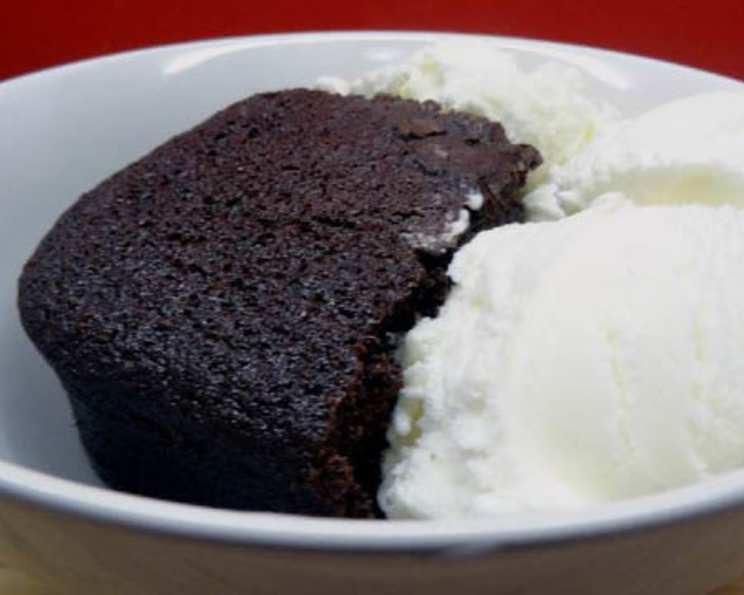
Decadent Cocoa-Buttermilk Cake: A Chocolate Lover’s Dream
The aroma of chocolate has always held a special place in my heart, instantly transporting me back to my grandmother’s kitchen. I remember watching her, perched on a stool, as she carefully layered a chocolate cake, the bittersweet scent filling the air with warmth and love. Each slice was a memory, a perfect blend of rich cocoa and tender crumb, shared laughter, and stories that stretched late into the night. This Cocoa-Buttermilk Cake, with its intensely chocolatey flavor and incredibly moist texture, reminds me so much of those cherished moments. It’s a comforting, deeply satisfying dessert that deserves a place on every baker’s repertoire.
Recipe Overview
- Prep Time: 20 minutes
- Cook Time: 30-35 minutes
- Total Time: 2 hours 50 minutes (includes cooling and refrigeration)
- Servings: 12
- Yield: 1 9×13 inch cake
- Dietary Type: Not specified
Ingredients
For the Cake:
- 1 1/2 cups unsalted butter
- 1 1/2 cups water
- 1/2 cup unsweetened cocoa
- 3 cups sugar
- 3 cups flour
- 1 tablespoon salt
- 1 tablespoon baking soda
- 3 large eggs
- 3/4 cup buttermilk
- 1 tablespoon vanilla
For the Icing:
- 3/4 cup unsalted butter
- 4 1/2 ounces buttermilk
- 7 1/2 tablespoons cocoa
- 1 1/2 cups powdered sugar, sifted
Equipment Needed
- 9×13 inch cake pan
- Parchment paper
- Whisk
- Sifter
- Mixing bowls
- Food processor
- Platter
- Offset spatula
- Serrated knife
Instructions
- Preheat your oven to 350 degrees F (175 degrees C).
- Prepare your cake pan. Butter a 9×13 inch cake pan and then line the bottom with parchment paper. This will ensure the cake releases easily after baking.
- In a saucepan, melt 1 1/2 cups of butter over medium heat.
- Stir in 1 1/2 cups of water and 1/2 cup of cocoa.
- Whisk the mixture until it is smooth and well combined. Set aside to cool slightly.
- In a large mixing bowl, sift together 3 cups of flour, 3 cups of sugar, 1 tablespoon of salt, and 1 tablespoon of baking soda. Sifting ensures there are no lumps and creates a lighter cake texture.
- In a separate bowl, whisk together 3 large eggs, 3/4 cup of buttermilk, and 1 tablespoon of vanilla extract.
- Add the cocoa mixture and the buttermilk mixture to the dry ingredients.
- Combine all ingredients very well, mixing until just incorporated. Be careful not to overmix, as this can lead to a tough cake. A few streaks of flour are okay.
- Pour the batter into the prepared cake pan and spread evenly.
- Bake in the preheated oven until a wooden skewer inserted into the center comes out clean. This should take approximately 30-35 minutes. Start checking for doneness around the 30-minute mark.
- Let the cake cool in the pan for 20 minutes while you prepare the icing.
- For the Icing: In a saucepan, melt 3/4 cup of butter over medium heat.
- Add 4 1/2 ounces of buttermilk and 7 1/2 tablespoons of cocoa.
- Whisk the mixture until it is smooth and well combined.
- Place 1 1/2 cups of powdered sugar into a food processor.
- With the motor running, slowly pour the cocoa mixture through the feed tube.
- Process until the icing is smooth and creamy. Be careful not to over-process.
- Once the cake has cooled slightly, place a platter over the cake pan. Flip the cake over so that it comes out onto the platter.
- Remove the parchment paper from the bottom of the cake.
- Pour the prepared icing over the top of the cake and spread it evenly over the cake to the edges using an offset spatula. Don’t worry if some icing drips over the sides; it adds to the rustic charm.
- Refrigerate the cake for at least 2 hours to allow the icing to set.
- Remove the cake from the refrigerator. Using a serrated knife, trim all four sides of the cake by about 1/4 inch. This will create clean edges and a more professional appearance.
- Cut the cake into pieces to serve.
Expert Tips & Tricks
- For an even more intense chocolate flavor, use Dutch-processed cocoa powder. Its deeper, less acidic flavor will enhance the richness of the cake.
- Don’t have buttermilk on hand? You can make a quick substitute by adding 1 tablespoon of white vinegar or lemon juice to a liquid measuring cup, then filling it with milk to equal 1 cup. Let it stand for 5 minutes before using.
- To ensure the cake releases perfectly, grease the cake pan with shortening or cooking spray before buttering and lining with parchment paper.
- If you find that the edges of the cake are browning too quickly during baking, you can tent the cake with aluminum foil.
- For a more decorative look, sprinkle the iced cake with chocolate shavings, cocoa powder, or chopped nuts.
- The food processor helps to create a smooth icing quickly, but if you don’t have one, you can whisk the powdered sugar into the melted butter mixture by hand. Just make sure to sift the powdered sugar thoroughly to avoid lumps.
Serving & Storage Suggestions
Serve the Cocoa-Buttermilk Cake chilled or at room temperature. It pairs wonderfully with a scoop of vanilla ice cream, a dollop of whipped cream, or a sprinkle of fresh berries. For an extra touch, dust the plate with cocoa powder before placing the slice of cake.
Leftover cake can be stored in an airtight container in the refrigerator for up to 3-4 days. For longer storage, you can freeze the cake for up to 2 months. Thaw it in the refrigerator overnight before serving. Note that the texture of the icing might change slightly after freezing.
Nutritional Information
| Nutrient | Amount per Serving | % Daily Value |
|---|---|---|
| Calories | 723 kcal | N/A |
| Total Fat | 37.1 g | 57% |
| Saturated Fat | 22.7 g | 113% |
| Cholesterol | 145.4 mg | 48% |
| Sodium | 946.2 mg | 39% |
| Total Carbohydrate | 94.1 g | 31% |
| Dietary Fiber | 2.7 g | 10% |
| Sugars | 66.3 g | N/A |
| Protein | 7.3 g | 14% |
Note: Nutritional information is an estimate and may vary based on specific ingredients and portion sizes.
Variations & Substitutions
- Gluten-Free: Substitute the all-purpose flour with a gluten-free all-purpose flour blend. Be sure to include xanthan gum if the blend doesn’t already contain it.
- Dairy-Free: Replace the butter with a plant-based butter alternative and the buttermilk with a mixture of non-dairy milk and lemon juice or vinegar (as described above).
- Mocha Cake: Add 1-2 tablespoons of instant espresso powder to the cocoa mixture for a mocha-flavored cake.
- Spice Cake: Add 1 teaspoon of ground cinnamon and 1/2 teaspoon of ground nutmeg to the dry ingredients for a warm, spiced variation.
- Chocolate Chip Cake: Fold in 1 cup of chocolate chips into the batter before baking for a delightful texture.
FAQs (Frequently Asked Questions)
Q: Why is buttermilk used in this cake?
A: Buttermilk adds moisture and tenderness to the cake, creating a soft and slightly tangy crumb. It also helps to activate the baking soda, resulting in a lighter texture.
Q: Can I use a different size cake pan?
A: While a 9×13 inch pan is recommended, you can use two 9-inch round cake pans. Adjust the baking time accordingly, checking for doneness after about 25 minutes.
Q: What if my icing is too thick?
A: Add a tablespoon of buttermilk at a time until you reach your desired consistency.
Q: Can I make the cake ahead of time?
A: Yes, you can bake the cake a day ahead of time. Wrap it tightly in plastic wrap and store it at room temperature. Frost it the day you plan to serve it.
Q: Why do you trim the sides of the cake?
A: Trimming the sides creates clean edges, giving the cake a more polished look. It also exposes the tender crumb, making it easier to frost the sides if desired.
Final Thoughts
This Cocoa-Buttermilk Cake is more than just a recipe; it’s an invitation to create memories. It is an easy cake that will impress. So gather your ingredients, preheat your oven, and let the aroma of chocolate fill your home. I hope this cake brings as much joy to you and your loved ones as it has brought to mine. Don’t hesitate to share your experience and any variations you try – I’m always eager to hear how you make this recipe your own! Happy baking!