
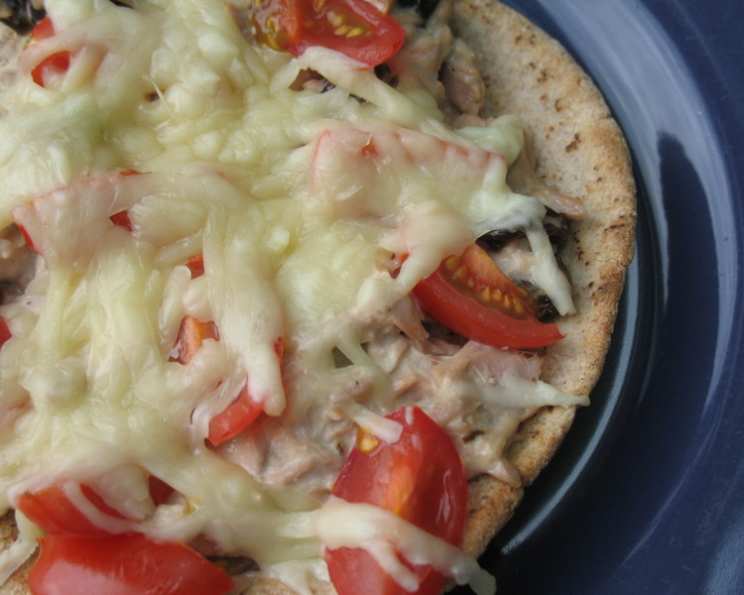
Tuna Pita Melts: A Nostalgic Twist on a Classic Comfort Food
I still remember those carefree summer afternoons after a long swim at the local pool. Exhausted but happy, my friends and I would descend on my kitchen, ravenous. My mom, ever the champion, would whip up a batch of these Tuna Pita Melts. The aroma of toasted pita, the savory tuna, and the melted cheddar – it was the perfect quick and satisfying fuel for our endless summer adventures. The simple joy of those warm, cheesy bites still lingers, and to this day, these Tuna Pita Melts bring back that feeling of sun-kissed skin and the sound of children’s laughter.
Recipe Overview
- Prep Time: 10 minutes
- Cook Time: 11 minutes
- Total Time: 21 minutes
- Servings: 4
- Dietary Type: Pescatarian
Ingredients
- 4 (6-inch) pita bread
- 2 (6-ounce) cans tuna, drained
- 3-4 tablespoons mayonnaise (or to taste)
- 2 tablespoons dill pickle relish
- 1 tablespoon fresh lemon juice
- 1 pinch dried dill
- Seasoning salt (to taste, or use white salt)
- Black pepper (to taste)
- 1/2 cup raisins
- 1 large tomato, sliced
- 1 cup grated cheddar cheese (divided into 1/4-cup portions, or use mozzarella cheese)
Equipment Needed
- Baking sheet
- Mixing bowl
- Measuring spoons and cups
Instructions
-
Preheat your oven to 400 degrees Fahrenheit (200 degrees Celsius). This ensures the pitas toast nicely and the cheese melts evenly.
-
Place the whole pitas onto a baking sheet in a single layer. Avoid overcrowding to ensure even toasting.
-
Bake the pitas for 5 minutes, or until they are lightly toasted. Keep a close eye on them – they can burn quickly! You’re aiming for a golden-brown hue and a slightly crisp texture.
-
While the pitas are toasting, prepare the tuna mixture. In a mixing bowl, combine the drained tuna with the mayonnaise, dill pickle relish, fresh lemon juice, and dried dill.
-
Mix the ingredients together until they are well combined. The mayonnaise acts as a binder, bringing all the flavors together, while the dill pickle relish adds a tangy sweetness.
-
Season the tuna mixture with seasoning salt and black pepper to taste. If you don’t have seasoning salt, regular salt works just fine. Don’t be afraid to adjust the seasoning to your preference.
-
Gently fold in the raisins. The raisins add a burst of sweetness and a chewy texture that complements the savory tuna.
-
Remove the toasted pitas from the oven. Carefully divide the tuna mixture evenly among the 4 toasted pitas, spreading it to cover the surface.
-
Arrange the tomato slices on top of the tuna mixture, creating a visually appealing layer.
-
Lightly sprinkle the tomato slices with salt and pepper. This simple step enhances the tomatoes’ natural sweetness and acidity.
-
Top each pita with about 1/4 cup of grated cheddar cheese (or mozzarella cheese), distributing it evenly over the tomato slices. The cheese will melt beautifully and create a gooey, satisfying topping. You can adjust the amount of cheese to your liking.
-
Return the pitas to the oven and bake for about 5-6 minutes, or until the cheese is well melted and bubbly. Watch carefully to prevent burning. The edges of the cheese should be slightly golden brown.
-
Remove the Tuna Pita Melts from the oven and let them cool slightly before serving.
Expert Tips & Tricks
- For an extra layer of flavor, try adding a dash of hot sauce to the tuna mixture. A few drops of your favorite hot sauce will give it a subtle kick.
- If you prefer a crunchier texture, toast the pitas for a minute or two longer. Just be careful not to burn them!
- To prevent the pitas from becoming soggy, you can lightly brush them with olive oil before toasting. This creates a barrier that helps keep the moisture from the tuna mixture at bay.
- If you’re short on time, you can prepare the tuna mixture ahead of time and store it in the refrigerator. This will save you a few minutes when you’re ready to assemble the melts.
- Feel free to experiment with different types of cheese. Monterey Jack, provolone, or even a sprinkle of parmesan would all be delicious.
- To add some freshness, consider topping the finished Tuna Pita Melts with a sprinkle of chopped fresh parsley or chives.
- For a richer flavor, use tuna packed in olive oil instead of water. Be sure to drain it well before mixing it with the other ingredients.
- If you don’t have dill pickle relish, you can substitute it with sweet pickle relish or even a small amount of chopped dill pickle.
- To get a perfectly melted cheese topping, you can place the Tuna Pita Melts under the broiler for a minute or two after baking. Keep a close eye on them to prevent burning!
Serving & Storage Suggestions
Serve these Tuna Pita Melts warm, straight from the oven. A side of crunchy coleslaw or a simple green salad makes a wonderful accompaniment.
Leftovers can be stored in an airtight container in the refrigerator for up to 2 days. To reheat, you can microwave them for a minute or two, or bake them in a preheated oven at 350 degrees Fahrenheit (175 degrees Celsius) for about 5-10 minutes, or until heated through. Microwaving will soften the pita, while baking will help to retain some of the crispness. Freezing is not recommended as it can affect the texture of the pita and the tuna mixture.
Nutritional Information
| Nutrient | Amount per Serving | % Daily Value |
|---|---|---|
| Calories | 467.8 kcal | N/A |
| Calories from Fat | 161 g | 34% |
| Total Fat | 17.9 g | 27% |
| Saturated Fat | 7.7 g | 38% |
| Cholesterol | 64.8 mg | 21% |
| Sodium | 598.6 mg | 24% |
| Total Carbohydrate | 45.4 g | 15% |
| Dietary Fiber | 2.4 g | 9% |
| Sugars | 13.4 g | 53% |
| Protein | 31.8 g | 63% |
Variations & Substitutions
- Gluten-Free: Use gluten-free pita bread for a gluten-free version.
- Dairy-Free: Substitute the cheddar cheese with a dairy-free cheese alternative.
- Vegetarian: While this is typically a tuna recipe, consider using smashed chickpeas mixed with nori flakes to mimic the tuna flavor for a vegetarian option.
- Spicy: Add a pinch of red pepper flakes or a dash of hot sauce to the tuna mixture for a spicy kick.
- Mediterranean: Use feta cheese instead of cheddar, and add some chopped Kalamata olives to the tuna mixture.
- Italian: Use mozzarella cheese and add a sprinkle of Italian seasoning to the tuna mixture. You can also add some sun-dried tomatoes.
FAQs (Frequently Asked Questions)
Q: Can I use flavored tuna?
A: Absolutely! Using flavored tuna like lemon pepper or sun-dried tomato tuna can add an extra layer of flavor to the Tuna Pita Melts. Just be sure to adjust the other seasonings accordingly.
Q: Can I make these ahead of time?
A: You can prepare the tuna mixture ahead of time and store it in the refrigerator for up to 24 hours. However, it’s best to assemble and bake the melts just before serving to prevent the pitas from becoming soggy.
Q: What kind of mayonnaise is best to use?
A: The best mayonnaise to use is a matter of personal preference. Full-fat mayonnaise will provide the richest flavor and creamiest texture, but you can also use light or fat-free mayonnaise to reduce the calorie count.
Q: Can I grill these instead of baking them?
A: Yes, you can grill these Tuna Pita Melts! Preheat your grill to medium heat and grill the pitas for a few minutes per side, or until the cheese is melted and bubbly. Watch carefully to prevent burning.
Q: Can I add other vegetables to the tuna mixture?
A: Absolutely! Chopped celery, red onion, or bell pepper would all be delicious additions to the tuna mixture.
Final Thoughts
These Tuna Pita Melts are more than just a quick and easy meal; they’re a taste of nostalgia, a comforting reminder of simpler times. Whether you’re looking for a light lunch, a satisfying snack, or a fun dinner option, these Tuna Pita Melts are sure to please. Don’t be afraid to get creative with the variations and substitutions to make them your own. Give this recipe a try, and let me know what you think! What other flavors or ingredients would you add to personalize these melts? I’d love to hear your feedback!