
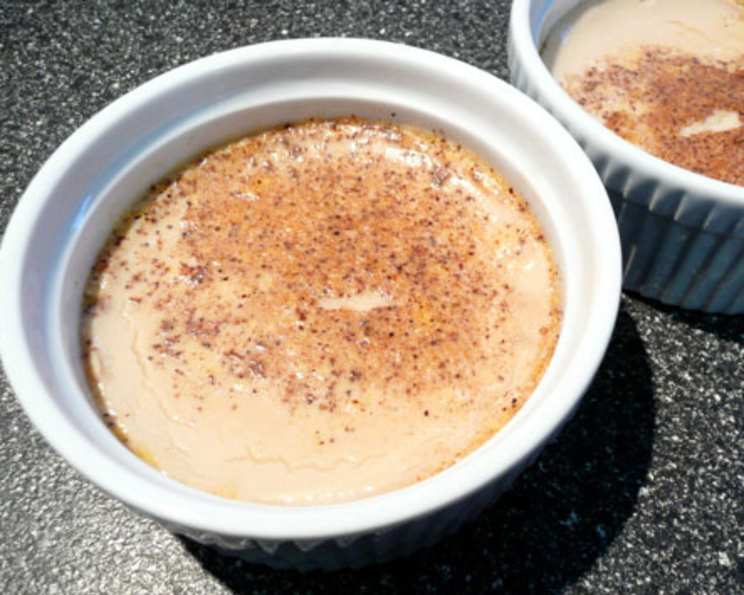
Vanilla Custard Cups (Baked): A Taste of Childhood
The first time I tasted baked custard, I was probably no more than five years old, perched on a stool in my grandmother’s sun-drenched kitchen. She’d pull them, still warm, from the oven, their surfaces quivering like a gentle tremor. The aroma of vanilla and warm milk would fill the air, and with the first spoonful, I was transported. It was pure comfort, a sweet, simple indulgence that always felt like a warm hug from Grandma herself. This recipe brings me right back to that kitchen.
Recipe Overview
- Prep Time: 10 minutes
- Cook Time: 30-35 minutes
- Total Time: 40-45 minutes
- Servings: 2
- Yield: 2 custard cups
- Dietary Type: Vegetarian
Ingredients
- 1 egg
- 1 cup milk (whole or 2%)
- 3 tablespoons brown sugar
- ¾ teaspoon vanilla extract
- ⅛ teaspoon salt (optional)
- ⅛ teaspoon ground nutmeg (optional, for garnish)
Equipment Needed
- Mixing bowl
- Whisk or hand mixer
- Two 6-oz custard cups
- 9-inch square baking pan
- Measuring spoons and cups
Instructions
-
Preheat your oven to 350°F (175°C). While the oven is heating, prepare your custard mixture.
-
In a mixing bowl, combine the egg, milk, brown sugar, vanilla extract, and salt (if using).
-
Using a whisk or hand mixer, beat the ingredients together until they are fully blended and the brown sugar is completely dissolved. This ensures a smooth and creamy custard. Don’t overbeat, just mix until everything is well combined.
-
Pour the custard mixture evenly into two ungreased 6-oz custard cups. There’s no need to grease the cups, as the custard will release easily once baked.
-
If desired, sprinkle the tops of the custard cups with a very light dusting of ground nutmeg. This adds a touch of warm spice and a beautiful visual appeal.
-
Place the filled custard cups in a 9-inch square baking pan.
-
Carefully fill the baking pan with hot water to a depth of 1 inch. This creates a water bath (bain-marie), which helps the custards bake evenly and prevents them from curdling or cracking. The hot water should come about halfway up the sides of the custard cups.
-
Bake, uncovered, in the preheated oven for 30-35 minutes.
-
To check for doneness, insert a knife into the center of one of the custard cups. If the knife comes out clean, the custards are done. They should be set around the edges but still have a slight jiggle in the center.
-
Once baked, carefully remove the baking pan from the oven. Use caution, as the water will be hot.
-
Gently remove the custard cups from the water bath and let them cool slightly on a wire rack before serving. This allows the custard to firm up a bit.
Expert Tips & Tricks
- Even Baking is Key: The water bath is crucial for a perfectly smooth and creamy custard. Don’t skip it! The water helps to regulate the temperature and prevents the custard from overcooking.
- Don’t Overbake: Overbaking is the enemy of custard. It will result in a dry, rubbery texture. Err on the side of slightly underbaked rather than overbaked. The custard will continue to set as it cools.
- Variations in Brown Sugar: The type of brown sugar you use will affect the flavor and color of the custard. Light brown sugar will result in a lighter-colored and more subtly flavored custard, while dark brown sugar will give it a richer, more caramel-like taste.
- Preventing a Skin: To prevent a skin from forming on top of the custard while it cools, you can lightly sprinkle the surface with granulated sugar or cover it with plastic wrap, pressing the wrap directly onto the surface of the custard.
- Troubleshooting Curdling: If your custard looks curdled after baking, it’s likely been overbaked. While it might not be as visually appealing, it will still taste delicious. Next time, reduce the baking time or lower the oven temperature slightly.
- Consider using a candy thermometer to ensure the water bath does not exceed 180F, to help avoid curdling.
Serving & Storage Suggestions
Vanilla custard cups are delicious served warm, at room temperature, or chilled. They make a perfect light dessert or afternoon treat.
- Serving Suggestions: Garnish with a sprinkle of fresh nutmeg, a dollop of whipped cream, fresh berries, or a drizzle of caramel sauce. You can also serve them with a side of biscotti or shortbread cookies for dipping.
- Storage: Leftover custard cups can be stored in the refrigerator for up to 3 days. Cover them tightly with plastic wrap to prevent them from drying out.
- Freezing: While you can freeze baked custard, the texture may change slightly upon thawing. The custard may become a bit grainy. If you do freeze it, wrap it tightly in plastic wrap and then in aluminum foil. Thaw in the refrigerator overnight. Reheating is not recommended, as it can further alter the texture. It’s best enjoyed cold after thawing.
Nutritional Information
| Nutrient | Amount per Serving | % Daily Value* |
|---|---|---|
| Calories | 197 kcal | 10% |
| Total Fat | 6.8g | 9% |
| Saturated Fat | 3.6g | 18% |
| Cholesterol | 110.1mg | 37% |
| Sodium | 101.2mg | 4% |
| Total Carbohydrate | 26.4g | 10% |
| Dietary Fiber | 0g | 0% |
| Sugars | 20.4g | 41% |
| Protein | 7.2g | 14% |
*Percent Daily Values are based on a 2,000 calorie diet. Your daily values may be higher or lower depending on your calorie needs.
Variations & Substitutions
- Dairy-Free: Substitute the milk with almond milk, soy milk, or oat milk for a dairy-free version. Keep in mind that the flavor and texture may be slightly different.
- Sweetener Swap: Use maple syrup or honey instead of brown sugar. Adjust the amount to taste.
- Spice it Up: Add a pinch of cinnamon, cardamom, or ginger to the custard mixture for a warming spice variation.
- Citrus Zest: A little lemon or orange zest can add a bright and refreshing flavor.
- Coffee Infusion: Add a teaspoon of instant coffee granules to the milk for a coffee-flavored custard.
- Chocolate Custard: Mix a tablespoon of cocoa powder into the dry ingredients before adding the milk.
FAQs (Frequently Asked Questions)
Q: Can I use granulated sugar instead of brown sugar?
A: Yes, you can substitute granulated sugar for brown sugar. However, the brown sugar adds a hint of caramel flavor and a slightly richer texture. If using granulated sugar, consider adding a tiny touch of molasses to replicate the brown sugar flavor.
Q: How do I know if the custard is done without a knife?
A: If you don’t want to use a knife, you can gently shake the custard cups. The edges should be set, but the center should still have a slight jiggle. The custard will continue to set as it cools.
Q: Can I make this recipe in larger quantities?
A: Yes, you can easily double or triple the recipe. Just be sure to adjust the baking time accordingly. You may need to bake for a longer period if you’re making a larger batch. Also use appropriately sized bakeware and cups.
Q: Why is my custard lumpy?
A: Lumpy custard is usually caused by overcooking or curdling. Make sure to use a water bath and keep a close eye on the custard while it’s baking. If it starts to look like it’s curdling, reduce the oven temperature or remove it from the oven immediately.
Q: Can I add fruit to the custard before baking?
A: Yes, you can add small pieces of fruit, such as berries or chopped apples, to the custard cups before baking. Just be sure not to add too much, as it can affect the texture of the custard.
Final Thoughts
These baked vanilla custard cups are a testament to the beauty of simple ingredients and time-honored techniques. They are easy to make, incredibly satisfying, and a perfect way to end any meal. I encourage you to give this recipe a try and experience the joy of creating a classic dessert from scratch. Don’t be afraid to experiment with variations and make it your own. And most importantly, share it with loved ones and create your own memories around this comforting treat. Pair it with a cup of herbal tea, or a sweet dessert wine. Enjoy!