
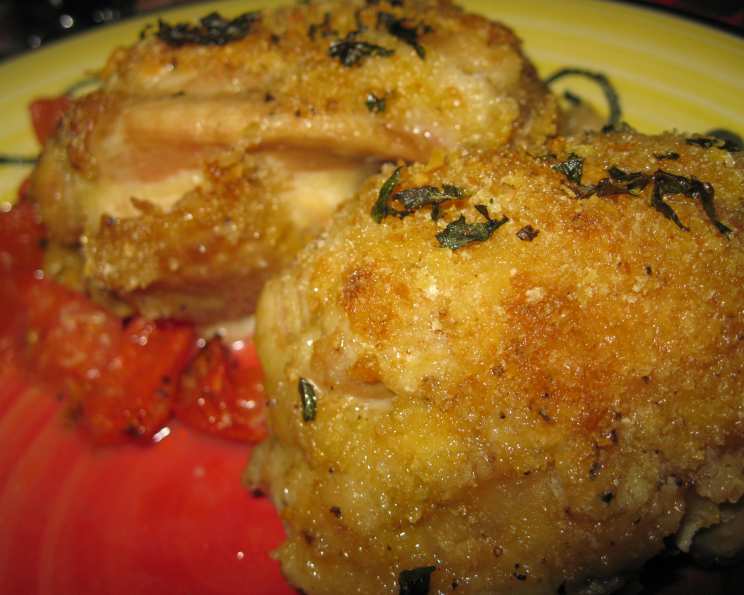
Cheesy Basil-Stuffed Chicken Breasts: A Culinary Classic Reimagined
There’s a certain magic that happens when simple ingredients come together to create something truly special. I remember the first time I made these Cheesy Basil-Stuffed Chicken Breasts. It was a weeknight, I was short on time, but desperate for a flavorful, home-cooked meal. As the aroma of basil, garlic, and melting mozzarella wafted through my kitchen, I knew I was onto something good. That first bite – the tender chicken, the creamy, herbaceous filling, the burst of sweetness from the roasted tomatoes – sealed the deal. This wasn’t just dinner; it was a culinary hug.
Recipe Overview
- Prep Time: 20 minutes
- Cook Time: 25 minutes
- Total Time: 45 minutes
- Servings: 4
- Dietary Type: Gluten-Free (naturally)
Ingredients
- 4 ounces whole-milk mozzarella cheese, shredded
- 1/4 cup fresh basil, minced
- 2 tablespoons heavy cream
- 1 tablespoon fresh lemon juice
- 3 garlic cloves, minced
- Salt and pepper to taste
- 4 boneless, skinless chicken breasts (6-8 oz each), avoid very thin breasts
- 3 tablespoons mayonnaise
- 1 slice high-quality sandwich bread, torn into quarters
- 2 tablespoons extra virgin olive oil, divided
- 1 pint cherry tomatoes, halved
- Toothpicks or wooden skewers
Equipment Needed
- Medium mixing bowl
- Cutting board
- Sharp knife
- 13×9-inch baking dish
- Food processor
Instructions
-
Preheat your oven to 425 degrees Fahrenheit (220 degrees Celsius) and adjust an oven rack to the middle position.
-
In a medium bowl, combine the shredded mozzarella cheese, 2 tablespoons of the minced fresh basil, heavy cream, fresh lemon juice, 2 teaspoons of the minced garlic, ½ teaspoon of salt, and pepper to taste. Mix well until all ingredients are thoroughly incorporated. This is your flavorful filling.
-
Pat the chicken breasts dry with paper towels. This helps them brown nicely in the oven. Trim off any excess fat. Now, carefully cut a pocket in the thickest part of each chicken breast. Gently work your knife back and forth, creating a space that extends down into most of the breast. Be cautious not to cut all the way through. The goal is to create a generous pocket for the filling.
-
Scoop one-quarter of the cheese filling into each chicken breast pocket. Distribute the filling evenly.
-
Seal the opening of each stuffed chicken breast by threading a toothpick or wooden skewer through the chicken about ¼ inch from the opening. This will keep the delicious filling from oozing out during baking.
-
Transfer the stuffed chicken breasts to a 13×9-inch baking dish. Spread the mayonnaise evenly over the tops of the chicken breasts. This will create a flavorful crust and help the breadcrumb topping adhere.
-
In a food processor, pulse the torn bread into coarse crumbs, about 8 pulses. You want a rustic texture, not a fine powder. In a separate small bowl, toss the breadcrumbs with the remaining 1 teaspoon of minced garlic, remaining 2 tablespoons of minced fresh basil, and 1 tablespoon of extra virgin olive oil.
-
Sprinkle the breadcrumb mixture generously over the mayonnaise-coated chicken breasts, pressing lightly to help it adhere. This will create a crispy, golden-brown topping.
-
In the same bowl, toss the halved cherry tomatoes with the remaining 1 tablespoon of extra virgin olive oil, ½ teaspoon of salt, and pepper to taste. Arrange the seasoned cherry tomatoes in the baking dish around the chicken breasts.
-
Bake in the preheated oven until the breadcrumbs are golden brown and the thickest part of the chicken registers 160 degrees Fahrenheit (71 degrees Celsius) on an instant-read thermometer, about 25 minutes. Ensure the chicken is fully cooked.
-
Let the chicken rest for a few minutes before serving. This allows the juices to redistribute, resulting in a more tender and flavorful dish. Remove toothpicks or skewers before serving.
Expert Tips & Tricks
- Don’t overstuff: Avoid the temptation to cram too much filling into the chicken breasts. Overstuffing can cause the filling to leak out during baking and result in uneven cooking.
- Temperature is key: Use an instant-read thermometer to ensure the chicken is cooked to a safe internal temperature of 160°F (71°C). Remember that the temperature will rise a few degrees as it rests.
- Breadcrumb variations: For a gluten-free option, use gluten-free bread or almond flour for the breadcrumb topping. You can also add grated Parmesan cheese to the breadcrumb mixture for extra flavor.
- Make-ahead tip: The filling can be made a day in advance and stored in the refrigerator. You can also stuff the chicken breasts a few hours ahead of time, but wait to add the breadcrumb topping until just before baking to prevent it from getting soggy.
- Prevent dry chicken: If you find your chicken breasts tend to dry out, try brining them in a saltwater solution for 30 minutes before stuffing. This helps them retain moisture during baking.
Serving & Storage Suggestions
Serve these Cheesy Basil-Stuffed Chicken Breasts immediately for the best flavor and texture. They pair beautifully with mashed potatoes, roasted vegetables (like asparagus or broccoli), or a simple side salad.
Leftovers can be stored in an airtight container in the refrigerator for up to 3 days. To reheat, bake in a preheated oven at 350°F (175°C) until warmed through, or microwave in short intervals until heated. Be careful not to overheat, as this can dry out the chicken. While freezing isn’t recommended (the texture of the cheese and breadcrumbs may change), it can be done. Ensure the chicken is cooled completely, wrap tightly in plastic wrap, and then place in a freezer bag. Thaw overnight in the refrigerator before reheating.
Nutritional Information
| Nutrient | Amount per Serving | % Daily Value |
|---|---|---|
| Calories | 378 kcal | 19% |
| Total Fat | 21.4g | 32% |
| Saturated Fat | 7.4g | 37% |
| Cholesterol | 104mg | 34% |
| Sodium | 382.6mg | 15% |
| Total Carbohydrate | 10.7g | 3% |
| Dietary Fiber | 1.2g | 4% |
| Sugars | 3.4g | 13% |
| Protein | 35.1g | 70% |
Nutritional information is an estimate and may vary based on specific ingredients and preparation methods.
Variations & Substitutions
- Spice it up: Add a pinch of red pepper flakes to the cheese filling for a touch of heat.
- Cheese swap: Use provolone, fontina, or even goat cheese in place of mozzarella for a different flavor profile.
- Herbaceous twist: Experiment with different fresh herbs like oregano, thyme, or rosemary in addition to or instead of basil.
- Vegetarian option: Substitute the chicken breasts with thick slices of eggplant or portobello mushrooms.
- Mediterranean flair: Add sun-dried tomatoes and Kalamata olives to the cheese filling for a Mediterranean-inspired version.
FAQs (Frequently Asked Questions)
Q: Can I use pre-shredded mozzarella cheese?
A: While you can use pre-shredded mozzarella, freshly shredded mozzarella will melt more smoothly and provide a better texture.
Q: How do I prevent the chicken from drying out?
A: Patting the chicken dry, stuffing it with a moist filling, and avoiding overbaking are key to preventing dryness. Also, using a meat thermometer helps ensure the chicken is cooked just to the correct temperature.
Q: Can I make this recipe ahead of time?
A: Yes, you can prepare the filling and stuff the chicken breasts several hours in advance. However, it’s best to add the breadcrumb topping just before baking to prevent it from becoming soggy.
Q: What if I don’t have a food processor for the breadcrumbs?
A: You can use a ziplock bag and rolling pin to crush the bread into crumbs, or purchase pre-made breadcrumbs.
Q: Can I grill these chicken breasts instead of baking them?
A: Yes, you can grill them! Preheat your grill to medium heat, place the stuffed chicken breasts on the grill, and cook for about 6-8 minutes per side, or until the internal temperature reaches 160°F (71°C). Watch carefully to prevent burning.
Final Thoughts
This Cheesy Basil-Stuffed Chicken Breast recipe is more than just a meal; it’s an invitation to create a comforting and flavorful experience in your own kitchen. It’s simple enough for a weeknight dinner yet elegant enough to serve to guests. Don’t hesitate to experiment with variations and substitutions to make it your own. Share your creations and feedback – I’d love to hear how you make this classic dish your own. Serve alongside a crisp glass of white wine and enjoy!