
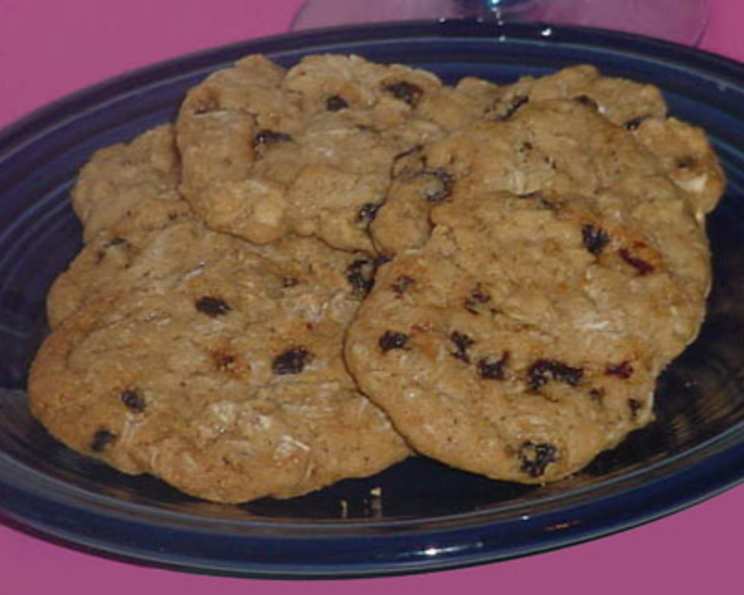
Dad’s Cookies: A Taste of Home
The aroma of these cookies instantly transports me back to childhood, specifically to Dad’s workshop. While he wasn’t much for complicated baking projects, these were his specialty. I remember the rhythmic whir of his old stand mixer, the comforting scent of vanilla mingling with sawdust, and the pure joy of sneaking a bite of the dough before it even hit the oven. They weren’t fancy, but they were made with love – and that’s what made them the best cookies in the world.
Recipe Overview
- Prep Time: 20 minutes
- Cook Time: 10 minutes
- Total Time: 30 minutes (plus chilling time)
- Yield: Approximately 4 dozen cookies
- Dietary Type: Not specified (contains dairy and gluten)
Ingredients
- 1 cup butter, softened
- 1 cup brown sugar, packed
- 1 cup white sugar
- 2 large eggs, beaten
- 1 teaspoon vanilla extract
- 1 teaspoon salt
- 3 cups oatmeal (old-fashioned or quick-cooking)
- 1 1/2 cups all-purpose flour
- 1 teaspoon baking soda
- Optional Add-ins: 1 cup of coconut flakes, chopped nuts, raisins, or chocolate chips
Equipment Needed
- Stand mixer or hand mixer
- Large mixing bowl
- Measuring cups and spoons
- Wax paper or plastic wrap
- Baking sheets
- Spatula
- Sharp knife
Instructions
-
In a large mixing bowl, cream together the softened butter, brown sugar, and white sugar until light and fluffy. This is a crucial step for achieving the right texture, so don’t rush it. The mixture should be smooth and almost pale in color.
-
Beat in the beaten eggs and vanilla extract. Make sure the eggs are fully incorporated into the butter-sugar mixture. If the mixture looks curdled at this stage, don’t worry; it will come together in the next steps.
-
In a separate bowl, whisk together the salt, baking soda, and flour. This ensures that the baking soda is evenly distributed throughout the flour, which is essential for proper leavening.
-
Gradually stir the dry ingredients into the wet ingredients, mixing well until just combined. Be careful not to overmix, as this can result in tough cookies.
-
Stir in the oatmeal. Again, mix until just combined. The dough will be quite thick.
-
If using any optional add-ins (coconut, nuts, raisins, or chocolate chips), stir them in now. Distribute them evenly throughout the dough.
-
Shape the dough into 4 round logs, each about 2 inches in diameter. This is easiest to do on a lightly floured surface.
-
Wrap each log tightly in wax paper or plastic wrap.
-
Chill the wrapped logs in the refrigerator for at least 2 hours, or preferably overnight. This chilling time is essential for preventing the cookies from spreading too much during baking. The longer the dough chills, the easier it will be to slice and the more flavorful the cookies will be.
-
When ready to bake, preheat your oven to 350°F (175°C).
-
Slice the chilled logs into 1/4-inch thick rounds using a sharp knife. If the logs are too hard to slice easily, let them sit at room temperature for a few minutes to soften slightly.
-
Place the sliced cookies on ungreased baking sheets, leaving about 1 inch of space between each cookie.
-
Bake for 10 minutes, or until the edges are golden brown. Keep a close eye on the cookies during baking, as oven temperatures can vary.
-
Remove the baking sheets from the oven and let the cookies cool on the sheets for a few minutes before transferring them to a wire rack to cool completely.
Expert Tips & Tricks
- For a chewier cookie, use old-fashioned rolled oats instead of quick-cooking oats.
- If you want to intensify the vanilla flavor, use vanilla bean paste instead of vanilla extract.
- To prevent the cookies from spreading too much, make sure your butter is not too soft when creaming it with the sugar. It should be softened but still slightly firm.
- If you don’t have time to chill the dough for several hours, you can freeze it for about 30 minutes to speed up the process.
- To ensure even baking, rotate the baking sheets halfway through the baking time.
- For a more uniform appearance, you can use a cookie scoop to portion out the dough before shaping it into logs.
Serving & Storage Suggestions
These cookies are delicious served warm or at room temperature. They pair perfectly with a glass of milk, a cup of coffee, or a scoop of vanilla ice cream.
To store leftovers, place them in an airtight container at room temperature. They will stay fresh for up to 5 days. You can also freeze the baked cookies for up to 2 months. To freeze, arrange the cookies in a single layer on a baking sheet and freeze until solid. Then, transfer them to a freezer-safe bag or container. To thaw, simply let them sit at room temperature for a few minutes.
Nutritional Information
| Nutrient | Amount per Serving (estimated) | % Daily Value (approximate) |
|---|---|---|
| Calories | 150 kcal | 8% |
| Total Fat | 8g | 12% |
| Saturated Fat | 5g | 25% |
| Cholesterol | 25mg | 8% |
| Sodium | 100mg | 4% |
| Total Carbohydrate | 20g | 7% |
| Dietary Fiber | 1g | 4% |
| Sugars | 12g | N/A |
| Protein | 2g | 4% |
Note: Nutritional information is an estimate and may vary based on specific ingredients and portion sizes.
Variations & Substitutions
- Gluten-Free: Substitute the all-purpose flour with a gluten-free all-purpose flour blend. Be sure to check that the oats are certified gluten-free as well.
- Dairy-Free: Use a plant-based butter alternative. Make sure to choose one that is designed for baking.
- Spice it Up: Add 1/2 teaspoon of ground cinnamon or nutmeg to the dry ingredients for a warm, spiced flavor.
- Citrus Zest: Add the zest of one orange or lemon to the dough for a bright, citrusy twist.
- Chocolate Lovers: Increase the amount of chocolate chips to 1 1/2 cups or use a combination of milk chocolate, dark chocolate, and white chocolate chips. You could also add a tablespoon of cocoa powder to the dry ingredients for an even richer chocolate flavor.
FAQs (Frequently Asked Questions)
Q: Can I use quick-cooking oats instead of old-fashioned oats?
A: Yes, you can use quick-cooking oats. The texture of the cookies will be slightly different – a bit softer – but they will still be delicious.
Q: Why do I need to chill the dough?
A: Chilling the dough helps to prevent the cookies from spreading too much during baking. It also allows the flavors to meld together and develop more fully.
Q: Can I freeze the cookie dough?
A: Yes, you can freeze the cookie dough. Shape it into logs, wrap it tightly in wax paper or plastic wrap, and freeze for up to 2 months. Thaw in the refrigerator overnight before slicing and baking.
Q: My cookies are too dry. What did I do wrong?
A: Overbaking is the most common cause of dry cookies. Try reducing the baking time by a minute or two. Also, make sure you are measuring the flour correctly. Spoon it into the measuring cup and level it off with a knife, rather than scooping it directly from the bag.
Q: Can I add other ingredients to the dough?
A: Absolutely! Feel free to experiment with different add-ins, such as dried cranberries, chopped pecans, or even a sprinkle of sea salt on top before baking.
Final Thoughts
Dad’s Cookies are more than just a recipe; they’re a reminder of simpler times, of family, and of the love that goes into homemade treats. I hope you’ll give this recipe a try and experience the same warmth and comfort that these cookies have always brought to my family. Whether you bake them for a special occasion or just a cozy night in, I’m sure they’ll become a cherished favorite in your own home. Share your creations, and let me know how you made them your own!