
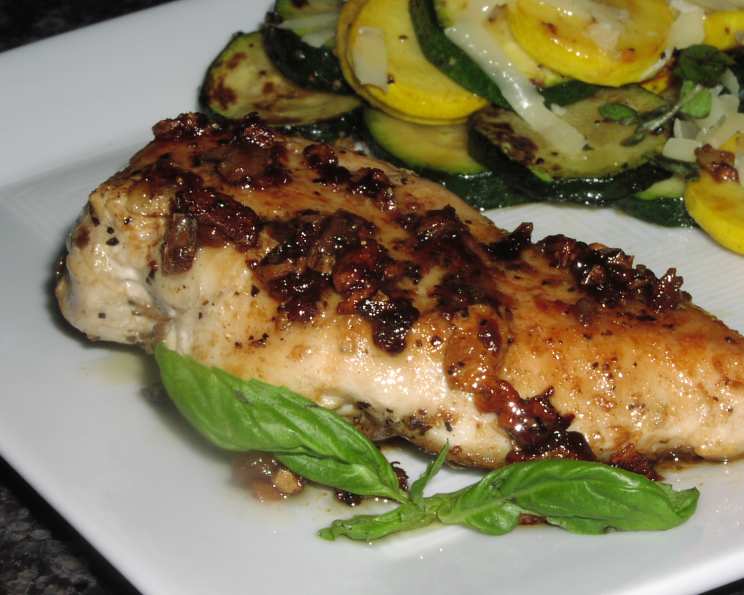
Delicious One Serving Chicken Breast
I remember the first time I truly appreciated the art of cooking for one. It wasn’t born out of loneliness, but rather a newfound appreciation for the simplicity of creating a meal just for myself. I had spent years catering to family dinners and elaborate gatherings, and suddenly, the focus shifted to my own palate. This simple chicken breast recipe reminds me of that shift – a perfectly portioned, flavorful dish that celebrates the joy of cooking, even when you’re the only one at the table.
Recipe Overview
- Prep Time: 2 minutes
- Cook Time: 20 minutes
- Total Time: 22 minutes
- Servings: 1
- Dietary Type: High Protein
Ingredients
- 1 boneless, skinless chicken breast
- ¼ teaspoon Cavenders All Purpose Greek Seasoning, divided in half
- 1 garlic clove, minced
- ½ tablespoon butter, melted
- ½ tablespoon olive oil
Equipment Needed
- Non-stick skillet
- Oven-proof dish
- Aluminum foil
Instructions
-
Preheat your oven to 450 degrees Fahrenheit.
-
Wait 5 minutes for the oven to reach temperature, then place a non-stick skillet on a medium heat element on your stovetop.
-
Melt ½ tablespoon of butter in the skillet. Once it is half-melted, add ½ tablespoon of olive oil. Stir to combine.
-
Add the minced garlic to the melted butter and oil mixture, and cook for 1 minute. Be careful not to let the garlic burn; burnt garlic will impart a bitter flavor to the dish.
-
Sprinkle the chicken breast with the Greek seasoning, using half of the ¼ teaspoon on each side of the breast.
-
Place the seasoned chicken breast in the skillet. Cook for 4 minutes on medium heat.
-
Turn the oven off but do not open the oven door! It’s crucial to retain the residual heat.
-
Flip the chicken over and cook for 6 minutes on low heat, making sure to cover the skillet. The lid will help to trap the heat and ensure the chicken cooks evenly.
-
Remove the chicken breast from the skillet and place it in an oven-proof dish.
-
Pour the skillet drippings (the flavorful mixture of melted butter, olive oil, garlic, and chicken juices) over the chicken breast in the oven-proof dish.
-
Cover the dish with aluminum foil. This helps to keep the chicken moist and prevent it from drying out during the final resting stage.
-
Place the dish with the chicken in the turned-off oven, and let it sit undisturbed for 10 minutes without opening the door. This allows the chicken to finish cooking gently in the residual heat and redistribute its juices, resulting in a more tender and flavorful result.
-
Serve the chicken breast with the pan drippings spooned over it. I like to cut mine into slices before topping with the drippings. Enjoy!
Expert Tips & Tricks
- Don’t overcrowd the pan: This recipe is specifically for one chicken breast. Overcrowding the pan reduces the temperature of the cooking surface, leading to steaming rather than searing.
- Use a meat thermometer: While the cooking times provided are a good guide, the best way to ensure your chicken is cooked through is to use a meat thermometer. Insert the thermometer into the thickest part of the breast; it should register 165 degrees Fahrenheit.
- Adjust cooking time for thickness: Chicken breasts vary in thickness. If your breast is particularly thick, you might need to increase the cooking time slightly. Conversely, if it’s thin, reduce the time.
- Don’t skip the resting period: This is crucial! Allowing the chicken to rest in the oven after cooking allows the juices to redistribute, resulting in a more tender and flavorful breast.
- Infuse the butter: For an extra layer of flavor, infuse the butter with herbs like thyme or rosemary before melting it. Simply add a sprig of your chosen herb to the butter as it melts.
Serving & Storage Suggestions
Serve this delicious chicken breast immediately while it’s still warm and juicy. The pan drippings make an excellent sauce, adding richness and flavor to the dish. It pairs well with a variety of sides, such as roasted vegetables, a simple salad, mashed potatoes, or rice.
Storage: Leftover chicken breast should be stored in an airtight container in the refrigerator. It will last for 3-4 days.
Reheating: To reheat, you can microwave it (although this can sometimes dry it out), or you can reheat it gently in a skillet with a little bit of olive oil or broth. You can also slice the chicken and add it to salads or sandwiches.
Freezing: Cooked chicken breast can also be frozen for longer storage. Wrap it tightly in plastic wrap and then place it in a freezer bag. It can be stored in the freezer for up to 2-3 months. Thaw it in the refrigerator overnight before reheating.
Nutritional Information
| Nutrient | Amount per Serving | % Daily Value |
|---|---|---|
| Calories | 249.6 kcal | – |
| Calories from Fat | 140 g | 56% |
| Total Fat | 15.6 g | 23% |
| Saturated Fat | 5.2 g | 26% |
| Cholesterol | 90.8 mg | 30% |
| Sodium | 188.2 mg | 7% |
| Total Carbohydrate | 1 g | 0% |
| Dietary Fiber | 0.1 g | 0% |
| Sugars | 0 g | 0% |
| Protein | 25.3 g | 50% |
Note: Nutritional information is an estimate and may vary based on specific ingredients and preparation methods.
Variations & Substitutions
- Spice it up: Add a pinch of red pepper flakes to the skillet when cooking the garlic for a little heat.
- Lemon Herb: Instead of Greek seasoning, use a combination of lemon zest, dried herbs (such as thyme, rosemary, and oregano), salt, and pepper.
- Garlic Herb Butter: Make a compound butter by combining softened butter with minced garlic, fresh herbs (such as parsley and chives), and a pinch of salt. Place a pat of this butter on top of the chicken breast before placing it in the oven to rest.
- Gluten-Free: This recipe is naturally gluten-free, making it a great option for those with gluten sensitivities.
- Different Oil: Feel free to substitute the olive oil with avocado oil or coconut oil.
- Different Seasoning: You can also use a pre-made seasoning blend or create your own by mixing herbs and spices.
FAQs (Frequently Asked Questions)
Q: Can I use frozen chicken breast?
A: Yes, but make sure to thaw it completely before cooking. Thawing it in the refrigerator overnight is the safest method. Pat it dry with paper towels before seasoning and cooking.
Q: How do I know when the chicken is cooked through?
A: The most reliable way is to use a meat thermometer. Insert it into the thickest part of the breast; it should register 165 degrees Fahrenheit.
Q: Can I use this method on a larger piece of chicken?
A: You can adapt the method, but you’ll need to adjust the cooking times accordingly. Use a meat thermometer to ensure the chicken is cooked to a safe internal temperature.
Q: What if I don’t have an oven-proof dish?
A: You can use a regular baking dish or even leave the chicken in the skillet, as long as the skillet is oven-safe.
Q: Can I add vegetables to the skillet while the chicken is cooking?
A: Yes, you can add vegetables like sliced bell peppers, onions, or mushrooms to the skillet during the last few minutes of cooking time.
Final Thoughts
This simple yet elegant chicken breast recipe is a testament to the fact that delicious meals don’t have to be complicated or time-consuming. It’s a perfect dish for those cooking for one, offering a satisfying and flavorful experience. I encourage you to try it out and experiment with different variations and seasonings to find your perfect combination. Don’t hesitate to share your feedback and any creative twists you add to the recipe. Bon appétit!