
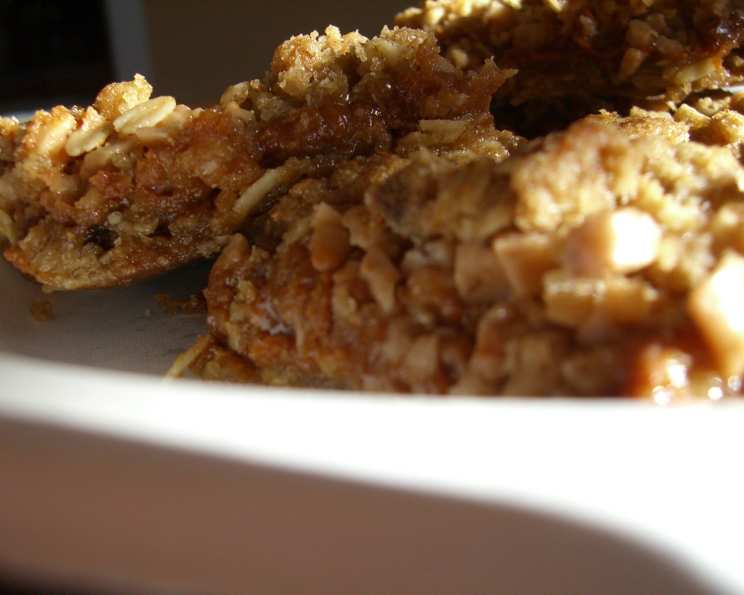
Dulce De Leche Dream Bars: A Taste of Argentina in Every Bite
The aroma alone takes me back. As a child, the scent of dulce de leche simmering on the stovetop was a constant, comforting presence in my Argentine grandmother’s kitchen. She would stir it patiently for hours, transforming simple milk and sugar into a decadent, caramel-like ambrosia. These Dulce de Leche Dream Bars capture that same rich flavor and comforting feeling, all nestled within a buttery, oat-filled crust. They are a simple but elegant tribute to those sweet childhood memories.
Recipe Overview
- Prep Time: 20 minutes
- Cook Time: 30 minutes
- Total Time: 50 minutes
- Yields: 32 bars
- Dietary Type: Not specified
Ingredients
- For the Crust & Topping:
- 1 1/2 cups flour
- 1 1/2 cups oatmeal
- 1 cup packed brown sugar
- 1/2 teaspoon salt
- 1 cup (2 sticks) butter, softened
- For the Filling:
- 1 (13 1/2 ounce) can Nestlé Dulce de Leche (or sweetened condensed milk as a substitute)
- 1 cup toffee pieces
Equipment Needed
- 9×13 inch baking pan
- Large mixing bowl
- Pastry blender (or two forks)
- Microwave-safe bowl
- Measuring cups and spoons
- Knife
Instructions
-
Begin by preheating your oven to 350°F (175°C). This ensures even baking and prevents the crust from becoming soggy.
-
In a large mixing bowl, combine the flour, oatmeal, packed brown sugar, and salt. Whisk briefly to make sure everything is distributed evenly.
-
Add the softened butter to the dry ingredients. Using a pastry blender (or two forks), cut the butter into the mixture until it resembles coarse crumbs. The butter should be evenly distributed throughout the dry ingredients; this is crucial for a tender and flavorful crust.
-
Set aside 1 cup of this crumbly mixture – this will be used for the topping. Press the remaining mixture firmly and evenly into the bottom of a 9×13 inch baking pan. Do not grease the pan! The butter in the crust mixture is sufficient to prevent sticking.
-
Bake the crust for 10 minutes. This par-baking process helps to set the crust and prevent it from becoming soggy when the dulce de leche is added.
-
While the crust is baking, prepare the dulce de leche. Empty the can of dulce de leche into a microwave-safe bowl.
-
Heat the dulce de leche in the microwave on medium power until it is soft enough to spread easily. This usually takes 2-4 minutes total, but microwave times can vary. A good method is to microwave for 45 seconds, stir, and then microwave again in shorter bursts until the desired consistency is reached. Monitor closely to prevent burning or splattering. If substituting sweetened condensed milk, note that it might be a thinner consistency.
-
Remove the par-baked crust from the oven. Evenly spread the warmed dulce de leche over the crust.
-
Sprinkle the toffee bits evenly over the dulce de leche layer, followed by the reserved 1 cup of oatmeal mixture. Make sure the toffee and oat mixture are spread consistently for a uniform flavor and texture in every bite.
-
Bake for another 20-25 minutes, or until the topping is golden brown. Keep a close eye on the bars during the final baking minutes to avoid over-browning.
-
Remove the bars from the oven and let them cool for 15 minutes in the pan.
-
Run a knife around the edges of the pan to loosen the bars from the sides. This will help prevent sticking and ensure clean cuts.
-
Allow the bars to cool completely for another 30 minutes before cutting into 32 bars. This cooling period is essential for the dulce de leche to set properly, resulting in neat and even slices.
Expert Tips & Tricks
- Softening Butter: Ensure your butter is truly softened for the crust. It should be pliable, but not melted. This is critical for achieving the correct crumbly texture. If you forgot to take it out ahead of time, try grating cold butter with a cheese grater for quicker softening.
- Dulce de Leche Alternatives: If you can’t find Nestlé dulce de leche, you can certainly substitute sweetened condensed milk. For a richer flavour, you can even make your own dulce de leche by simmering a can of sweetened condensed milk in a water bath on the stovetop for several hours (be sure to research the proper method beforehand, as safety is key!).
- Preventing a Soggy Crust: Par-baking the crust is a must to prevent a soggy bottom. Also, make sure the dulce de leche isn’t too hot when you spread it on the crust.
- Even Baking: If your oven has hot spots, rotate the pan halfway through baking for even browning.
- Clean Cuts: For neat slices, use a sharp knife and wipe it clean between each cut.
Serving & Storage Suggestions
These Dulce de Leche Dream Bars are best served at room temperature, allowing the flavors to fully develop. They make a wonderful addition to a dessert platter, a sweet treat with a cup of coffee or tea, or a delightful homemade gift.
Store leftover bars in an airtight container at room temperature for up to 3 days, or in the refrigerator for up to a week. For longer storage, freeze the bars individually wrapped in plastic wrap and then placed in a freezer-safe bag for up to 2 months. Thaw in the refrigerator before serving.
Nutritional Information
Note: Nutritional information is an estimate and may vary based on specific ingredients used.
| Nutrient | Amount per Serving | % Daily Value |
|---|---|---|
| Calories | 113 kcal | 6% |
| Calories from Fat | 54 kcal | – |
| Total Fat | 6.1g | 9% |
| Saturated Fat | 3.7g | 18% |
| Cholesterol | 15.2mg | 5% |
| Sodium | 89.3mg | 3% |
| Total Carbohydrate | 13.8g | 4% |
| Dietary Fiber | 0.5g | 2% |
| Sugars | 6.7g | 26% |
| Protein | 1.2g | 2% |
Variations & Substitutions
- Gluten-Free: Substitute the all-purpose flour with a gluten-free blend. Ensure the blend contains xanthan gum or a similar binder to mimic the texture of gluten.
- Nutty Delight: Add 1/2 cup of chopped pecans or walnuts to the topping for extra flavor and crunch.
- Chocolate Lover’s Version: Sprinkle chocolate chips on top of the dulce de leche layer before adding the oat mixture.
- Salted Caramel: Sprinkle flaky sea salt on top of the bars after baking to enhance the sweetness of the dulce de leche.
- Spiced Bars: Add 1/2 teaspoon of cinnamon or nutmeg to the crust mixture for a warm, spiced flavor.
FAQs (Frequently Asked Questions)
Q: Can I use quick oats instead of rolled oats?
A: While you can, rolled oats provide a better texture and chewier bite. Quick oats may result in a slightly softer crust.
Q: My dulce de leche is too thick to spread. What should I do?
A: Microwave it in short bursts, stirring in between, until it reaches a spreadable consistency. Be careful not to overheat it, as it can become too thin and runny.
Q: How do I prevent the crust from burning?
A: Keep a close eye on the bars during the final 5-10 minutes of baking. If the topping is browning too quickly, tent the pan with foil.
Q: Can I make these bars ahead of time?
A: Absolutely! In fact, they are often better the next day, as the flavors have more time to meld. Store them in an airtight container at room temperature.
Q: What is the best way to cut these bars cleanly?
A: Let them cool completely, then use a sharp knife and wipe it clean between each cut. You can also refrigerate them briefly before cutting for even cleaner slices.
Final Thoughts
These Dulce de Leche Dream Bars are more than just a recipe; they are a nostalgic journey back to cherished memories. With their buttery oat crust, creamy dulce de leche filling, and crunchy toffee topping, they offer a symphony of flavors and textures that will delight your taste buds. I urge you to try this recipe and experience the magic of dulce de leche for yourself. Share them with your loved ones, and don’t hesitate to experiment with variations to create your own unique version. I’d love to hear your thoughts and feedback! Perhaps serve them with a scoop of vanilla ice cream or a strong cup of Argentinian coffee for the ultimate indulgence.